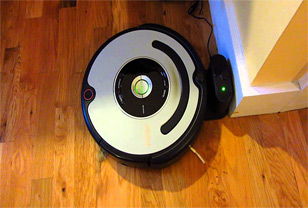
Roomba Won't Charge: How to Troubleshoot & What You Can Do to Repair It at Home
But before you bring the robot to a repair center and spend your hard-earned money on a fix-up job, diagnose and try to fix the robot yourself, first. Many common issues, such as the “Roomba won’t charge” problem, can be fixed by even amateurs in certain cases.
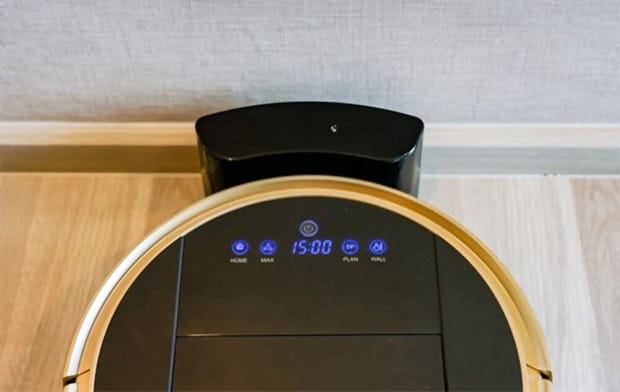
You can find full troubleshooting and repairing instructions in this guide!
My Roomba won't Charge: Troubleshooting Steps
There are several troubleshooting steps that you can take to figure out the reason why your Roomba won’t charge.
The first step, of course, is to figure out the answer to “Why won't my Roomba charge” question. Below, you’ll see several potential causes. After that, we will show you how you can fix these issues.
Check Your Outlet and Power Plug
If you’ve already done this, skip this part.
It’s not rare for an outlet to lose power. Plug something like a phone charger to the outlet to see if it works or not.
Next, unplug the power cord of the charging station and seat it back in again. Hold it flush against the outlet. The power cord may just be loose and didn’t have a good enough contact.
Check Your Roomba’s Charging Contacts
The charging contact points are the small metal parts that the robot uses to dock to its charging station. There are usually two charging contacts on an iRobot Roomba. You will also find two corresponding contacts on the charging base, as well.
If the contact points are dirty, the robot won’t be able to connect and draw power from the base to recharge its battery.
The fix is straightforward enough: clean up the contact points.
You can do this with just a simple microfiber cloth. However, if you want to be extra certain, you can make use of a microfiber cloth with a bit of rubbing alcohol. A damp piece of melamine foam will also do the trick.
After you have gathered all of the materials, make sure to unplug the charging base while you’re at it. That way, you won’t be accidentally shocked.
Gently rub all of the gunks and dirt from off the contact points on both the robot and the charging base. Once everything is clean, manually dock the robot to the charging base and see if the problem is fixed.
➜ RELATED: Best Robot Vacuum For Vinyl Plank Floors: TOP Robot Vacuums
Clean the Wheels of the Robot
Flip your robot and check all of its wheels. The wheels are one of the parts on the robot that are constantly exposed to dirt and debris. Over time, detritus will collect within the wheels, causing them to rise higher than normal. This will also cause the robot’s height to increase.
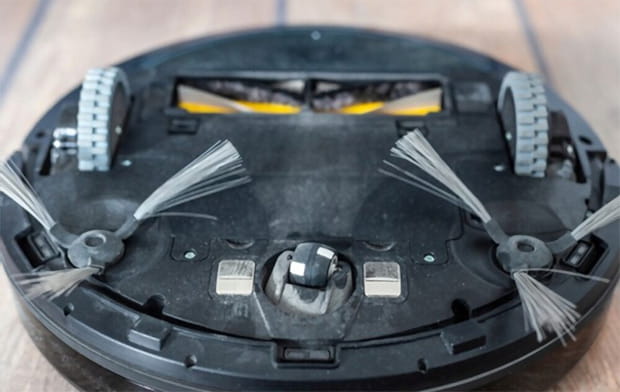
When the robot is higher than normal, the charging contacts will also be too high to reach the contacts on the charging station. Because of this, the robot may not be able to connect to the station, which explains the “Roomba not charging on dock” issue.
The fix is to clean out the wheels along with the wheel chambers. Take out all of the dirt and debris and the robot will lower down to its usual height.
How to Clean the Roomba’s Caster Wheel
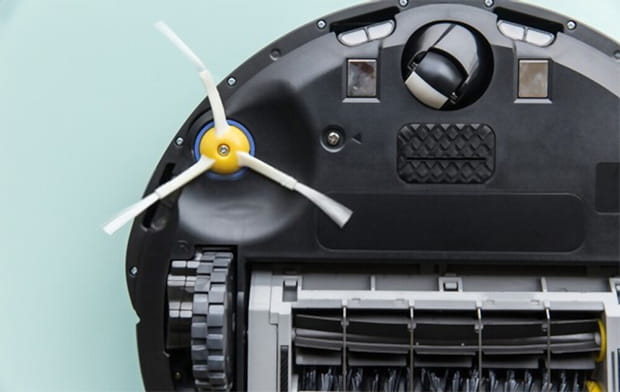
The caster wheel is at the front of the robot. Out of all the wheels on a Roomba, this one is most likely to get jammed or filled with dirt. Fortunately, it is very easy to clean (and even replace).
Tools You Will Need
- A microfiber cloth
Step 1: Take Off the Caster Wheel
To remove it from the robot, simply tug hard on the wheel. It should pop right out.
Step 2: Clean the Wheel
Clean off all the dirt and debris stuck to the outside of the wheel with a damp microfiber cloth.
Step 3: Clean the Wheel Cavity
Next, inspect the wheel cavity (the slot that the wheel sat in). The cavity could be filled with all manner of dirt, so clean it out carefully.
Step 4: Clean the Wheel’s Axle and Housing
If it’s been a while since you last cleaned the caster wheel and there are pets in the house, there’s a good chance that there’s some hair stuck to the wheel’s axle. In that case, remove the wheel from its housing. Once it’s off, you will have direct access to the axle. Remove the hair and clean up the axle.
Clean up the wheel housing, too. The top of the housing can also harbor a lot of dust and dirt.
Step 5: Reassemble
And that’s everything! Reassemble the wheel and stick it back into the wheel cavity. Push until you hear a loud click, indicating that the wheel has been seated into place.
How to Clean the Roomba’s Side Wheels
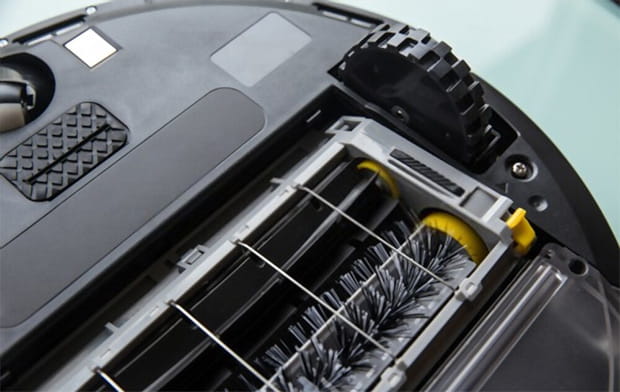
Aside from the front caster wheel, a Roomba will also have two extra large wheels on either flank. It’s very rare for these wheels to have problems, but it’s not impossible.
Cleaning these wheels is going to be slightly more difficult than the front caster wheel. However, the process is easy enough that most people — even those without technical expertise — can do it in twenty or thirty minutes.
Tools You Will Need
- A standard Phillips #1 screwdriver
- A handheld vacuum cleaner
- A microfiber cloth
Step 1: Clean the Outside of the Wheels
Flip the robot over to expose its belly. The large side wheels can be easily seen on either side of the robot. Give each wheel a test spin, they should spin smoothly without any resistance.
Closely inspect the wheels for any sign of dirt or debris. Wipe away all the dirt with your microfiber cloth. Alternatively, you can suck them away with your vacuum cleaner.
Then, push each wheel to the side and peer into the wheel cavity to check for any debris within. If the wheel cavities are dirty, proceed to the next step.
Step 2: Remove the Side Brush
Before you can reach the wheels, there are a few parts that you need to take off. The first on the list is the side brush (the rotating brush with long spokes to the side of the robot).
The brush is held to the robot via a retention screw in the center. Use your Phillips screwdriver to take it off. The brush can be safely taken off the robot afterward.
Step 3: Remove the Cover Plate
The inner parts of the robot are locked up behind a plastic cover plate. All around the robot, you will find four large bolts. Take off all four bolts and the cover plate can be taken off.
Step 4: Take Off the Side Wheels’ Assemblies
With the cover plate off, you now have full access to the Roomba’s internals. Look at one of the wheels and focus on its assembly. The wheel is locked to the assembly via three smaller bolts.
Use your Phillips #1 screwdriver to take these bolts off.
Once they’re loosened, gently pull the assembly out of its place.
Proceed to the next step and clean the wheel you just loosened. We highly recommend cleaning each side individually. If you loosen both sides at the same time, it can be hard to keep track of all the parts.
Step 5: Clean the Wheel
Carefully clean the assembly as well as the wheel with a damp microfiber cloth. If you have a vacuum cleaner on hand, you can use it to suck up dirt on and around the wheel.
Step 6: Repeat and Re-Assemble
Reassemble the wheel assembly. Then, repeat step 4, step 5, and the reassembly step with the other side.
Check If the Pull Tab of the Roomba’s Battery Has Been Pulled
If your Roomba is brand new, check if you have pulled out the battery’s pull tab or not. The pull tab is there to prevent the robot from accidentally turning on during shipping. It blocks off the contact points of the battery, preventing the robot from getting power. So, for the robot to function, you need to pull it out.
Since it’s meant to be taken off, iRobot has made the pull tab highly visible.
Flip the robot onto its belly and there should be a bright yellow tab hanging down from its belly. Grab the tab and pull until the tab slides out of the robot.
Check if the “Roomba iRobot not charging” problem persists.
➜ RELATED: How to Clean Roomba Brushes - Easiest & Quickest Roomba Maintenance Guide
Check the Battery’s Positioning
If you’ve pulled out the tab and the robot is still not working, maybe the problem lies in the battery itself. The battery may have been knocked out of its position and lost contact with the robot. In that case, you have to push it back into place.
The location of the battery compartment will differ depending on the model that you got.
In older models, the battery is hidden behind a simple door (you can consult your user’s manual for more details). Open up the door and you can work with the battery.
Newer models, such as the i-Series Roombas, will have the battery hidden behind the cover plate. You have to take off the side brush, then unscrew the cover plate. The battery should be near the front of the robot.
Anyhow, once you have gotten access to the battery, push it firmly inward. Alternatively, you can slip the battery out, then reinsert it into the compartment again.
Test the Roomba to see if it works and whether the Roomba battery not charging problem has been fixed or not.
Replace the Battery
If the battery’s pull tab has been taken off and the battery is seated solidly within its compartment but the Roomba is still not charging, then maybe it’s time to replace the battery.
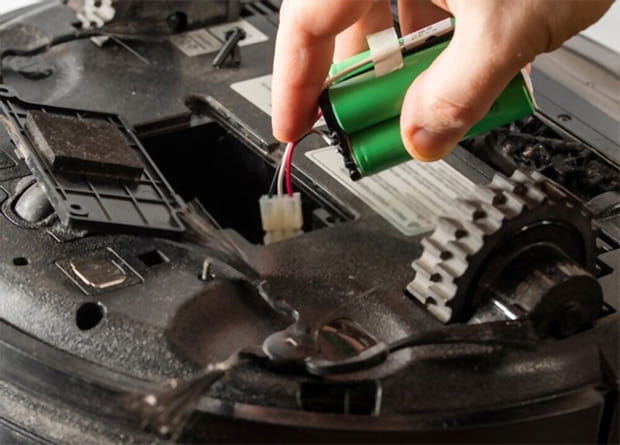
Both modern and older generations of Roombas use Lithium-ion battery cells. Although they are very durable, their power capacity will diminish over time. If your robot is old, you will notice that it has a shorter run-time than when it was first taken out of the box. This is very normal. However, there is a point where the battery’s capacity has degraded so much, it’s unable to hold a charge at all.
As a result, for older robot vacuums, a dead battery is one of the most common answers to the “Why is my Roomba not charging?” question.
However, if you have a very old model that you’ve been using for 4 or 5 years, we highly recommend replacing it. Yes, it’ll still work, but newer models will offer you more features and performance. But if your unit is relatively new or you want to hold onto your robot for a few more months, replacing the battery is the next best course of action.
Here’s the battery replacement process.
Access the battery compartment. We’ve demonstrated how to do so in the previous segment (“Check the Battery’s Positioning”).
Now that the battery cell is exposed, take it out of the compartment and put it to the side. Then, it’s only a matter of putting the new battery in.
iRobot has done a great job at making replacing the battery simple and easy. But most people usually aren’t stumped on the battery replacement itself. Rather, it’s usually where to find and buy replacement batteries that’s the key challenge.
If you have more recent models, iRobot sells replacement batteries that you can find on their homepage or on third-party sellers like Amazon. For older models, you may need to check Ebay or similar auctioning sites. The oldest Roombas date back to 2002, so spare parts for these models aren’t manufactured anymore.
Like we mentioned earlier, if it’s too hard to find replacement batteries for your model, it’s best to just buy a new model.
Reboot the Roomba
If your Roomba is still online but it doesn’t seem to charge, try and perform a manual reset of the robot. If the issue is software and not hardware, hopefully, the reset will iron that out.
In older models (like the iRobot Roomba 960), you can perform a manual reset by pressing and holding the ‘Clean’ button at the top for 10 seconds. The robot should make a small sound that tells you that it’s rebooting its system.
For newer i-Series or s-Series models, you need to hold the ‘Clean’ button for 20 seconds. The ring of light surrounding the button is going to flash a bit, then shut off. Wait for the robot to reboot. The process may take up to 15 minutes.
Guide the robot back to its charging station again to see if it charges.
Rebooting is a very common troubleshooting procedure. We have recorded it being able to work with newer models as well as old. It’s able to fix the Roomba i7 not charging issue and Roomba 980 wont charge issue, according to our database.
Factory Reset the Roomba
If there’s still power in your robot’s battery, it’s worth trying a factory reset. It’s the ‘nuclear option’, so do it when nothing else works. Factory resetting will scrub all of your robot’s data and preferences. By the time the process is finished, your robot’s system would be as if it has just rolled off the manufacturing line.
The factory reset process will differ depending on the model.
For Roombas with a Wi-Fi Module
Roombas that can connect to the home’s WiFi network and your phone (through the Roomba’s app) can be factory reset directly via the app. Go to the “Settings” option and you will see the “Remove/Factory Reset” button. Follow the on-screen prompts.
You can reset manually through the buttons on the robot, too.
For a-Series, i-Series, 600-series, 800-series, and 900-series Robots
Press and hold all three buttons on the robot (“Home”, “Spot Clean”, and “Clean”) all at once. Wait until the lights on the robot turn on or you hear a reset tone.
For e-Series Robots
Press and hold all three buttons on the robot (“Home”, “Spot Clean”, and “Clean”) for 20 seconds. Release.
For j-Series Robots
Take the dust cup out of the robot. Press the “Clean” button and hold for 15 seconds until you hear a chime. Press the “Clean” button again and the process will start.
Replace the Charging Base
If it’s not the robot or its battery that’s acting up, maybe it’s the charging station. Prolonged usage of the charging base may cause the contacts to malfunction, the power cord to loosen, and many other technical problems.
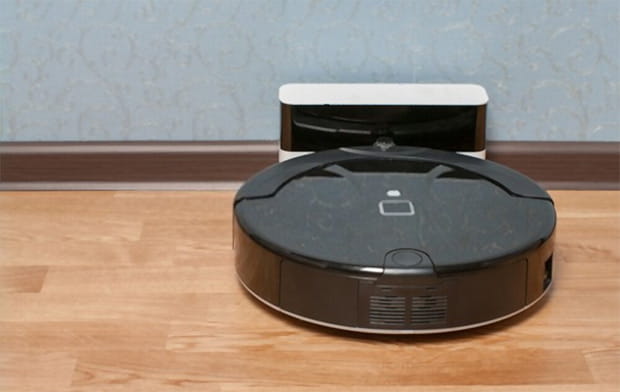
However, there’s a huge caveat here. Only replace the charging base if you’re very sure that the problem lies in the charging base and in the robot itself. Else, it’s best to skip this part.
How to Fix a Roomba with a Slow-to-Charge Battery
If you suddenly notice your robot’s battery taking much slower to recharge, here’s what you can do to fix it.
Reset the Battery
Abnormally slow charging time may be fixed by performing a Roomba battery reset (also known as “Deep Charging”).
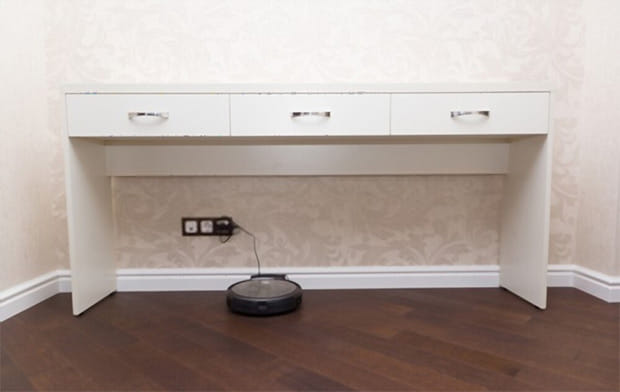
Resetting the battery is quite similar to resetting the Roomba itself. You can fix many issues with this technique, including the Roomba won’t charge. And of course, a reset can also solve the issue of the battery taking too long to charge or drain too quickly, as well.
The process will differ depending on the series.
How to Reset the Battery of Roomba 600-series Robots
The first step involves removing the battery from the robot. Remove the side brush and the four bolts that hold the cover plate in place. The battery is near the front of the robot. Take it out of its compartment and set it aside.
Flip the robot back up, then press and hold the ‘Clean’ button for 15-20 seconds.
Then, put the battery back in and reinstall everything.
Place your robot back onto its charging dock and allow it to charge for 16 hours at a minimum. When the green light on the robot turns on, then the reset process has been completed.
How to Reset the Battery of Roomba 700-series Robots (and Later)
For the 700-series and later robots, the process is far less complicated.
Plug the robot into its charging base. Then, press the ‘Clean’ button and wait until the display on the robot shows “r 5 t”. Release the ‘Clean’ button then.
The robot will shut itself off. After a while, it’s going to turn on again, followed by a signal sound.
Allow the robot to recharge its battery for a minimum of 16 hours.
Conclusion
iRobot has done a great job at making the Roomba easy to service. So, whenever something bad happens with your robot (like the Roomba won’t charge issue), you’ll be able to fix that right from home most of the time.
However, if none of the methods above resolves your issue, then it’s time to bring it to a service center. Alternatively, you can buy a new model to replace it.
We have received many interesting questions from our readership. Here are some of the most frequently asked questions (and their answers).
FREQUENTLY ASKED QUESTIONS
- 01. How Do I Know If My Roomba Battery Is Bad?
-
If your Roomba won’t charge at all, it’s very likely that it’s because you got a bad battery. Slow charging or rapid battery drain are also signs of a bad battery.
In all of these cases, you should consider replacing the battery.
- 02. How Many Years Does a Roomba Battery Last?
-
It depends on how often you use the robot. The more frequently you use it and the more charging cycles the battery goes through, the quicker it’s going to degrade. But, according to iRobot, the battery cell will usually last around 1-2 years before it has to be replaced if you use it once or twice daily.
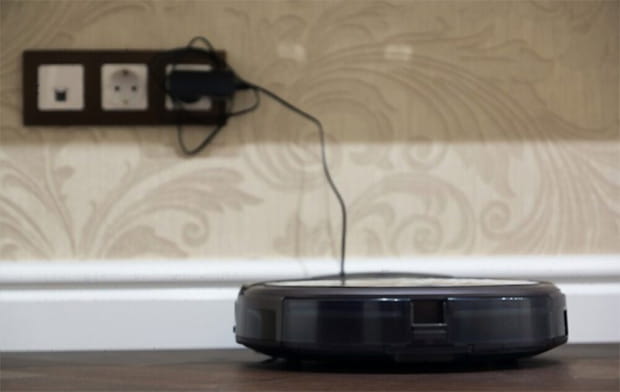
We talked at length about “How often to run Roomba?” in our Roomba usage guide. You can consult it for more information.
- 03. How Do I Clean My Roomba Battery?
-
Since the battery is locked deep within the robot, it’s rare for dirt and dust to build up in there. However, it’s not impossible for that to happen.
To clean the battery, first, we highly recommend removing and emptying the dust cup. As for how to empty Roomba, there should be a latch that allows you to open up the dust cup. Dump everything inside of the cup into the trash can.
After that, open up the battery compartment (you may have to unscrew the cover plate). Take the battery out of its place and clean all around the battery as well as the compartment with a microfiber cloth.
Reinstall.
- 04. Does the Green Light Stay on the Charger When Roomba Is Charging?
-
No. After you’ve plugged it in for a while, eventually, the Roomba’s light will turn off.
Here’s how to know if Roomba is charging.
On older models prior to i-Series and s-Series robots, press the ‘Clean’ button. If the light on the button flashes an amber color, then it’s still charging. If it’s green, the battery has been fully recharged.
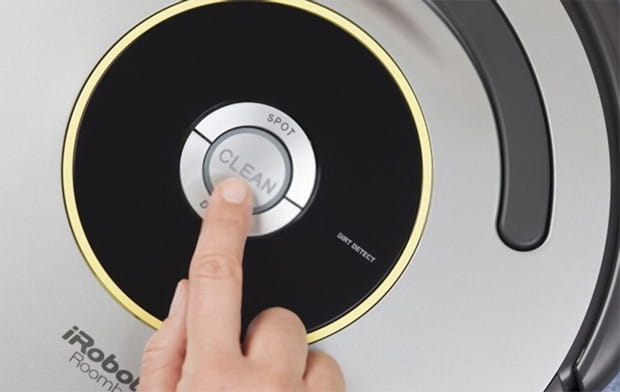
For i-Series and s-Series models, if the light ring surrounding the ‘Clean’ button is pulsing, then it’s charging. If it’s fully white, then the battery has been fully charged.
- 05. What Does Flashing Blue Light on Roomba Mean?
-
The blue light on older Roomba robots indicates low battery status. If it’s flashing, then the battery is very low and the robot must be recharged immediately.
On the new s-Series Roomba, a flashing blue light ring means the “Dirt Detect” feature is on.


