How to Install Vinyl Plank Flooring Like a Pro
High-end vinyl plank flooring can even withstand wear or scratches caused by foot traffic and pets or kids. And the best part is that this is still an affordable and DIY-friendly option, making it a quick way to freshen up the look of your room.
Let's learn how to install vinyl plank flooring with our guide. It is a good companion to the official manufacturer instructions, especially when you want to have every step explained in detail.
What You Need
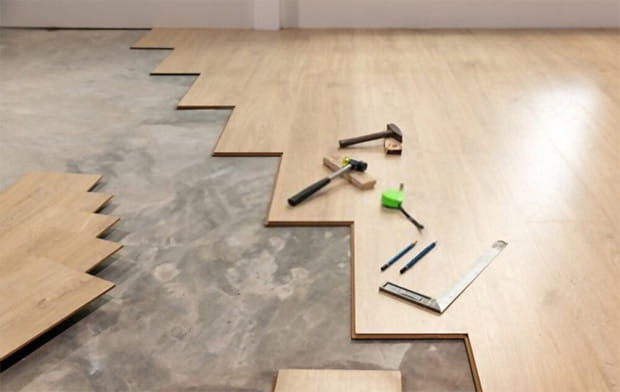
Some tools you need to get started
Installing vinyl flooring doesn't require any specialized equipment. These tools are widely available and can help you get the job done:
- Utility knife
- Tape measure
- Hammer
- Pry bar
- Nail set
- Fine-tooth saw
- T-square
- Sander
- Straightedge
- Floor-leveling compound
- Chalk
Below are optional tools that can make your job much easier:
- Circular saw
- Pneumatic brad nailer
We also recommend using protective equipment like work gloves, goggles, and knee pads.
➜ RELATED: Best Vacuum for Vinyl Plank Floors: 8 TOP Choices at the Moment
Planning And Preparations
Choose The Installation Method
Before learning how to install vinyl flooring, you have to make some decisions first.
There are a lot of ways to install vinyl plank flooring: interlocking, glue-down, and loose-lay. Every home is different, and one type of installation may work better than another. Because of this, you should think hard about it before making the decision.
All three installation methods are easy enough for a beginner to do by themself. Which method you choose should depend on your own preferences and the room you want to renovate.
Interlocking

Interlocked planks
The interlocking mechanism is similar to what you may have heard of as the "tongue and groove" or "click-and-lock" installation. To make a floating floor, you just lock vinyl planks together. The final floor doesn't stick to the subfloor - what keeps it from moving is its own weight.
Most vinyl products use this DIY-friendly method. It is easy to carry out all by yourself and only requires a few tools like a utility knife and a rubber mallet.
Glue-down
While interlocked planks can work in many situations, areas with higher traffic need a more secure solution. Consider the glue-down method if this is the case for you. It holds the vinyl plank flooring to the subfloor with either pressure-sensitive or hard-set adhesives, providing a more solid foundation.
When the subfloor is covered with hard-set adhesive, you can put vinyl planks on top of it. In the case of pressure-sensitive adhesive, the bottom of the plank already has the adhesive. It will stick to the subfloor when pressed into place.
Both types of glue are strong, but the pressure-sensitive glue makes it easier to replace individual vinyl planks.
Loose-lay
This type of vinyl plank flooring doesn't rely on any adhesives or mechanical fasteners, even the traditional tongue and groove mechanism, to hold itself in place. Instead, the backing of each plank can grip the subfloor and prevent itself from moving. It can just stay in position once you have laid it on the floor.
This simple installation method works well when you don't anticipate much traffic. However, it can develop seams, and you will need enhancements when there is a lot of foot traffic.
For instance, you may need to put carpet tape around and undeath these planks to keep them in place. If you want a more permanent solution, glue the planks together.
Plan The Layout
Before installing the planks, think about how you will lay them out. This will make the job go as quickly and easily as possible, making this step a crucial part of learning how to install LVP flooring.

Plan your flooring pattern in advance
First, choose where the first row is located. This controls how the rest of the flooring goes.
Usually, the first row begins with the most visible wall or the first wall you see when you walk into a room. From there, you can work outward toward the door. In a small bathroom, the edge next to the bathtub might be the one that stands out the most.
Starting from the edge of a wall isn't a requirement - you can also start from the room's center instead, as it helps make your flooring more symmetrical. In fact, when you are new to glue-down vinyl plank flooring, starting in the middle will be easier.
Find and mark the center of your first row if you want it to be in the middle of a doorway or focal wall. Mark where your first row of planks will go with a chalk line or permanent marker. This helps you make sure the panel is in the right place.
Using the room measurements and divide the width of the room by the width of a plank. This will give you two pieces of information: the required number of rows to fill out the entire flooring and the width of the last rows bordering the walls.
For the best outcome, make sure this is at least half of its original width. If your vinyl planks are 6 inches wide, for example, you should cut them down to at least 3 inches. In an ideal situation, you only need to trim the last row. But don't hesitate about cutting the first row if that could make your flooring look much better.
Remember to leave enough space between the planks and the walls, as the manufacturer recommends.
Think about the cuts you need to make in the planks on the edges so that you can reinstall the baseboard back later. If you want to stagger your flooring, now it is time to plan the pattern as well.
Determine The Required Number Of Planks
This number mostly depends on how big the room is and the way you want to lay out the planks.
Try to get as accurate as you can, and then buy 10 to 20% more than you think you will need. This will make sure you have enough planks to cover the floor of the whole room, as well as some extras that you can use to cut down or replace in the future.
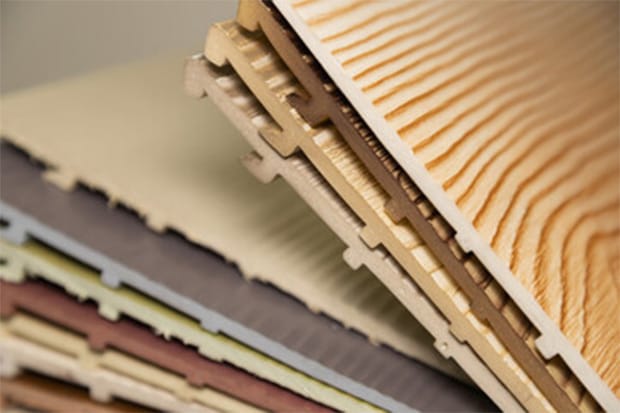
Use the room measurements to determine how many planks you will need
Acclimate Planks
After buying your planks, unbox them, and give them some time to get used to the conditions of your room.
The core of vinyl plank flooring has a high density and is actually porous, even though it looks solid. The tiny holes in the core let air move in, which brings a lot of humidity into the core.
This means that the planks are more prone to swelling when there is more moisture. On the other hand, they are more likely to shrink if the air is dry.
Acclimating the planks gives them a chance to adjust to the temperature and humidity of their permanent home. Getting your vinyl floors ready for installation also reduces the risk of voided warranty.
- Luxury vinyl floors need to be in their new home for 48 hours to get used to it. That is why you should order your planks early and get them shipped to your house at least two days before the installation.
- Once you have your plank boxes, take them to the room where you want to install them.
- Make sure that the room is about the same temperature as it usually is. Get the planks out of their boxes and let them sit there for about 48 hours.
- Also, it is a good idea to mix vinyl flooring from different boxes. If there are color variations in your planks, they will be spread through the surface instead of concentrated in one place.
Prepare The Floor
Start doing basic prep work while the planks are getting used to your house.
Take away anything that might get in the way
Vinyl flooring can go in many different settings, so the appliances and furniture you have to put aside depending on where the new flooring will be installed.
First, remove all the free-standing furniture, then move on to the appliances. In the kitchen, you will need to take out the non-built oven and fridge. And in the bathroom, you will need to remove the toilet.
Cabinets and vanities do not need to be moved because they are usually fixed in place, and you can put the flooring around them.
Take off the moldings
To make installation easier, you should always take off the trim that touches the floor. This includes case moldings, base shoe molding, and baseboards. Taking doors off their hinges helps too.
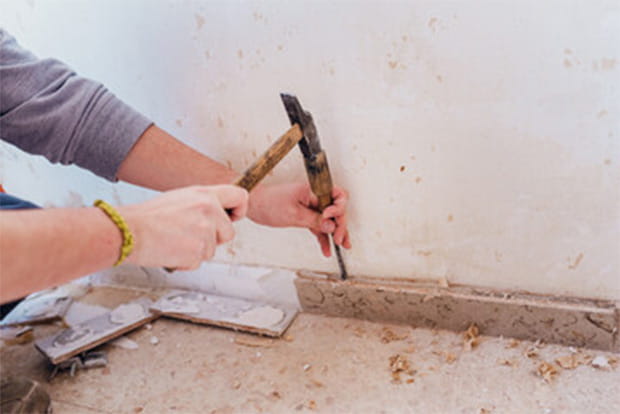
Remove the baseboards
The door casing is easy to take off and put back on, which makes the installation easier and cleaner. If you do not want to remove the door trim or there are protrusions you can't easily remove, you can cut the planks to fit around those obstacles.
It is easy to take off trim molding with a pry bar as it is usually held in place with thin nails. To get the brads out, use pliers to pull them through the molding from the back. You can reuse the trim later if it is still in good condition.
If you want to keep the door casing, undercut it so the vinyl flooring can slide under it.
Place a plank against the door casing, then mark it with a pencil. Cut the waste away with a door jamb saw or a multi-tool.
➜ RELATED: Best Robot Vacuum for Vinyl Plank Floors: TOP Robot Vacuums
Level the subfloor
The subfloor needs to be level, clean, and firm. It shouldn't have any cracks, bumps, dips, or steep slopes.
If you are installing vinyl planks over concrete, you will need to level bumps. This could mean sanding them down, patching concrete, and filling scars with self-leveling compounds.
Most of the time, you can buy a self-leveling compound at any home improvement store. It is a concrete blend that dries quickly, so you will need to spread it out and do the leveling quickly.
If you are installing over porcelain or ceramic, you will need to use thin-set mortar to fill in any deep-set grout and imperfections.
The dry time depends on the leveling method. Most of the time, you will need to give the levelers at least 24 hours before installing vinyl planks on top of them.
Add Underlayment
If you need to, put an underlayment on the subfloor in your room. Different underlayments have different benefits, but most of them serve as a barrier against moisture and noise. If you have a floating vinyl plank floor, the underlayment layer may also make the floor less likely to bounce.

Use underlayment if necessary
Cleaning up
Dust and other debris can make it hard for vinyl planks to fit together right or stick to the subfloor. Because of this, you will want to make sure that the subfloor is as clean as possible before laying out the planks.
Make sure to sweep and vacuum up any dirt or dust and mop the subfloor if necessary.
Don't throw the broom or vacuum away just yet - you might encounter some dirt and dust while installing the planks. Keep them by your side to quickly remove those particles. Getting the best mops for vinyl plank floors also helps with maintenance later.
How To Install Vinyl Plank Flooring
Cut Your Planks To Size
There are different ways to cut vinyl planks, depending on how skilled you are, what tools you have, and how thick the planks are. Always make sure to check out the official instructions from the manufacturer.
Here are some common methods to cut vinyl planks before installing them.
Snap
Scoring and breaking a vinyl plank by hand is the simplest way, as it requires no tools.
Lightly score a straight line with a T-square or a utility knife. You may need to do it more than one time. Then bend the plank along the core line to break it in two. You can use your knees as the leverage point for easier snapping.
Tile Cutter
A tile cutter is another way to cut vinyl planks. You can rent it from a local store for one-time use.
Carefully measure the plank and mark the line along which you want to cut it. Then simply make the cut by pulling the lever.
Circular Saw
If you happen to get one on hand and know how to use it, a circular saw is a great choice tool. Use a blade with fine teeth and move slowly so you won't melt the plank.
Lay Down And Connect The Planks
Interlocking Vinyl Plank Flooring
- Cut off the first plank's short tongue edge and lay this plank down.
- Put the second plank in place by attaching its tongue to the groove of the first plank. Lower the plank until it snaps with the first one.
- Continue in this way for the rest of the first row, cutting the last plank to size if necessary.
- For other rows, use the angle-and-snap technique to fit the planks next to each other and to the previous row. Keep going full until you reach the final row. Make sure the end joints are spaced at least six inches apart from those of the row before them.
- In the last row, cut the planks bordering the wall to the right length. Leave enough expansion space between them and the wall.
Glue-down Vinyl Plank Flooring

Spread the adhesive when installing glue-down vinyl flooring
- Find the middle of the room and draw a line with your chalk. Make a second line that crosses the first line at a right angle. This will divide your flooring into four equal quadrants.
- Apply the adhesive as recommended by the manufacturer to the subfloor. Use a trowel and work your way out to the area you want to cover.
- Give the adhesive some time until it becomes tacky. But don't let it rest for too long. The adhesive should still have a cloudy color and not turn clear. If it gets on the top surface of a plank, wipe the adhesive off with a dry cloth right away before it dries.
- Put the short edge of the first plank where the two chalk lines meet. Continue putting the planks down row by row, following the parallel chalk lines, and making sure that the edges of each plank fit tightly against those next to it.
- In the last row, cut the planks bordering the wall to the right length. Leave enough expansion space between them and the wall.
- Use a floor roller to roll over the flooring you have just installed to evenly and fairly seat the planks to the adhesive. Peel off or wipe away any glue getting into the seams.
Loose-lay Vinyl Plank Flooring
- Lay the first row along the wall, leaving enough expansion space as recommended by the manufacturer (usually 1/4 inch) between the wall and the edge of the plank. If the boards have been cut, make sure those edges face the wall.
- Place the planks end-to-end, let the adhesive strips overlap, and use a hand roller to press down each plank evenly.
- Continue your way across the room, making sure to firmly press the grip strips on the planks.
Stagger The Row
It is easy to learn how to lay vinyl plank flooring. When planning the next few rows, just keep in mind that the joints should be spaced out. The more randomly you stagger a row from those next to it, the more natural the final flooring will look.
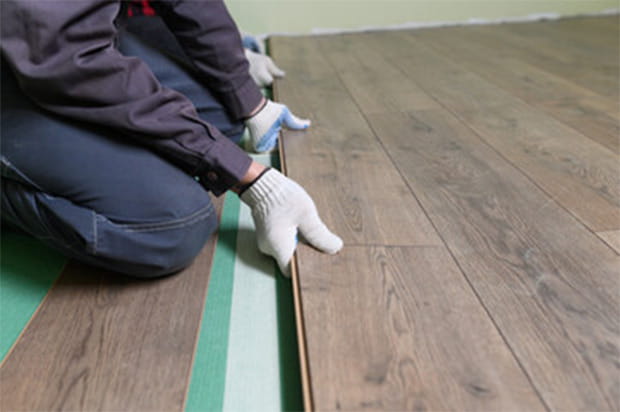
Install row by row until you are done
Install Planks Around Protrusions
When encountering obstacles like floor ducts or door frames, use a utility knife to cut a plank to the desired shape so it can fit around the protrusions.
Put Back The Trim Moldings
When you are done with the planks, it is time to reinstall the trim and baseboards.
If possible, use a pneumatic brad nailer to do this. Even though you can do it by hand with a hammer, it is easy to damage the trim.
You might want to replace the trim at this time, especially if it is old or has got damaged or cracked when you took it off. With a combo of new moldings and flooring, your room will even look more polished and elegant as well.
➜ RELATED: How to Make Vinyl Plank Floors Shine? Try These 7 Simple Steps
Conclusion
Knowing how to install vinyl plank flooring is useful knowledge that can save you a lot of money. This material has enjoyed rising popularity thanks to its variety of finishes and easy installation. With careful preparations, you can get it done with great results that look just like the work done by professionals.
FREQUENTLY ASKED QUESTIONS
- 01. Is It Easy to Install Vinyl Plank Flooring??
-
If you are familiar with DIY projects, especially woodworking, installing vinyl plank flooring shouldn't be a difficult task for you. Follow the instructions carefully when dealing with material, pay attention to common mistakes, and you should be fine.
- 02. When Should I Use A Professional Service Instead??
-
If you have a large room or complicated layout, you can consider leaving the vinyl plank flooring installation in the hands of experienced professionals. The huge amount of work required may overwhelm you.
- 03. What Is The Easiest Installation Method??
-
For DIYers, vinyl flooring installation with interlocking and loose-lay products is easier to deal with. They don't involve adhesives, which don’t just require more work but can also create a mess.
- 04. When Should I Install A New Vinyl Plank Floor During The Year??
-
You can carry out this task in almost every climatic condition and season. Just make sure the room is too hot (> 100°F) or too cold (< 50°F).
- 05. Do I Need Underlayment??
-
Vinyl plank flooring doesn't necessarily need underlayment. But many turn to it for moisture barriers, sound reduction, and comfort underfoot. You can consider it when one of those capabilities is your concern.


