How to Cut Vinyl Flooring in 6 Different Ways - Simple Methods You Can Do at Home
Believe it or not, there are six straightforward methods to slice through this stuff, all simple enough for a weekend warrior to handle in their garage. Craving more guidance? Dive into our seven-step tutorial that'll walk you through shaping your vinyl exactly how you envision it.

Cutting vinyl plank flooring is a DIY project anyone can do at home
Quick rundown of what's in store here:
- Six varied approaches to cutting vinyl flooring.
- A hands-on guide with seven clear steps for cutting vinyl plank floors.
- Handy tips and tricks for pro-level results.
And hey, swing by the Q&A at the bottom for extra insights. But first, let's cover the essentials of slicing up vinyl plank flooring.
➜ RELATED: A Simple Guide on How to Clean Vinyl Floors
6 Different Ways To Cut The Vinyl Plank Floor
You've got options galore when it comes to tools for trimming vinyl plank floors. Each one offers a unique twist on the job, tailored to your skill level and the cuts you need. Mix and match them based on what feels right – especially once you understand the fundamentals of how the tools behave on vinyl material.
We've rounded up six go-to tools, from beginner-friendly picks to advanced beasts, with step-by-step breakdowns below.
1. Cutting Vinyl Plank Floor With a Vinyl Tile Cutter:
If you're dipping your toes into DIY flooring, a vinyl tile cutter is your best bet – it's foolproof for crisp, straight lines without breaking a sweat. No fancy skills needed; it's practically idiot-proof.
Kick things off by measuring twice and marking your lines clearly on the plank. Set the cutter on a solid, non-slip surface to avoid any wobbles or mishaps – safety first, right? That blade's razor-sharp, so glove up and keep your fingers clear.
Slide the plank into position, aligning your mark perfectly with the blade. Weigh it down with books or clamps if it shifts around; a steady hold ensures a flawless edge. Then, with one firm downward push, let the blade do its thing. Pop off the excess, grab your fresh piece, and boom – you've just mastered cutting luxury vinyl planks or the standard variety with ease.
2. Cutting Vinyl Plank Floor With a Utility Knife:
For those starting out, a sharp utility knife paired with a metal ruler is a game-changer. It's ideal for straight lines but can handle some intricate shapes too, though curves might test your patience.

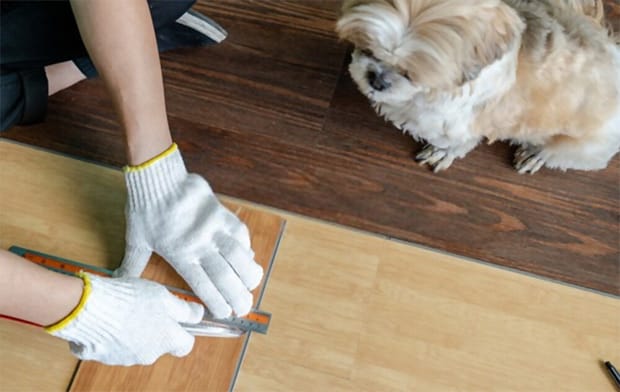
A utility knife always goes with a stainless steel ruler to create the cleanest cut
Begin by sketching your guidelines on the plank. Lay it on a stable workbench to prevent slips – nothing ruins a cut like a wobbly base. Position the ruler just shy of your line, leaving room for the blade to glide in snugly.
Score the surface repeatedly, pressing the ruler down hard to keep everything aligned. Don't rush; multiple passes create a deep groove. Finally, flip the plank and snap it along the score – bend it gently until it breaks clean. Once you've got this down, trimming and shaping vinyl plank floors for installation becomes second nature.
3. Cutting Vinyl Plank Floor With a Handsaw:
Ah, the trusty handsaw – a staple in any DIYer's toolkit. If you've sawn through wood before, tackling vinyl flooring with this will feel like old hat. It's especially handy for curves, where precision and a steady hand shine.
Newbies, take note: this one's a step up in difficulty from knives or cutters, so proceed with caution. But with practice, you'll carve smooth arcs effortlessly – just stay focused and go slow.
Mirror the basics: measure, mark, and secure the plank firmly. Guide the saw along your line, applying even pressure without forcing it. Pro tip: Clamp it tight to dodge vibrations that could veer you off course, and take your time – rushing leads to ragged edges every time.
➜ RELATED: How to Clean Discolored Vinyl Flooring Safely and Effectively
4. Cutting Vinyl Plank Floor With a Miter Saw:
Spot a miter saw, and you know you're dealing with a powerhouse for precise work on vinyl plank floors. It's not beginner territory, though – if motors and spinning blades intimidate you, stick to manual options until you're comfy.
This beast excels at rip cuts, like when planks butt up against walls, but hey, the other tools here can pull that off too. Pick what suits your confidence level.

A miter saw may not be suitable for amateurs, so make sure you know how to use it
Gear up with safety essentials – goggles, gloves, the works – because things move fast. It's akin to a motorized tile cutter: align your mark, lower the blade steadily, and let it rip. For the smoothest results, opt for a high-TPI blade; it'll chew through vinyl without chipping or tearing.
5. Cutting Vinyl Plank Floor With a Jigsaw:
Picture the jigsaw as your handsaw's beefed-up cousin – amped with electric oomph that slashes effort while cranking up the pace. Sure, it's a notch above beginner basics, but if you've wrangled drills or sanders before, you'll catch on in a flash and breeze through those flooring tasks like a pro.
Picking the right blade? That's the real game-changer: go for ones with dense, fine teeth to nail those laser-straight paths without fraying edges, or switch to slimmer profiles for navigating funky angles and serpentine contours. And don't skimp on the safety kit – goggles, gloves, even a dust mask – because vinyl shavings and sawdust can turn your workspace into a chaotic blizzard in seconds.
Set up echoes the earlier steps: sketch your guides precisely, lock the plank in a vise-like grip, and slide a catch-all bucket underneath to snag the fallout. Rev that puppy to life, trace your marks with deliberate strokes; yeah, the engine handles the grunt work, but it's your steady hand that delivers that polished, showroom-worthy edge.
6. Cutting Vinyl Plank Floor With a Table Saw:
Wrapping up our list, the table saw is a beast for high-volume cuts, blasting through vinyl plank floors in record time. But it's pro-level stuff – skip it if you're green, as one wrong move could spell trouble.
For big installs, though, nothing beats it for efficiency. Master this, and your DIY game elevates instantly.

Always wear protective gear when working with a table saw
Unlike push-pull tools, here you feed the plank into the blade – precision is everything, so stay alert and suited up. Inspect the saw first for smooth operation; a glitch mid-cut is a nightmare. Guide the material steadily, and you'll emerge with perfect pieces, ready for flooring glory.
How To Cut Vinyl Plank Floors - 7 Steps You Can Do At Home
Tool selected? Great – now let's break down the process into seven actionable steps for flawless results on your vinyl plank floors.
Step 1: Create Guidelines on the Vinyl Plank for the Cut
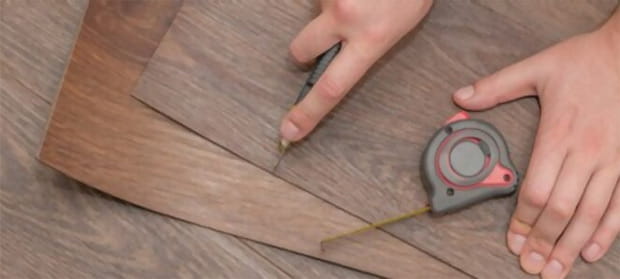
Start by mapping out your layout. Grab a tape measure, jot down dimensions, and pencil in those lines. This preview shows if you're facing straights, longs, or tricky curves – knowledge that shapes your tool pick.
Step 2: Choose the Suitable Method for the Cut
Eyeball your marks to decide: short straights suit knives, longs need saws, and curves scream for handsaws or jigsaws. Patience is your ally on bends – glide slowly for accuracy.
Step 3: Score the Vinyl Plank (for Short Cut Only)
On shorts, team a utility knife with a ruler. Score deeply, pass after pass, anchoring the plank to avoid slips. A solid groove sets you up for success.
Step 4: Snap Off the Cut Section (for Short Cut Only)
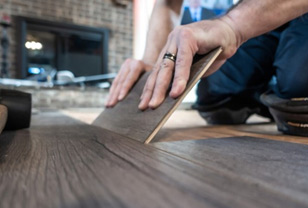
Flip it, weigh the main piece, and lift the scrap end. It should crack right off – if not, deepen that score. Easy peasy when done right.
Step 5: Secure the Vinyl Plank Before Cutting (for Long Cut)
For longs, lock it down with clamps or weights. Hang the waste edge off the table, aligning your line perfectly for a stable setup.

Always place the excess part of the vinyl plank outside of the table
Step 6: Cut the Vinyl Plank With a Suitable Tool
Don your gear – goggles, mask – to fend off flying bits. Whether handsaw, jigsaw, or miter, start at the line's edge, blade away from you, and push outward. Safety and control trump speed every time.
Step 7: Do Some Trimming (if Necessary)
Inspect for rough spots; sand them smooth if tiny. Curves often need this tweak, especially if you're still honing your blade-handling finesse.
Tips and Tricks To Effortlessly Cut Vinyl Plank Floor Even When You Are An Amateur
Slicing vinyl plank flooring? It's no rocket science, but these nuggets can turn a novice effort into something slick.
Double-measure marks and test-fit them in place – better safe than sorry.
Hone your blades sharp ahead of time; dull ones snag and frustrate.
Tiny nips? Pliers grip better than fingers for those fiddly bits.
Corded tools? Tape down cables to keep your workspace tangle-free and accident-proof.
➜ RELATED: Replace Carpet With Vinyl Flooring - Is It a Good Idea for Home Innovation?
Final Words
Armed with this guide on how to cut vinyl flooring, you're set to revamp your space solo. Grab your favorite tool, dive in, and craft that stunning floor. Once it's down, maintain the magic with the best mop for Vinyl plank floors – it'll keep things pristine for years.
FREQUENTLY ASKED QUESTIONS
- 01. Can I only use a utility knife to cut vinyl plank flooring?
-
Technically, yes. But that would be a very long process and will cause you more trouble, especially with the long cuts. Unless the utility knife is the only cutting tool you have, consider at least using a handsaw to reduce the workload.
- 02. How can I fix a rugged cut?
-
You can trim off the excess part by scoring and snapping it off. If it is too small to snap, use sanding paper to grind it.
- 03. Why can’t I snap the vinyl plank after scoring?
-
The vinyl plank is not too thick and tough to snap. This situation usually happens when the groove is not deep enough. You can try scoring a few more times. And remember to flip the plank before snapping. The groove should be facing down because it is the best position to snap the plank off.
- 04. What kind of protective gear should I put on while cutting vinyl plank flooring?
-
If you use a powered cutting tool, protection gear is a must. You should wear goggles and gloves to prevent splitter, and a mask (optional) if you are sensitive to dust.
- 05. Do I have to use different cutting tools for luxury vinyl plank flooring?
-
All cutting tools mentioned in the post can be used to cut both regular vinyl plank flooring and luxury ones. But luxury vinyl plank flooring is more delicate so it is recommended to use manual cutting tools if you are not familiar with powered cutting tools.


