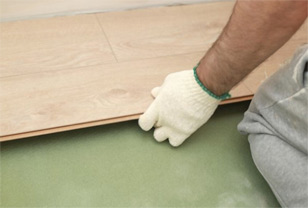
Replace Carpet With Vinyl Flooring: Pros, Costs & DIY Steps
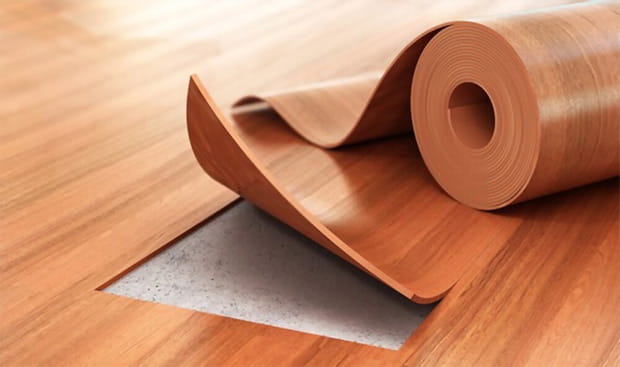
So, Should You Swap Carpet for Vinyl Flooring?
Crave water resistance, easy cleaning, and high-traffic toughness (kids, pets, spills)? Go LVP. Need pillow-soft comfort and deep sound absorption? Stay with carpet.
Compared with laminate or engineered wood, LVP generally handles water better and cleans faster in busy rooms. Bottom line: replace carpet with vinyl when performance and upkeep matter more than underfoot softness.
A Little Story: A Weekend Makeover
Saturday 9 a.m.: you pull the last strip of carpet and snap a dead-straight starter line. By Sunday evening, the hallway feels solid and hushed, and the living room looks brighter—those crisp micro-bevels read clean under soft light. Moral of the story? Careful prep + patient tapping = pro-looking seams.
Pros and Cons vs Carpet
Pros
-
Highly durable wear layer for daily wear and tear
-
Water-resistant and easy to wipe down
-
Pet-friendly hygiene; broad design variety
-
Low maintenance over the long haul
Cons
-
Less cushion/warmth underfoot than carpet
-
Moderate sound absorption unless paired with acoustic underlayment
-
Sensitive to subfloor flatness and moisture conditions
Cost, Time, and Difficulty
-
Typical room size: ≈130–215 ft² (12–20 m²)
-
Timeline: 1–2 days for two motivated DIYers
-
Difficulty: Moderate
-
Budget for: planks, underlayment or vapor control, transition strips, quarter-round/base shoe, and basic tools
-
Allow 5–10% overage for cuts/waste
-
Single room with one doorway = faster; multi-room runs with multiple transitions = 1.5–2 days
Buying & Specs (What the Labels Really Mean)
If you plan to replace carpet with vinyl flooring, use this quick label decoder:
-
Core:
-
SPC (stone polymer): denser, tougher, excellent dent resistance, cooler underfoot
-
WPC (wood composite): slightly warmer/cushier feel, still water-resistant
-
-
Wear layer: 12–20 mil for busy homes; clearer visuals and better scratch hold-up
-
Pad/Acoustics: Attached IXPE/EVA adds comfort and noise control; only use approved underlayments for your click system
-
Air & Sun: Choose low-VOC products; add UV-resistant finish for sun-drenched rooms
-
Traction/Cleaning: Light embossing improves grip in halls/kitchens without making cleanup harder
In-Store One-Stop Check
-
Confirm flatness tolerance and approved underlayment for your click profile
-
Verify wet-area rating if installing in baths or laundry
-
Bring door-threshold heights to match transitions cleanly
-
Pro tip: snap a photo of aisle labels (big-box stores) and keep receipts for returns
Standards and Measuring (Get the Numbers Right)
-
Flatness: ≤ ⅛ in over ~6½ ft (check with a 2 m straightedge)
-
Fix lows with leveling compound; sand highs before you start
-
Moisture: follow manufacturer ranges (concrete/wood) to protect seams and warranty
-
Layout: run planks with the main light source or the longest wall; stagger 6–8 in (150–200 mm)
Subfloor Moisture & Flatness: Field Methods You Can Trust
If you don’t own pro meters, use simple checks to stay within spec. Tape plastic sheeting (about 18×18 in) to concrete in two or three places for 24 hours; if you see condensation or darkening, address moisture before laying planks. For wood subfloors, probe suspect areas with a thin screw: if it turns easily or comes out dusty, reinforce or replace sections. To verify flatness, lay a 6–7 ft straight board or a level and look for daylight underneath; shim the gap to estimate variance—anything approaching ⅛ in requires patching or sanding. Feather patch low spots with cement-based leveling compound and let it cure fully; shave proud seams with a floor sander or 60–80 grit on a palm sander. Sweep and vacuum between passes so dust doesn’t lodge in click profiles later. Small habits matter: keep a labeled “high/low” chalk mark system as you circle the room, and recheck after each fix. Ten minutes here saves hours of rework and protects your warranty.
Layout, Aesthetics & Room Flow (Plan It Before You Cut)
Dry-fit three or four rows to preview joint rhythm and avoid narrow slivers at the far wall. If the last row will be under 2 in, trim the first row so both edges land at comfortable widths. Aim plank direction toward the primary light source or along the longest run—this minimizes joint shadowing and makes spaces read larger. Balance doorways: center a full plank in high-visibility openings, then backfill each side so your T-molding reveals look even. If you’re mixing patterns (herringbone, chevron) or strong grains, keep them parallel across connected rooms so transitions feel intentional, not accidental. Check stair landings and hallway elbows early; these choke points dictate staggering and cut strategy. Finally, stage materials like a production line—cut station, tap station, and a clean stack of ready planks. Fewer trips across the room mean fewer chances to chip edges or drop debris into the locks.
“Start straight. Stay patient. Seams tell on you.”
Sound and Comfort
If footfall noise bugs you—or you share floors/walls with neighbors—plan acoustics early. Thicker SPC plus an attached pad usually lowers footfall sound. Use only underlayments approved for your click profile (keeps the warranty intact).
Tools and Materials (Grouped So You Don’t Overbuy)
-
Demo & Prep: pry bar, end nippers, floor scraper, putty knife, shop-vac
-
Layout & Cuts: chalk line, tape measure, T-square, utility knife, jigsaw or compact circular saw
-
Set & Tap: spacers, rubber mallet, tapping block, pull bar
-
Underfoot & Finish: underlayment/vapor barrier (if required), transitions (T-molding/reducer/threshold), quarter-round/base shoe
-
Note: adhesive only for glue-down systems
Safety First
Before you replace carpet with vinyl flooring, suit up: wear gloves, safety glasses, knee pads, and a respirator when cutting or stripping adhesive. Ventilate well. Lift with your legs. Follow local rules for disposing of carpet, padding, tack strips, and any solvent waste.
Prep and Safety Checklist
-
Clear the room; mark door swings and transition points
-
Ensure the subfloor is flat and dry
-
Undercut door jambs and casings for clean edges
-
Acclimate planks per spec (typically 24–48 h)
-
Leave ¼–⅜ in (6–10 mm) expansion gaps around all fixed objects
-
Add 5–10% to material takeoff for waste
Step-By-Step Installation
Every click system is designed for tight, flat seams that tolerate seasonal movement. Read the product sheet, then dry-fit two starter rows and confirm expansion gaps.
Click-Lock (Most Common)
-
Snap a straight chalk line and set spacers at walls.
-
Lay row one perfectly straight; lock long edges cleanly.
-
Start row two with a ≥12 in (300 mm) offcut to maintain the stagger.
-
Angle in the long edge; engage the short edge; tap gently with a block.
-
If you see a gap, pause and fix it now.
-
After the field is in, remove spacers and install transitions + quarter-round/base shoe.
Drop-Lock
-
Position plank lengthwise along the previous row, drop to lock per the profile.
-
Inspect joints; a light mallet tap on the short edge can finalize the lock.
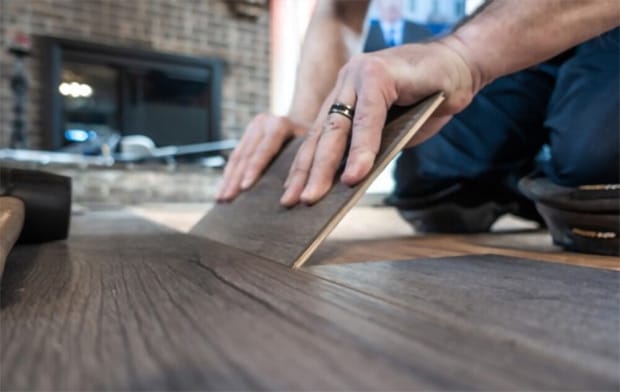
The drop lock system will require a rubber hammer to process
Loose-Lay
-
Use compatible tape or acrylic adhesive if the brand requires it.
-
Secure rows at intervals on long runs and at perimeters; press pieces tight together.
Glue-Down
-
Use the specified trowel and adhesive.
-
Lay planks carefully along the previous row; clean any squeeze-out immediately.
-
Follow open/work times—excess ridges can telegraph through thin wear layers.
Transitions, Trims, and Baseboards
-
Use a reducer to bridge height differences; T-molding when floors are level
-
At doorways, add a low-profile threshold to protect edges and cover the expansion gap
-
Finish with quarter-round/base shoe for a clean perimeter
-
For rolling chairs, use soft casters and a desk mat to protect micro-bevels
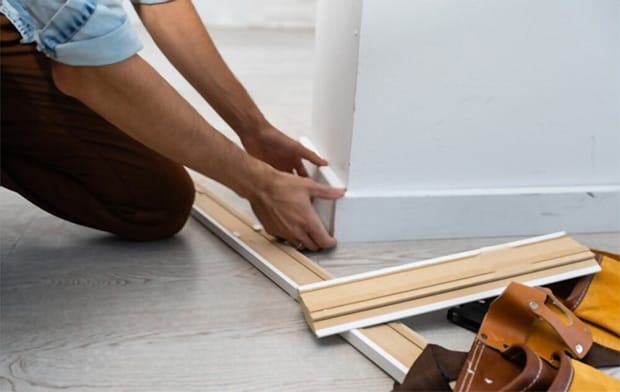
You should remove the baseboard before doing any replacement project
Reducer vs. T-Molding
-
Reducer: you need a ramp between different heights
-
T-Molding: you want a clean expansion joint between same-height rooms
Thresholds at Doors
-
A thin threshold at the hinge side protects edges in high-traffic funnels and hides the expansion joint.
Bathrooms and Laundry Rooms (Wet-Area Essentials)
If you plan to replace carpet with vinyl flooring in these spaces, follow these must-dos:
-
Only use products the manufacturer rates for wet areas
-
Add vapor control as specified and seal seams where splashes or standing water are likely
-
Choose anti-slip textures and low-VOC adhesives; ventilate well
-
Follow substrate, cure, and dry times before returning the room to service
Seam Sealing Near Wet Zones
-
Where the manual calls for it, seal seams.
-
Keep the wear layer clean at edges—grit causes premature wear.
Common Mistakes (And How to Avoid Them)
-
Skipping the ¼–⅜ in expansion gap → buckling/peaking
-
Not leveling the subfloor → movement and open joints
-
Poor staggering (< 6–8 in) → weak, messy look; avoid H-joints
-
Forgetting moisture tests on concrete/wood
-
Starting from a crooked wall instead of a straight snapped line
-
Doors rubbing after install → undercut slab and/or adjust hinges
Post-Setup Last Checks
Walk the room and listen for hollow spots. If a joint looks open, tap it back with a block. Verify expansion gaps around all verticals (radiators, casings). Check transitions: T-moldings should bridge evenly; reducers should sit flush with no trip edge. Open/close every door to confirm threshold clearance.
Unsuccessful Attempts & Little Fixes
-
Short-edge lift: clean debris from the groove, warm gently (hair dryer/low heat gun), re-engage with light taps, and weight for an hour.
-
Wall-row plank damage: remove base shoe, back out the last row, swap plank, re-install.
-
Mid-field plank replacement: mark; plunge-cut corners with a fine-tooth blade; remove core; insert new plank with a thin bead of manufacturer-approved adhesive on click surfaces.
-
Scratches: use a color-matched repair pen for fine marks; filler putty + plastic scraper for deeper ones.
-
Seasonal gapping: maintain indoor RH within the product’s recommended range.
Use and Upkeep
Vacuum with a soft-bristle head, then damp-mop using a neutral cleaner. Avoid steam and don’t let water pool. Add felt pads to furniture feet and caster mats under desk chairs. Keep pet nails trimmed. For stubborn stains, follow the product’s care guide.
Persona Tips for Better Results
-
With kids, consider anti-slip textures and darker designs with EIR embossing—they hide smudges better.
-
Live upstairs? Pair a thicker SPC core with an underlayment approved for your click system to reduce impact noise.
-
Expect heavy pet traffic? Choose thicker wear layers to minimize visible scratching.
Real-World Case
A small bedroom (~150 ft² / 14 m²) over plywood showed max 3 mm deviation across 2 m. Demo and subfloor inspection took ~2 hours. Two workers installed click-lock in ~6 hours, using an 8 mm (~5/16 in) reducer at the tile transition. Waste factor: ~7%. The final floor felt solid, with clean, consistent micro-bevels—signs of good prep, a true starter line, and patient tapping.
How We Research and Review
We look at the manufacturer’s installation guides—especially for products you’ll use to replace carpet with vinyl flooring. We also double-check measurements using tools like a 2-meter straightedge and moisture meters. Then, we test out common tricky situations in controlled DIY setups before we publish anything. These include things like doorways, uneven subfloors, and expansion gaps. We update our content regularly to keep up with product changes and what users tell us.
Affiliate Disclosure: Some of our suggestions might be from affiliates. We only recommend products that are good for DIY projects. If you're planning to swap out carpet for vinyl flooring this weekend, make sure your subfloor is flat and dry first. Pick an SPC or WPC plank with a suitable wear layer. Then, snap a perfectly straight starter line before you make any cuts. This guide comes from TheKingLive to help you achieve professional-looking results right from the start.
FREQUENTLY ASKED QUESTIONS
- 01. Can vinyl be installed over carpet?
-
Generally no. Very thin, low-pile carpet is sometimes allowed, but moisture, hygiene, and flatness issues remain. Best practice: remove the carpet.
- 02. What’s the typical time frame?
-
About 1–2 days for an average room—assuming materials and tools are ready.
- 03. Is vinyl cheaper than carpet??
-
Upfront LVP can be competitive or lower, and maintenance costs are typically lower over time.
- 04. Do I need underlayment or a vapor barrier?
-
Check your product sheet and subfloor type. Some click-lock planks have attached underlayment; others require a separate layer.
- 05. How do I handle floor-height differences?
-
Use a reducer for differing heights. If both floors are level, T-molding works well. Small gaps may be addressed with underlayment or subfloor build-up.


