Complete Tutorial on How to Remove Vinyl Flooring
Knowing how to remove vinyl flooring will come in handy when that day comes, and you want to install new flooring.
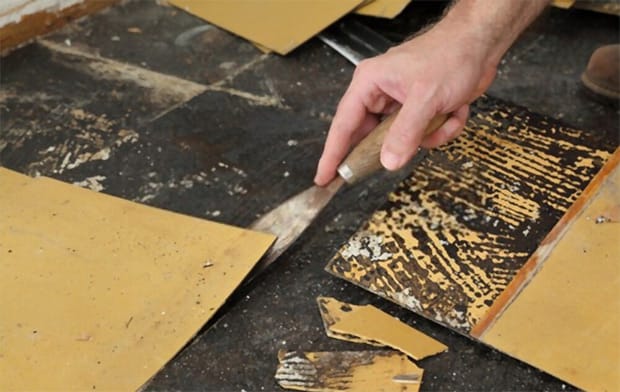
There will be a time you have to remove old vinyl flooring to install a new one
This is a very easy home innovation project which does not cost a lot of money and time. So let’s learn how to remove vinyl flooring at home with the detailed tutorial below.
Here is a quick glance at what we will dive into through this post:
- Things you will need for removing vinyl flooring.
- How to remove vinyl flooring tutorial.
- What to do with the removed vinyl flooring strips.
There is also a FAQs section at the end of this post. Don’t forget to check that out as well.
Let’s begin!
Things you will need for removing vinyl flooring
To successfully remove vinyl flooring, here is the equipment you will need:
- A pair of work gloves for safety.
- A utility knife for cutting and scoring the vinyl flooring.
- A flat pry bar to remove the baseboard and the vinyl flooring.
- A 5-in-1 tool to scrap out stubborn vinyl flooring pieces.
- A heat gun to melt down the glue under the vinyl flooring.
- A wood block to make leverage for prying the baseboard.
Keep in mind that there is no way you can remove vinyl flooring without heavily damaging it. This means you can hardly re-use the old vinyl flooring once you have peeled it off the floor. The final section will tell you what to do about the residue of vinyl flooring.
But now, let’s learn how to remove vinyl sheet flooring in the next part!
How to remove vinyl flooring, step by step
Step 1: Remove the quarter-round trim
The quarter-round trim is installed to cover the gap between the floor and the baseboard. That is where you should start first when removing vinyl flooring. Put on your work gloves to prevent injury during the whole process. Then, use the flat pry bar to pry the quarter-round trim off.
The trick is to be gentle and go slow so that you won’t damage the baseboard and the wall by accident. We will cover the floor with new flooring later, so it doesn’t matter if it gets scratched. But it would add more work if you have to repair the baseboard and the wall after this vinyl floor removal project.
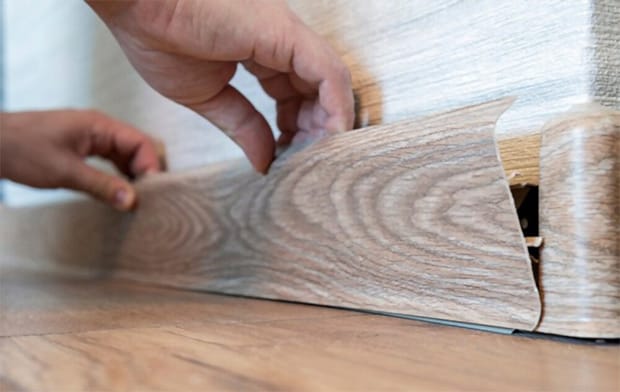
You have to remove the round-quarter trim before removing the vinyl flooring
Step 2: Remove the baseboard trim
In some cases, you will need to pry the baseboard trip off to remove the vinyl flooring that was installed behind it. The reason why they install vinyl flooring like this is it looks more appealing and natural. But that would make removing vinyl flooring more difficult.
If this is your house’s case, here is how to remove the baseboard rim with the least damage:
Place a wood block a few inches above the baseboard, and press it against the wall. Make sure the surface of the wood lock is smooth so it won’t scratch the wall. Or you can place a thin, soft cloth between the wall and the wood block to protect it.
Insert the flat pry bar and use the wood block as leverage to pry the baseboard off the wall. Move the wood block along the length of the baseboard to remove it slowly.
Be careful not to break the baseboard even though you don’t have any interest in re-using it. Since it would be harder to remove the baseboard when it is broken into pieces, you better keep it intact.
A small trick for those who want to re-use the baseboard: mark it on the back with numbers, so you will know which one is the first piece to reinstall later.
➜ RELATED: How to Clean Discolored Vinyl Flooring Safely and Effectively
Step 3: Remove the center section of the vinyl flooring
We finally come to the main part of this tutorial: how to remove sheet vinyl flooring. And the best way to do it is to process from the inside out. Since the vinyl flooring is glued down at the edges, normally 8 inches from the walls, the center section is often laid loose. That is where we can take advantage of removing the vinyl flooring easier.
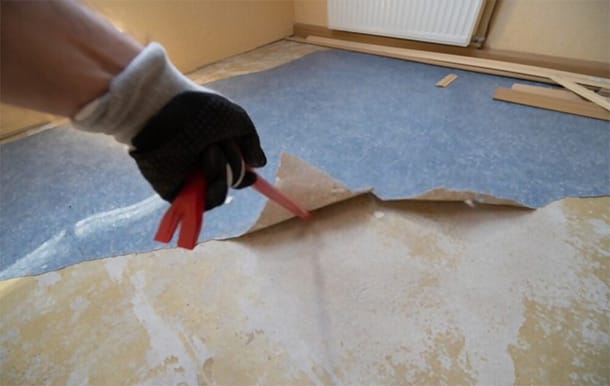
Always start by removing the center section of the vinyl flooring
To check where the best place to process is, use a utility knife to cut the vinyl flooring 8 inches away from the walls and peel it off to see if you have any trouble doing that. Move away from the edges if it is not easy to remove the vinyl flooring yet.
If you have your vinyl flooring installed on a wood floor, you can peel it off without using chemicals. But for those installed on concrete floors, buy some chemicals for scrapping the vinyl flooring off beforehand.
Step 4: Cut the vinyl flooring into strips
Cutting the vinyl flooring into strips is how to remove vinyl flooring easily and effectively because it can be removed faster that way without leaving residue. It is recommended to cut the vinyl flooring into long narrow strips about 18 inches wide. The cut doesn’t have to be straight, but it is best to keep it clean for easy peeling.
Unless you are planning to reuse the old vinyl flooring for different parts of the house or give it to someone else, you shouldn’t make large strips. The vinyl flooring can be quite heavy and bulky to deal with. Cutting it into small narrow strips will help you dispose of it easier later.
Step 5: Remove the glued-down vinyl flooring
There are a few ways to remove glued-down vinyl flooring. Depending on the situation, you can choose one method that is most suitable for you or use all of them for removing vinyl flooring at home:
- Method 1 - use a pry bar:
Try to scrape out the vinyl flooring with the flat end of a pry bar. It can be a bit hard for those pieces at the edges. So keep your work gloves on and pick them up slowly, be careful not to hurt yourself. It will eventually come off, and don’t forget to use the chemicals if the vinyl flooring is installed on a concrete floor.
- Method 2 - use a 5-in-1 tool:
There are some areas where the pry bar is not sharp enough to pry off the vinyl flooring, so you should use different equipment, like a 5-in-1 tool. Remember to sharpen it before using it and have the work gloves on for safety.
Use one hand with a chisel movement to remove the vinyl flooring while peeling it off with the other hand. Make sure you remove the full width of the vinyl flooring instead of scraping out the top layer only since the blade is too sharp.
- Method 3 - use your hands:
For the loose parts of the vinyl flooring, you can peel them off with your hands. Try doing that upwards or pulling towards you for stronger force. Try to stand as steady as you could to prevent losing balance during this process.
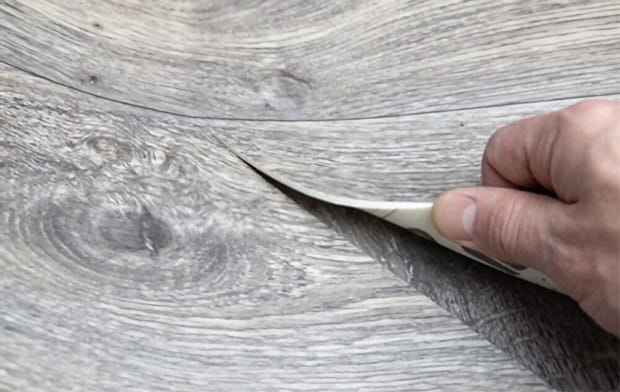
You can use your hands to remove old vinyl flooring
- Method 4 - use a heat gun:
When all the methods above fail due to the stubborn adhesives, you should use a heat gun to melt it off for easy removing vinyl flooring. Make sure you have protective gear on, like a pair of work gloves, and at least wear long and thick pants to prevent accidental burns.
Turn the heat gun on at a low level and wait for it to heat up completely. When the heat gun is ready, hover it on the stubborn area and try to pull it up after a minute or two. Continue doing that for all the remaining parts.
What to do with the old removed vinyl flooring
Once you have successfully removed the entire vinyl flooring, you will be left with rolls of this material. Now, if you already have plans to use it for a new project or give it away to someone else, awesome! But if you don’t, here is how to correctly dispose of the old vinyl flooring.
First, try to fold up the vinyl flooring strips accordion-style. Score the surface with your utility knife so that you can snap and fold it into square bits. The thicker the layers, the deeper the scoring should be so that you will have no problem folding it.
When you have compressed the vinyl flooring neatly, try to find a disposal site that accepts this material. Building material like this may not be accepted along with household trash, so you should check the local ordinances for information.
Final words
If you find it exhausting to take care of your vinyl floor so that you want to get rid of it, don’t do it just yet. Instead, try using the Best Robot Vacuum For Vinyl Plank Floors before you come to a decision. Maybe this amazing tool can change your mind.
To keep your vinyl flooring's beautiful appearance last longer, you should use the Best Mops For Vinyl Floors so that stains can’t affect the surface and fewer scratches are scored on your vinyl flooring.
However, when the time comes and your vinyl flooring is no longer able to make your house look great, knowing how to remove vinyl flooring with the tutorial provided in this post will help you get rid of it effectively without the help of any professional.
If you find this post helpful, don’t forget to check out other posts on our website as well. You can find tutorials on various topics to take care of your house better. See you in the next post!
FREQUENTLY ASKED QUESTIONS
- 01. How much does it cost to remove the vinyl flooring?
-
If you choose to use a professional service, the cost can be up to $1000 for an average room. The price may vary depending on where you live.
However, if you choose to remove vinyl flooring at home, the cost won’t be too far from $25. Having all the tools at home already can even cut down the budget.
- 02. How long does it take to remove vinyl flooring at home?
-
As mentioned in the post, removing vinyl flooring is an easy DIY project that everyone can do, even amateurs. It will take about 2 - 4 hours to complete this task. The time also depends on how large your vinyl flooring is. Skills also play an important role in cutting down working time.
- 03. Can I tile the floor over vinyl flooring?
-
Technically speaking, you can. But it is never recommended to do so. The smooth surface of the vinyl flooring is not good for securing the tiles, so your new flooring will become bad very soon. Try to remove all the vinyl flooring before installing new ones.
- 04. Does the floor installer remove old flooring for you?
-
That depends on the service you hire. Some may do it for a charge, some do it for free, while the rest refuse to remove your old flooring. That is why you should learn how to remove vinyl flooring in case those guys can’t help you.
Some services don’t remove the old floor completely, causing the new floor to go down quickly. So if you ask the service to do it for you, supervise their work carefully. Or you can do it yourself since this task is not that hard and it is better because you are the one who will take the best care of your floor.
- 05. How can I ensure safety while removing vinyl flooring?
-
Wearing protective gear is something you must do while working on a project like removing vinyl flooring. Since you will be working with sharp tools like the utility knife, it’s best to take things slow and be patient when you need to cut or score the vinyl flooring.
Another thing to pay attention to is the power cord of the electric tool like the heat gun. Keep the wire neatly by taping it together and away from the spot you are working on. Always wear work gloves and wait for a bit before touching something you just heat up with the heat gun.


