How to Fix Scratches on Laminate Floors: The Quick & Easy Ways
And that’s what we can help you with today! This guide will show you all you need to know about how to fix scratches on laminate floor.

How Can Scratches Form on Your Laminate Floor?
Many things can scratch up your floors, from your pets’ claws to the feet of your chairs dragging across the lamination.
And to be honest with you, it’s impossible to avoid them altogether. But knowing the reasons can help you avoid scratches and keep your floors clean and pretty for longer before they have to be overhauled.
Scratches are separated into two categories: minor and major.
Minor Scratches
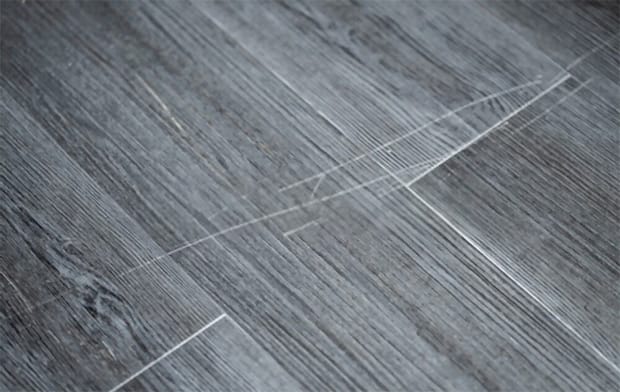
Minor scratches are shallow, usually faint cuts on the floor's surface. Typically, you will need to look long and hard to find them. They can be caused by high heels or by your pets' nails grazing the surface as they walk. Fortunately, these are very easy and cheap to repair.
Major Scratches
Major scratches are caused by impacts, like something heavy falling down onto the floor. Deep gorges can also form on the floor’s surface because of furniture like chairs and tables dragging across the lamination.

As expected, they are far more difficult to deal with than minor scratches. For them to look normal again, not only you need to mask them, you also have to fill them.
Is It Worth Fixing Scratches in Laminate Flooring?
Although laminate floors are cheap, beautiful, and highly durable, it’s unfortunate that they aren’t very serviceable. Most manufacturers recommend that you do not try to fix anything on your own if they are damaged. Instead, they will tell you to go ahead and replace the entire plank.
Now there’s a very good reason for that.
Laminate floors are synthetic flooring made from layers of wood fiberboards stuck together by a lamination layer. The lamination is the key here. Because of it, a laminate floorboard can’t be refinished or sanded. As a result, once they have gotten too beaten up, it’s best that you remove the floors and replace everything.
But there’s nothing or no one who’s going to tell you no if you want to do a DIY floor repair! It’s relatively simple and can save you quite a lot of time and money.
Fixing Scratches in Laminate Flooring: Before You Start
How to Prep the Floor for Repair
Before you dive in, you have to prep the floor first. If you don’t, all the scratches on laminate floors will look even worse.
Start by sweeping the floor and mopping up all the dirt and debris. You need to ensure that the floor is as clean as possible by the time you begin your DIY repair operation. This is because dirt and debris can dig into the lamination as you move around, worsening the scratches.
Sweep the floor with the best broom for laminate floor that you can find (something soft-bristled). If you use a vacuum cleaner, ensure its motorized brush roll is off, or the suction hose is attached to a wood floor-cleaning accessory.
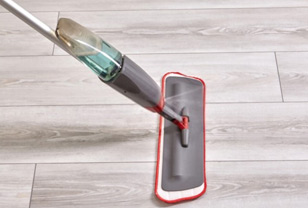
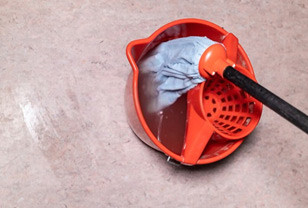
Wet mop the floor next with a mild laminate floor cleaning mixture and a best mop for laminate floors. After you have finished mopping the entire floor, go through the place again with a dry mop and clean up all the moisture. If you don’t dry mop afterward, water stains can form from the excess moisture.

Match the Floor Color
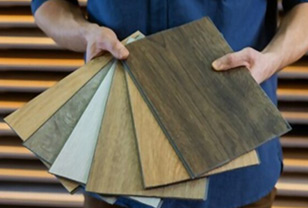
Though most laminate floorboards will come imprinted with wood patterning, they will differ in coloration. Some are darker, some are lighter, et cetera. So, do a brief inspection of the floor first. Then, try to buy tools and materials that match the floor’s color and tone as much as possible.
If you accidentally pick the wrong tools that are too dark or too light, they will only highlight the damages on the floor rather than mask them.

A surefire way to get repair tools that match is to ask your floor manufacturers! Many of them sell repair kits that fit the color and tone of your particular floor model. All you have to do, usually, is to send them the floor’s serial number, and they will forward you a kit that matches.
But not all floor manufacturers sell these kits. In that case, your next best option is to retrace the receipt or user manual that came with your floor. In it, you should find all the essential information about your floorboards (the model, the color, tone, and so on).
That information will be helpful while finding and sourcing floor repair kits from third-party companies. There are a lot of these products floating on the market, with many different options in colors and tones that you can choose.
If you lost your floor manufacturer’s information and couldn’t find the user’s manual, you got a few options. Take a picture of the floor with your phone and show the clerk at the hardware store or the repair kit seller online. See if they can help you find something that matches.
If that didn’t work out, your last option is to guesstimate the color. Pick a laminate floor scratch repair kit with the closest color to that of your floor and hope it works out.
How to Fix Scratches in Laminate Flooring: Step-by-Step Guide
There are many different strategies that you can use to clean up a scratched laminate floor. We highly recommend you read through the entire guide before deciding on a method so that you know all the available options.
Method 1: Touch-Up Markers and Pencils
This is the cheapest and easiest of all the methods we got for you today. It works best for very minor, shallow scratches and won’t work for substantial scratches. The process is simple enough: color over the scratches with pens and markers that have the same color tone as your floor.
You can find these floor touch-up pens very cheap on the market. The only issue is finding one that has the same color as your floor.
Once you have acquired the correct pens and markers, as we mentioned earlier, sweep and mop the floor until they’re spotless first. Once the floor’s surface is nice and clean, uncap the pens and get to work.
The operation is simple enough. It’s basically like coloring. Trace the scratch from one end to the other with the pen using gentle, light strokes. Don’t press down too hard or the ink is going to look dark and heavy.
Gradually layer up the color until the scratches fade away. Just remember that the more layers you add, the darker the spot is going to become.
Once you’re satisfied with your work, use a clean cloth to gently buff the spot until the ink blends seamlessly with the floor’s natural tone.
That will mask the scratches, but there’s a good chance it won’t do it well. Usually, floor touch-up pens will come in packs of three markers varying in shades. You need to combine all three markers for the prettiest and most seamless look. Use the three different shades to imitate the wood patterning, so the ink marks don’t look out of place on the floor.
Beware that this is only a temporary solution. The inks will fade over time. Fortunately, once the inks disappear, you can recolor the floor again with the markers!
Method 2: Wood Wax
For deeper scratches, wood wax filler sticks are our next recommendation. For the best result, you should contact your floor’s manufacturer and see if they sell any of these. You will have a better color match as a result.
But if you can’t remember the manufacturer, these wax filler sticks are sold at many hardware stores and even online. Check out their catalogs and buy one that matches the color tone of your floor.
Similar to the floor touch-up markers above, these wax filler sticks usually come in a pack of several tones. An applicator will also be included to help you apply the wax.
Wax filler sticks are a bit more difficult to use than touch-up markers. First, you have to melt down the wax with a lighter. Allow the liquefied wax to drip onto the included applicator, then add the wax onto the scratched surface.
If this is your first time using wax filler sticks, you should test it on a random surface first before you move to the real thing. Since these sticks come in packs of several shades, you can experiment with different combinations until you achieve the perfect look.
After the wax has been applied to the floor, allow it to dry out. Then, use a small putty knife to remove any excess wax from the floor’s surface.
Use a damp cloth to clean the area one last time before wrapping it up!
Method 3: Crayons
Can’t find wax filler sticks? A very similar alternative are crayons.
Pick up a pack of crayons from your local bookstore, then choose the stick with a similar tone to your floor.
Put it into a microwave-safe bowl and zap it in your microwave until it melts down into a waxy liquid. Pour this liquid onto a putty knife, then apply to the scratches or cuts on the floor.
Clean the area carefully with a damp cloth afterward and give the melted crayon a bit of time to dry out.
Crayons aren’t as efficient or as good-looking as a full-fledged floor repair wax kit, but it’s a great fix to turn to when you don’t have access to wax sticks.
Method 4: Burn-in Sticks
This is arguably the best way to fix scratches in laminate flooring. Burn-in sticks are usually included in professional laminate floor repair kits. These sticks are specially designed to fill deep gashes and cuts on the surface of laminate floorboards.
Like wood wax filler sticks, you can usually buy these burn-in sticks from the same manufacturer that made your floor. Many hardware stores sell them, too, but you will have to browse for the sticks in the right color.
Each kit will contain multiple burn-in sticks in different shades. You can liberally combine the sticks to the floor to achieve a seamless look for your floor. The kit should also come with an instruction manual. We highly recommend that you read it from the beginning to the end.
Using a burn-in stick is quite similar to a wood wax filler stick. You have to heat the stick with an electric knife, then apply it to the floor. The liquefied substance will fill in the scratches and restore the floor.
After the filler has been applied, use a putty knife to remove excess material from the floor. Give it an hour or two to dry fully.
A burn-in stick is more complicated and will cost you a lot more. However, when properly applied, they should perfectly restore your floor to the point where the floorboards look new!
Method 5: Colored Putty
For especially deep scratches and damages, consider getting a kit of colored putty. It’s a thick, paste-like substance that you can apply directly to the blemishes, and it will fill them out. The putty should have the same color as your floor.
To use it, clean up the floor thoroughly, then apply the putty to a small knife. Apply it evenly onto the damaged area and make sure that it fills into the scratches. Go over the area several times with your knife to ensure that the floor’s surface is flat.
Take a dry cloth and remove all excess material from the floor. Do it as quickly as possible. Once the putty dries out, it becomes much more difficult to remove.
Some floor manufacturers sell floor putty that matches the coloring of their floors. Notably, some will sell you colorless putty, and you can add pigments to it to fit your flooring!
Method 6: Replace the Planks
If none of the above works, it’s very likely that the damages are too extensive to repair. In that case, your only option is to replace the damaged planks with new ones.

How to Prevent Scratches on Your Laminate Floor
Now that you’ve learned how to fix scratches on laminate floor, it’s time that we get to scratch prevention. As we mentioned earlier in the article, it’s impossible to protect your floors from being scratched completely. But what we can do is to minimize the damage to the floor so it will be a while before you have to worry about fixing it.
Here are a few tricks that you can try.
Use Furniture Paddings
One of the most common causes for scratches on laminate floors is the legs of tables and chairs dragging across the lamination. To prevent this, you can stick rubber pads onto the legs of all your furniture to make them less abrasive. These pads are widely available and are very cheap.
Clean Your Floor Regularly
Arguably, the best way to protect your floor from scratches is to clean it regularly. You may bring dirt and debris like sand particles and little rocks into the house. As they move across the floor, they will create deep scratches.
Clean them up regularly with a soft-bristled broom or a vacuum cleaner with a gentle nozzle for wooden floors. At minimum, you should sweep at least twice a week.
Mopping once a week will be fine. Just make sure that you don’t use too much water. Too much moisture can cause water stains on the floor.
Use a Rug
A rug won’t just prettify your house, it will also protect your floor from damages. Equipping throw rugs in the oft-used spaces in your house such as the living room can minimize a lot of damage to your floor. The effect will be especially noticeable if you have kids or pets in the house.

Trim Your Pets’ Nails
Speaking of pets, you should give their nails regular trimming. As they run across the floor, their nails will leave behind long scratches that are usually very hard to repair.
No-Shoe Policy
Leave a sign at the front of the house to tell everyone coming in that they should leave their shoes at the door. You can put a shoe rack at the door and some slippers for the guests to wear, instead.
Shoes can bring a lot of dirt into the house. Debris, too. Loose sand particles and rock can get stuck underneath the soles of people’s shoes and scratch the floor as they walk around the house.
Conclusion
And that’s all you need to know about how to fix scratches on laminate floor! It is fairly straightforward. So long that you have all the correct tools, it’s a piece of cake no matter what method you end up choosing.
FREQUENTLY ASKED QUESTIONS
- 01. Does Laminate Flooring Need to Acclimate?
-
The short answer is yes. Laminate floors will expand or contract depending on the temperature and humidity level in your house. If you install them immediately without letting them acclimate, the floorboards may buckle and warp. So, you should let the floor acclimatize for at least 48 hours before you proceed with the installation.
➜ RELATED: Does Laminate Flooring Need To Acclimate? - Laminate Floor Installation & Maintenance Guide
- 02. What Chemicals to Use to Clean Laminate Floors?
-
It’s best to use mild floor cleaners when you have to mop laminate floors. Laminate is known for being a highly sensitive floor type. If you use chemicals that are too strong, the floor could be damaged.


