How Do I Know If My Roomba Is Charging: Detailed User's Guide
However, there’re many different Roomba models, and they don’t work the same. That said if you’re asking: “how do I know if my Roomba is charging”, you’ve come to the right place. This how-to article will detail out different light settings for all Roomba models when they’re charging. I’ll also share with you tips on how to fix your Roomba when it doesn’t charge and how to reset it. Without further ado, let’s dive right in!
1. How to tell If Roomba is charging?
Roomba robot vacuum cleaners are powered by a rechargeable battery, making them convenient to use. Once it runs out of battery, simply recharge for the next use. Roomba battery life is quite impressive compared to other robots on the market: it can run for 2 hours and last for more than 400 charges. Still, this is an estimation, and it all depends on how well it is taken care of and how often you keep the periodical maintenance.
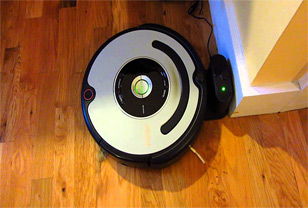
So, how to know if Roomba is charging? You can immediately tell that it is charging if the indicator light is in solid green after plugging it into a wall outlet. However, not all Roomba models work this way. In some higher-end machines, the power light blinks for a few seconds after being plugged in, and then it stops. In others like the i3 and i7 series, their light indicators are off when charging, and this is perfectly fine.
Now, if you’re using a modern Roomba model like the i3 or i7 and experience this, you might be wondering: “Is my Roomba charging?” While this question is rational, there’s nothing to worry about. Each machine has its own design with different light displays, and you’ll just need to know these specific signals to identify whether your Roomba model is charging.

Roomba vacuums’ charging light indicator vary from one model to another Via: Amazon
To keep things simple and useful for all readers, I’ve put together a table to share with you the battery status indicator for all Roomba models. Older versions like Roomba 500 or 600 will be on the top of this table, while more latest ones like i3 and i7 will come towards the end:
| Model | Charging | Partially charged | Fully charged | No battery | Low battery | Software Update | Light during charging |
| Roomba 500 series | Amber Pulse | Amber | Green | Amber Pulse | Red | Pulse (every four seconds) | |
| Roomba 600 series | Amber Pulse | Amber | Green | Amber Pulse | Red | Pulse (every four seconds) | |
| Roomba 700 series | Amber Pulse | None | Green | Red | Red | Only on for 60 seconds | |
| Roomba 800 series | Amber Pulse | None | Green | Red | Red | Only on for 60 seconds | |
| Roomba 900 series | Amber Pulse | None | Green | Red | Red | Only on for 60 seconds | |
| i3 and i3+ | Blinking white | White | Red | Amber Pulse | White squirl | No | |
| i7 and i7+ | Blinking white | White | Red | Amber Pulse | White squirl | Yes |
From this table, you can quickly tell that the Roomba 500 and 600 series show blinking light every four seconds when they’re charging. The 700, 800, and 900 models show blinking light for the first 60 seconds of their charging cycle. The i3 and its sibling, i3+, have no light during charging.
Owners of i7 and i7+ who might have asked: “how to tell if Roomba i7+ is charging” can also find an answer for themselves from the above table. Both i7 and i7+ have a light that blinks white while charging. For those models that do not show a light during the whole charging process, simply press the CLEAN button on the top of your machine once; it will display battery status and quickly return to their original display mode.

i7 series’ light indicators blink white when they’re charging Via: Amazon
What to do when your Roomba is not charging?
Battery-operated devices like Roomba vacuums need to be charged properly for their optimal performance. However, sometimes it doesn’t charge or doesn’t fully charge, which might leave you with frustration. In this guide on “How do I know If my Roomba is charging," I’ll also share with you a few quick and easy tips to fix your Roomba when it doesn’t charge.
-
Clean the contact points
Dirt and debris pile up after each vacuuming session, and they end up getting trapped on the contact points. Just clean these contact points with a microfibre cloth; you might want to use some alcohol if needed. Once you finish cleaning, try plugging it back in to see if it’s charging.
-
Check the outlet
Obvious as it might seem, your power outlet needs to work properly to supply sufficient power for your Roomba vacuum to charge. So if it doesn’t, your Roomba won’t charge. I would test by plugging in another electronic device in that same outlet. Alternatively, you can also try to plug the Roomba into a different outlet to see if it charges.
-
Clean the docking station
Dirt can easily get stuck in the contact points, and it can also accumulate on the connection ports of the docking station. Once too much dirt blocks these ports, it eventually stops the charging process. That said, you can quickly fix this charging issue by rubbing the docking station with alcohol. Your Roomba should be able to charge again after its dock is being cleaned.

Clean the charging dock regularly to make sure it works well Via: Amazon
-
Fix the battery position
Some Roomba owners reported that they face a charging problem right after plugging in a brand new machine. However, this shouldn’t be an issue since your Roomba's batteries are likely being displaced from their original position during the shipping process. So you only need to fix its position by unscrewing the base of the Roomba battery compartment, put the battery back in place, then put the screws back in. Now you can plug the Roomba in and check if it charges properly.
-
Check the charging dock
If your Roomba’s docking station malfunctions, it won’t get enough power supply for charging. So if you’ve followed the above tips to clean the contact points and the docking station and your Roomba still doesn’t charge, then it’s probably about time for a dock replacement. However, if your warranty is still effective, you only need to call iRobot’s customer service, and it will take several days to one week to get your dock replaced.
-
Replace batteries
Faulty batteries cause many charging issues, so if you’ve used your Roomba for a while, you might need to replace a new one. The good news is new batteries are not expensive, and replacing batteries is easy as a breeze. Simply unscrew the battery compartment, clean up accumulated dirt, if any, then put the new battery in, and screw the compartment back in. You can now test if it charges. In almost all cases, it should work just fine.
Another solution to fix the charging problem is to reset your robot. But how to reset a Roomba? Resetting is a good troubleshooting method before thinking of other solutions. Read on as I explore more in the next section. I’ll take you through a step-by-step guide on how to reset three key types of Roomba vacuums.
3. How to reset a Roomba?

Reset a Roomba is easy
3.1. Reset Roomba 500 and 600 line
- Step 1: Turn your gadget off.
This is an absolute first step for any type of vacuums you have, not just a robot vacuum. After turning it off, move the machine out from its charging dock. If you need to replace the battery, turn it off, put the new battery in, hit the CLEAN button. When the green light is on, release that button.
- Step 2:
Hold the SPOT and DOCK buttons at the same. Keep holding them for about ten seconds.
- Step 3:
Release the buttons. Now, you’ll hear some signaling sound, which implies that the vacuum is rebooting.
- Step 4:
Put the robot back to its charger to restore its connection, then wait until the green light shows up. In case you’re not sure whether your robot has rebooted, press the CLOCK button. If all clock settings are cleared, it means your Roomba has been successfully reset.
- Step 5:
Now you only need to set the date, time, and all other details as you wish so that the robot can continue its tasks as usual.
3.2. Reset Roomba 700, 800, 900 line and Roomba 960
- Step 1:
Hit the CLEAN button by pressing it for about ten seconds until the text “rSt” shows up right on the display screen.
- Step 2:
Once you see the text “rSt," release the CLEAN button. Leave it off, and you’ll hear signaling sounds indicating that your Roomba unit has been reset successfully.
- Step 3:
When you reset, all data was erased. So now you'll need to reprogram your time, date and get your robot to do its tasks again.
If you’re using a Roomba 960, chances are you’ve come across several Roomba 960 reviews, buying guides, or troubleshooting guides before. Steps to reset a Roomba 960 are similar to Roomba 700, 800, or 900 lines. So simply follow these steps to get it rebooted.
3.3. Reset Roomba i3 and i7
- Step 1:
Hit these three buttons simultaneously: CLEAN, SPOT CLEAN, and HOME
- Step 2:
Hold those three buttons until the white light ring on the CLEAN button becomes bright. Now, release all three buttons.
- Step 3:
Leave your robot about 20 to 30 seconds to reboot.
- Step 4:
It’s now done. Reset other details like time, date, ….to get it back on track.
4. How long does Roomba take to charge?
So you’ve got a few useful insights to have your own answers for the question “How do I know If my Roomba is charging." Dealing with this common issue is a no-brainer as long as you equip yourself with a few quick and easy tips as shared above.
Another common question that I’ve been asked recently is how long it takes a Roomba to charge. Also, does the charging time of different machines vary? I’ll explain more right below.
If you’ve just got a new Roomba, it’s best to remove the battery pull tab, then let it charge overnight. This extended initial charge will provide an essential boost for the battery life, and this advice applies to all Roomba versions. After this first time charging, your Roomba will usually take about 2 hours to charge, depending on your battery’s health condition.
To extend the battery life, which is also an important factor for the longevity of your robot, make sure to charge your Roomba right after each use. Do not wait till several days, or you can risk damaging the battery. If taken care of properly, Roomba batteries can last for a long time.
5. How to maintain your Roomba Battery
You’ve known that giving your Roomba an extensive first charge will prolong its battery life. Besides, there are a few other tips that can help you extend the lifespan of your Roomba battery:
Roomba batteries are made to be charged and discharged frequently. If the battery is left empty for a long time, it can become degraded. Therefore, run it often. If you’re usually away, consider purchasing higher-end models so that you can set up the cleaning schedule while you’re away. Regular use will ensure that the battery is put through its expected charging cycle.
If used properly and maintained regularly, your Roomba battery should last for about two years. If you're about to replace the battery, make sure that you only use those from reliable brands; otherwise, you can risk damaging your robot. It’s best to use batteries recommended by iRobot only.

Roomba’s battery is quite durable if used and maintained properly Via: Amazon
- Keep a periodical maintenance schedule by cleaning its wheels, contact points, and other moving parts.
- If you’re away for a long time, give it a full charge, then unplug it and store it away.
- Your Roomba robot will have a 16-hour charging cycle after being disconnected from its base for a long time. But, again, this is perfectly fine and normal.
The bottom line
I hope you’re getting some useful information in this how-to guide. How do I know if my Roomba is charging is a common question, yet its specific answers vary, depending on which model you’re using.
Roomba robot vacuums are well-engineered and easy to use, but they require regular maintenance to ensure optimal performance like any other electronic device. If you have any questions or comments, leave them right below, and we’ll get back to you shortly.
FREQUENTLY ASKED QUESTIONS
- 01. Does Roomba light stay on when charging?
-
It depends. If yours is in the Roomba 500 or 600 line, the light will pulse every four seconds. Those models in the Roomba 700, 800, and 900 lines will have their lights on only for the first 60 seconds. If you’re using an i3, there’s no light when it’s charging. But if yours is an i7, then its light is on when charging.
- 02. How long does it take for Roomba to charge?
-
Most Roomba models take about 2 hours to charge. However, your robot’s charging time will also depend on your battery’s health condition. Also, older machines usually take more time to charge than newer ones.
- 03. How long should Roomba battery last?
-
If you follow iRobot’s battery usage guidelines and maintain your robot regularly, its battery should last for about two years.
- 04. What does flashing red light on Roomba mean?
-
If your Roomba flashes a red light, it’s not a very good signal. It indicates problems with either the charger or the charging circuit. I would turn it off, unplug it, then follow a few troubleshooting guides shared above.
- 05. What lights are on when Roomba is charging?
-
When Roomba models in the 500, 600, 700, 800, and 900 series are charging, you’ll spot a pulsing amber display. But if you’re using a model in i-series, then it blinks white while charging.


