How to Install Glue Down Vinyl Plank Flooring: A Calm, Field-Tested Guide
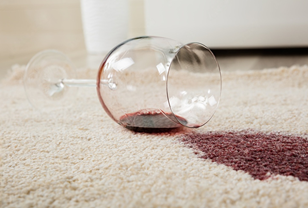
That little diary reminded me of something simple: when you prepare well, the work settles down. The result looks intentional. This guide aims to give you that same peace of mind. Quick note: at TheKingLive, we actually run these methods in real homes. What you’re getting here is what works—no wishful thinking.
5-Step Fast Track: Quick Start
Momentum matters, so start here to build confidence.
- Prep the subfloor until it’s flat, clean, and dry. Scrape high spots, fill shallow dips, then vacuum thoroughly—more than once if needed.
- Plan the layout, Snap a straight reference line square to the longest sightline (or main light). Dry-fit two rows to avoid skinny slivers at walls.
- Spread adhesive in small zones (about 100–150 sq ft each). Follow the pail label for the correct trowel notch and open time.
- Set planks straight and tight. Stagger end joints 6–10 inches. Recheck straightness every few rows.
- Roll both directions with a 75–100 lb roller, then hand-roll edges, doorways, and under toe-kicks.
Small, controlled zones + dead-straight lines = a pro finish.
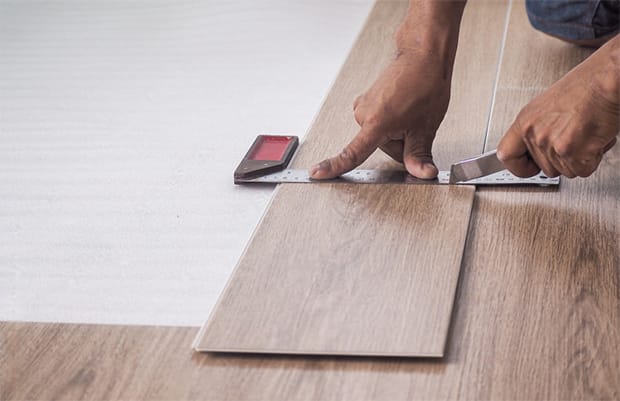
DIY installation means you must know how to cut vinyl planks too
Glue-Down vs. Floating: What Changes for You?
Glue-down bonds planks directly to the subfloor. Floating floors lock to each other and “float” over an underlayment. Glue-down feels rock-solid under rolling loads (chairs, carts), stays quiet, and resists movement in sunny or high-traffic areas. The trade-off: surface prep and timing matter more. You’ll work within adhesive open and working times, so staging is key.
Plain-English Dictionary (You’ll Use These)
- PSA (pressure-sensitive adhesive): Spread, let it turn tacky (the “knuckle test”: touch and it grabs without transferring), then set planks. You can still nudge pieces before final rolling.
- Wet-set adhesive: Lay planks while the glue is still wet. Strong initial grab but less repositioning time—stage carefully.
- Open time: The window between spreading and when planks can go down.
- Working time: How long you can adjust after placement before the glue locks up.
- Trowel notch: Tooth size/shape that sets film thickness. Match the pail label.
- Telegraphing: Underlying lines (grout joints, plywood seams) show through. Prevent with skim coat/embossing leveler.
- Transfer: How fully adhesive transfers to the plank’s back when pressed/rolled. You want consistent, full transfer.
Tools & Materials (What You Actually Need)
Flooring & adhesive
- Dry-back LVP (glue-down)
- Manufacturer-approved PSA or wet-set adhesive
Application & cutting
- Correct-notch trowel (per pail label)
- Utility knife with fresh blades; jigsaw with fine-tooth blade for vents/L-cuts
Surface prep & protection
- Scraper, straightedge, vacuum, broom, microfiber rags
- Skim coat/embossing leveler & primer (as required)
- Painter’s tape, plastic floor protection
Safety & comfort
- Knee pads, eye protection, gloves
- Dust mask for grinding/mixing; box/window fan for ventilation
The “right” kit isn’t just the glue—it’s the right notch and a heavy roller.
Layout That Looks Intentional
The eye follows the longest sightline—often the hallway toward a doorway or the main light. Snap a reference line parallel to that. Dry-fit two rows so you won’t end with skinny rips at the wall; cut the starter row to balance widths. Stagger off-cuts for joint variety. A dead-straight first course makes every following course easy.
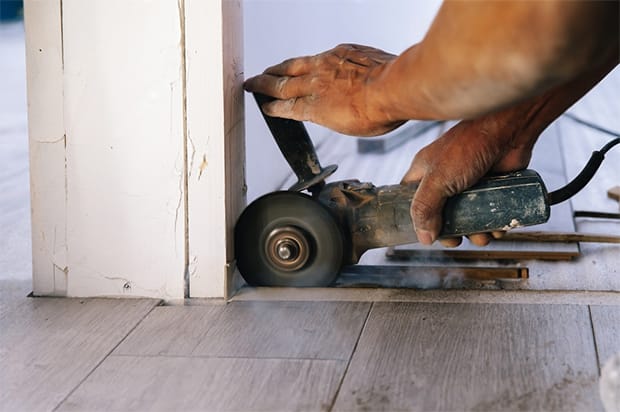
Be careful when cutting vinyl planks especially to match corners
Doors, Passageways & Thresholds
- Undercut door jambs so planks slide under for a factory-clean look.
- Pre-fit thresholds/transitions so height changes aren’t improvised late.
- Dry-fit the last two pieces at each doorway before glue goes down—no scribbling in wet adhesive under pressure.
Waste, Extras & Room Math
- Figure 5–8% waste in simple rooms; 10%+ for heavy cutting/angles.
- Keep one unopened box for future repairs. Note the dye/lot for color match years later.
- Quick area math: length × width (in feet) = square footage. Subtract fixed islands; add 5–10% for waste. Your adhesive pail lists typical coverage—use that to estimate how many gallons you need.
Subfloor Prep: Keep It Simple (Flat, Clean, Dry)
Vinyl is honest—it shows what’s beneath. Target flatness of 3/16" over 10 ft (or 1/8" over 6 ft). Fill dips; knock down ridges; vacuum dust (bond killer).
Concrete Basics
Vacuum thoroughly. Test slab moisture (in-slab RH or MVER) and follow the TDS. Prime if required. If moisture is out of spec, use an approved mitigation system—don’t “hope” the glue will hold.
Bottom line: a primed, dry slab sets you up for a durable bond.
Plywood/OSB Basics
Tighten fasteners, sand proud seams, fill shallow dips, vacuum dust. Some adhesives require a primer on wood—check porosity guidance in the TDS.
Aim for: a clean, sound wood deck—no hollow spots, no edge lift.
If installing over old resilient/tile, skim out grout lines so patterns don’t telegraph. For readers searching how to install glue down vinyl plank flooring, this is the wood-subfloor checklist to follow.
Radiant Heat
Install with heat off. After cure, bring heat back slowly and stay within the adhesive’s temperature limits. Fast swings can soften bond lines.
Moisture & pH (Plain English)
Excess moisture and high alkalinity are the enemies of adhesive. If your product calls for RH/MVER or pH testing, do it. Less trapped water = stronger, more predictable bonds.
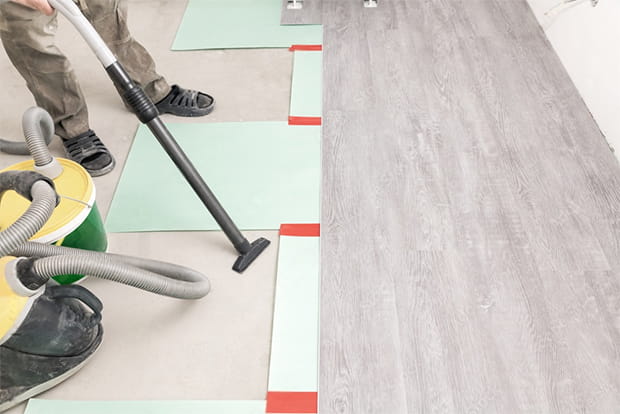
Make sure you have clean subfloor before installation
Adhesive: Timing, Transfer, Ventilation
Treat glue like a quiet partner—give it clear rules and space.
- Use the adhesive your flooring brand specifies (compatibility matters).
- Respect open and working times.
- PSA: wait for tacky (knuckle test), not wet.
- Wet-set: place planks before a skin forms.
- Use the labeled trowel notch. Too little = poor transfer/voids. Too much = squeeze-out/mess.
- Ventilate to reduce VOCs and help cure—open windows, run a fan.
- Check transfer: press a plank into PSA, roll it, then lift a corner to confirm an even adhesive print on the back.
Common notch sizes & feel:
- 1/16" × 1/32" × 1/32" U-notch → thin film, common for dry-back LVP. The ridges should lay down fully with rolling.
- 1/16" × 1/16" × 1/16" square-notch → heavier film for textured backs or rougher subs; watch for squeeze-out.
- If ridges remain visible after rolling, you likely under-rolled or the notch was too large. If you see dry spots on the plank back, notch was too small or open time was missed.
Step-By-Step: How to Lay Glue-Down LVP
Acclimate planks
Store boxes flat in the room for 24–48 hours (per brand). Keep away from direct sun/cold exterior walls.
Acclimated material moves less once set.
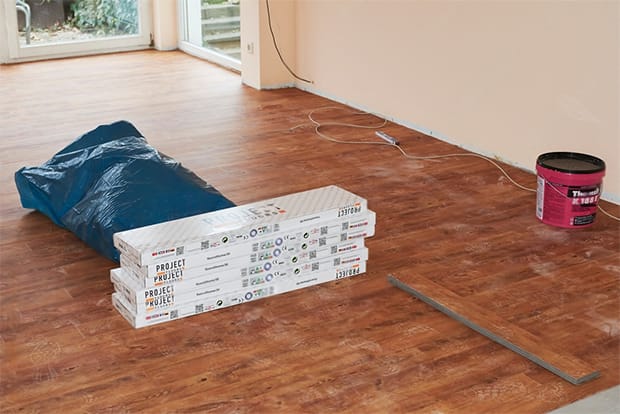
Acclimation is important as it lets the planks get used to the environment
Snap lines & stage tools
Keep trash bags, rags, and cutters within reach. Stage transitions, spacers, and the roller.
Good staging saves precious open time.
Spread glue in small zones
Work in 100–150 sq ft sections. Hold the trowel around 45° for even ridges. If the film skins, scrape it up and re-spread—don’t set into skinned glue. Keep a microfiber rag and the manufacturer-approved cleaner handy.
Small zones = consistent quality under low stress.
Set a dead-straight starter course
Work off your snapped line. Offset end joints 6–10 inches. Don’t “arc” a course to chase a tight joint. Use factory edges at the most visible seams; hide field cuts under trim.
A straight first row builds a straight floor.
Keep courses square
Recheck to the reference line every few rows and correct early. If drift starts, reset at the next plank, not ten planks later.
Drift never fixes itself.
Roll like a pro
Roll each fresh zone immediately—75–100 lb roller in two directions. Hand-roll edges, doorways, and under toe-kicks. If your PSA calls for a second roll after 30–60 minutes, do it; it collapses micro-voids.
Trims, transitions, perimeter
Glue-down floors don’t need large expansion gaps; leave a small relief at wavy walls and cover with base or quarter-round attached to the wall, not the floor. Dry-fit transitions, then set them to proper height.
Fasten trim to the walls—let vinyl sit free beneath.
Protect the first 72 hours
Light foot traffic is often OK after a few hours (check label). Move heavy furniture after 24–48 hours. Avoid wet mopping until 48–72 hours. Use sliders/plywood under appliances and don’t roll heavy loads across fresh seams. Protect the cure window to lock in those straight lines—this is the quiet secret behind how to install glue down vinyl plank flooring.
Cuts, Corners & a Clean Finish
- Keep blades fresh and cut face-up for clean edges.
- For vents and L-cuts, tape the cut line, drill a starter hole, and jigsaw from the waste side. Ease sharp inside corners to prevent cracks.
- Undercut jambs with a jamb saw or use a scrap plank as a depth guide—sliding under beats fussy scribing.
- Put factory edges where eyes fall; hide field cuts under trim.
Result: clean cuts and tight jambs that make DIY look pro.
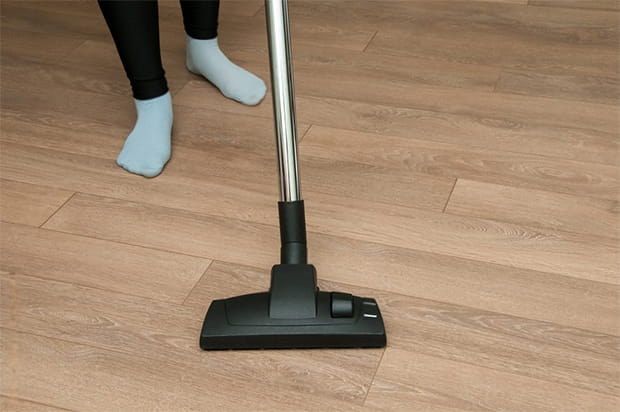
Vacuum the new floor to remove remaining dust
Special Rooms & Situations
Kitchens
Degloss old finishes before you start. Fill grout lines so casters don’t track the pattern. Ventilate—there’s more glue near toe-kicks. Flat, well-prepped kitchens install fast.
Hallways & Entries
High traffic and long sightlines. Stagger joints to break “railroad” lines end-to-end. Skim dips at thresholds—the roller rides these first.
Basements
Moisture rules. Test, mitigate if needed, and prime per system. Run a dehumidifier during cure for a stable environment.
Bathrooms & Laundry
Glue-down handles splashes, not standing water. Follow the flooring brand’s wet-area perimeter seal details. Use foam pads under washer feet when sliding appliances.
Stairs
Only proceed if your plank and adhesive are stair-rated. Usual order: risers, nosing, treads. Hand-roll edges thoroughly.
Home Office
Chair casters love glue-down. Add a chair mat or soft casters if you stand/sit in one spot for long periods. Re-roll around desk feet.
Rentals & Busy Family Rooms
Choose a thicker wear layer for tight seams and long life. Fasten trims to walls so you can refresh bases later without disturbing the field.
Troubleshooting (Causes → Fixes)
- Edge seams lifted/bubbled — Light rolling, dust, or too little glue.
- Fix: Lift if possible, re-spread, reset, roll hard. If cured, warm gently, lift, add adhesive, re-roll.
- Glue squeeze-out at seams — Too much glue or setting into wet PSA.
- Fix: Clean immediately with approved cleaner. If semi-cured, use a plastic scraper.
- Hollow sound — Inadequate rolling.
- Fix: Re-roll early. If cured, surgical lift, add adhesive, reset, roll.
- Telegraphing lines — Skipped skim over grout/seams.
- Fix: Mostly cosmetic; prevent in the next room with proper leveling.
- Courses drifting/curving — Starter not straight or drift ignored.
- Fix: Stop, snap a new line, reset at the next plank.
Roll now or roll later—either way, the 100-lb roller has to do its job.
Budget, Rental & Timing
- Adhesive coverage (typical): With a 1/16" × 1/32" × 1/32" notch, expect ~300–350 sq ft/gal. A 12' × 15' room (~180 sq ft) uses 0.5–0.6 gal; buy a full gallon for margin.
- Roller rental: Reserve a 75–100 lb roller for the day you install; don’t let someone else’s return window derail your pace.
- Blades & waste: Fresh blades matter more than most people think. Plan 5–10% waste depending on room complexity.
- Work blocks: Glue a zone, set it, roll it, stage the next. Short planned breaks protect form and reduce mistakes.
Hidden costs to remember: door undercut blades, extra rags, painter’s tape for protecting cabinet bases, and furniture sliders. Keep a small kit of felt pads for chair feet—you’ll need them the same day you move back in.
Maintenance That Keeps the “New” Look
Vacuum often—grit is invisible sandpaper. Damp-mop with a pH-neutral cleaner; don’t steam unless your manufacturer explicitly allows it. Use felt pads under furniture. Chair mats save office areas. Wipe spills quickly—puddles can attack adhesive. Routine light cleaning beats heavy scrubbing. If a plank gets damaged, heat and lift carefully, scrape residue, re-adhere a new plank, and roll. If you came here wondering how to install glue down vinyl plank flooring, remember that smart upkeep protects the bond you just worked for.
Spot-care recipe (general): a bucket of cool water with a capful of neutral cleaner; wring the mop pad hard; never flood the floor. For stubborn heel marks, try a white pad and a little cleaner—avoid abrasive powders that scratch the wear layer.
Copy-and-Go Weekend Plan
Friday night: Clear furniture, stage boxes, gather PPE/tools, snap a reference line. Tape off cabinet bases and thresholds to keep glue where it belongs.
Saturday morning: Pull old pads as needed, vacuum, flatten, skim/prime where required, dry-fit two rows. Pre-cut door jambs.
Saturday afternoon: Glue the first 100–150 sq ft zone, set and roll, then stage the next. Keep airflow moving.
Saturday evening: Sweep up, close off the room from pets, admire your lines.
Sunday: Install trims and transitions, allow light traffic per label, slide heavy items on plywood—don’t roll over fresh seams.
A planned weekend beats frantic sprints every time.
Safety, Ventilation & Indoor-Air Notes
- Ventilation reduces VOC exposure and speeds cure; a box fan in a window set to exhaust works wonders.
- Wear eye protection when cutting and a dust mask when sanding or mixing leveler.
- Keep solvents and cleaners away from ignition sources; never use open flame to speed drying.
- Store adhesive at room temperature; cold glue spreads poorly and changes open time.
- Unplug power tools when changing blades and keep hands behind the blade line.
- Keep pets and kids out of the work zone; use a baby gate or temporary plastic to block entries.
Common Mistakes You Can Skip
- Rushing layout: If your first course isn’t dead straight, you’ll fight the floor for the next 20 rows.
- Over-spreading glue: Open time isn’t infinite. Work small and win.
- Skipping transfer checks: One lifted corner now is five callbacks later.
- Rolling once and calling it done: If the TDS calls for a second roll, do it. It matters.
- Ignoring moisture: Testing takes minutes; a failure takes weekends.
- Forgetting furniture pads: Fresh floors and chair legs don’t mix.
Pro Tips From the Field
- Keep a damp microfiber in your pocket; a quick wipe beats scraping cured glue.
- Snap two reference lines at right angles; use them to check drift quickly.
- Label boxes and rotate cartons to mix plank tone/print for a natural look.
- Leave factory edges for doorways and high-visibility seams; hide cut edges under base.
- Keep a “waste ledger” and stage off-cuts where they’ll stagger joints cleanly.
- When in doubt, do a mini mock-up on a scrap board to practice the notch and pressure.
Adhesive & Substrate Pairings (Quick Guide)
- Dry, flat concrete: PSA or wet-set per brand; prime if the TDS requires.
- High-RH concrete (within mitigation): Follow the mitigation system + the adhesive specified for that system.
- Plywood/OSB: Check porosity; many brands call for primer to reduce soak-in.
- Existing VCT/resilient: Degloss, clean, fill grout/voids, prime if required, then PSA.
- Heated slabs: Both systems can work—watch temp limits and ramp heat slowly.
Always read the flooring and adhesive technical data sheets together and follow the stricter requirement when they differ.
If You’re Replacing an Old Floor
- Remove loose material and scrape residual adhesive flat.
- Check for asbestos on very old vinyl tiles (professional testing if in doubt).
- Fix squeaks and soft spots before you start—glue-down will not hide structural issues.
- Feather edges where transitions meet other floors so reducers sit flush.
Aftercare Schedule You Can Keep
- Week 1: Vacuum only; spot-clean with a lightly damp pad. No steam.
- Month 1: Add a gentle damp-mop routine with neutral cleaner. Fit felt pads under all chair/table feet.
- Quarterly: Inspect seams, thresholds, and chair-mat edges for wear. Re-roll any suspect area with a hand roller.
- Annually: Move big furniture, clean underneath, and refresh felt pads.
A simple routine keeps the “just installed” look far longer than heavy polishes.
Project Notes (Optional—but Handy)
If you found this by searching “how to install glue down vinyl plank flooring,” jot that exact phrase in your project notebook so you can re-locate specs and guides later. Title your notes clearly (e.g., “Date — PSA checklist — Glue-down LVP”). Record: room square footage, adhesive brand and notch, open/working time observed that day, and roll-pass timing. Those notes make future repairs painless.
10-Minute Action
Set a 10-minute timer. Measure the room, calculate square footage, and snap the first reference line. Make a three-item checklist: correct trowel notch, reserve roller, skim/level as needed. Work in small zones. If you need brand-specific adhesive tips or a printable checklist, check TheKingLive guides—and save your weekend from rework.
FREQUENTLY ASKED QUESTIONS
- 01. Does Glue-down LVP Need an Underlayment?
-
No. It bonds to the subfloor. Use skim/leveler to correct flatness—not foam underlay.
- 02. When Can I Walk on It?
-
Usually light traffic after a few hours (check the label). Move heavy furniture after 24–48 hours. Wet mopping after 48–72 hours.
- 03. Do I Need an Expansion Gap?
-
Not like a floating floor. Leave minor relief at irregular walls and cover with trim attached to the wall.
- 04. Can I Install Over Tile?
-
Yes, if it’s sound. Degloss/clean, fill grout with embossing leveler, and prime if required.
- 05. Is Glue-down Louder or Quieter Than Floating?
-
Usually quieter under chairs and traffic because the floor is anchored; rolling loads don’t “thump” as much.


