What Are Irobots and How Do You Reset a Roomba Robot Vacuum for Your New Home?
However, if you’re moving to a new house or a new apartment, or if you are looking to resell them, you’ll need to know how to reset Roomba robots and reboot them for a fresh start.
In the following article, we’ll dive deep into explaining the different Roomba robot vacuum models and how you can effectively manage them via their programmable functions. Hence, you’ll know exactly how to reboot Roomba robots and make the most of your Roomba!
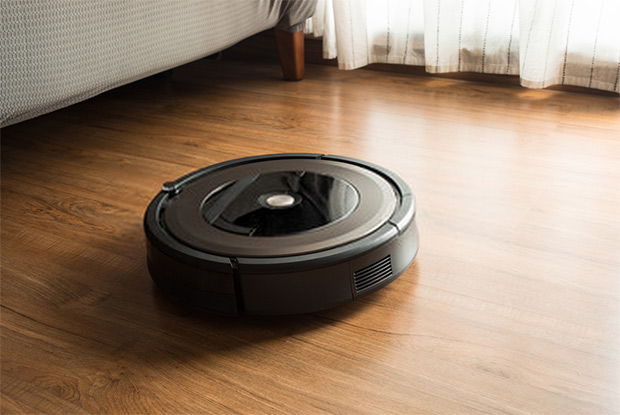
Learn more about the Roomba robotic vacuums
About the Roomba robots
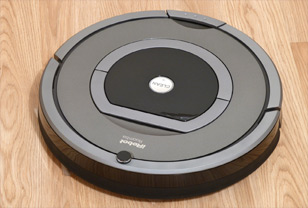
To start with, we’ll take a look at the different models of iRobot vacuum and see how they compare to each other. Here, we’ll briefly look at the main features that you can get from these robots and how you can benefit from them.
600 series
The 600 series, with its latest product, the Roomba 964, is Roomba’s budget robot vacuum that will introduce you to a smarter way of cleaning your home. Some of the notable models that you can still get from retailers are the Roomba 650 and Roomba 690. They all come with the standard Roomba build and the useful double-brush system that greatly enhance the machine’s capability.
And while it lacks other smart features when compared to other Roomba’s counterparts, we did find the model quite effective in regular floor cleaning. Again, thanks to the two brush rollers that follow the proper cleaning operation of loosening the dirt, lifting, and suction.

The iRobot 600 series is your entry-level smart vacuum product Via: Amazon
i3 series
For those of you who are interested in a smart cleaning experience the Roomba i3 series will definitely be a great choice. With the latest iRobot Roomba i3+ or the Roomba 3550, users can comfortably let the machine work on their floors.
The robot vacuum now comes with anti-tangle brushes that still offer great performance on both floors and carpets, while making sure that you aren’t hindered by entangled hair. Not to mention that the enhanced suction with 10x power to the standard 600 series, the Roomba i3+ can easily help you with your tasks.
Also, by using the smart navigation, the machine will easily clean which will greatly improve its performance. Instead of constantly bumping into edges and objects while trying to navigate around the house, the machine will steadily build up a map of your entire house. As a result, it can quickly and effectively clean your floors.
And last but not least, with the self-emptying system at the charging base, your machine will automatically clean itself up and get charged up to ready for the next run.

Go for the i3 if you want more smart features Via: Amazon
i7 series
If you want the navigation system to perform even better, the iRobot Roomba i7 which replaces its previous predecessor, the Roomba 770, will offer smarter and more controllable user experience while maintaining all the benefits and hardware from the i3 series.
Here, along with the useful patterned row cleaning and mapping feature, the robots also have a built-in camera. This is greatly beneficial if you wish to have your Roomba i7 mapping your house faster and more accurately.
And unlike the i3+, which only map the floors inside its memory for cleaning purposes, the i7+ will provide a visualized and interactive version of your floor map. This will enable many useful settings on your machine, like creating keep-out zones or making further adjustments to the cleaning programs. We’ll take a look at this in the detailed guides at the following section on how to reset irobot Roomba and program it for your homes.

The S7 series will deliver smarter experiences Via: Amazon
S9 series
And last but not least, if you need the perfect butler for your house, the Roomba 960, Roomba 980, or the latest Roomba s9+ are certainly great options. Not only do they come with all the desirable features on all the lesser models or the old Roomba 880, but these premium models from Roomba also offer great use.
To start with, you’ll get a major upgrade in suction power, with 40x the amount of suction compared to the 600 series. This allows the machine to effectively pick up dirt and debris on your floors and carpets while significantly reducing the total running time.
And along with many smart cleaning features that you can get from the i7 series, the S9 can now work together with the Roomba robotic mop, more particularly, the Braava jet m6. This dynamic duo will constantly work on cleaning your houses following the created schedules.

Go for the S9 series if you want a premium product Via: Amazon
How to reset and reprogram your Roomba?
The following guides are for all Roomba iRobot users, from the old 980 to the latest S9 series and many other models. Here we’ll show you how to reset Roomba’s settings on your machine and reprogram them for specific cleaning purposes.
And to make it easier, each operation will be categorized into different sections for your models. Old Roomba’s iRobot models only come with the physical button controls while the new ones can now work with the iRobot Home apps. This makes the two quite different when it comes to managing and programming. So, by dividing the article into sections, we’ll ensure that you can always find the right guides for your product.
➜ RELATED: Irobot Roomba E5: Is This The Best Entry-Level Robot?
How to reset old settings and programs?
Your machine will need a complete factory reset to get rid of all the current settings and programs that were installed on it. And here is how to reset roomba for new house:
On non-Wi-Fi connected models
The classic button design or remote-controlled Roomba models like the Roomba 650, 770, 800, and many others will require users to use the physical buttons. And among the different models, there will be subtle changes that you need to know.
So if your model is the classic 500, 600, 700, and 800 series, the control buttons will have the spot and dock button available. You can turn on the machine and press these two buttons simultaneously for 10 second. The machine will successfully reset itself once you hear a beep sound.

Press the correct Spot and Dock button to reset the machine Via: Amazon
And if you have slightly newer models, which have abandoned the two buttons around the Clean button, you simply need to press on the Clean button for 10 seconds to reset the machine. Release your finger once you hear the beeping sound and roomba battery reset will be completed.
On Wi-Fi connected models
All the latest iRobot models from Roomba can now connect to your Wi-Fi network and it will provide many useful features. By using the iRobot HOME App, homeowners can easily reset their machines.
Start by making sure that both your phone and iRobot are connected to the same Wi-Fi network. Open the dedicated Roomba app on your device and access the Settings. Here, you can look for the Remove/Factory Reset option with the respective name of your robots next to it. Choose this option and tap Accept on your phone to start resetting Roomba robot.

You can use the dedicated app to reset Wi-Fi connected models Via: Amazon
How to set up and operate your robot?
After your machine has been completely reset with its memory erased, it’s time to make a new setup and schedule. And the following instructions will inform you on how to reset Roomba schedule:
On non-Wi-Fi connected models
For the old models which use the physical buttons, the setup process will be a little more challenging and require you to pay more attention. And for different models, the operation can be slightly different. Hence, we also divide our guides into specific tutorials, which include the exact instructions for your Roomba robots.
The old 500 and 600 series
Setting the time
To make sure that the machine can operate properly, the time on your Roomba robots must be set correctly. Start by pressing and holding the Clock button then work on adjusting the Day, Hour, and Minute with the respective buttons. Simply release your finger on the Clock button to set the time.
And if you wish to change from the current 12-hour format to the 24-hour one, or vice versa, simply press and hold down to the Clock button again. Simultaneously press on the Day and Minute buttons for 3 seconds to see the current format, then release and press on them again to switch to the other way.
Setting the schedule
Users can schedule their machine to automatically clean once a day by pressing and holding down the Schedule button. Adjust the Day, Hour, and Minute settings on the respective button then release your hand on the Schedule button to complete the operation. After this, your machine will be programmed to automatically clean the house at the desired time period.
How to Set a Schedule on a non-Wi-Fi Connected Robot | Roomba® 600 series | iRobot®
Follow the video to learn how to schedule your machine
Monitoring the schedule
While using the machine, users can also monitor their schedule, thanks to the provided options.
Simply repeat the process of pressing and holding the Schedule button, then press the Day button to view the scheduled time. And if you wish to make changes to it, then you can immediately use the Hour and Minute button to adjust your schedule. Release the Schedule button to apply the changes.
Also, while you’re viewing the schedule, you can press the Day button for a couple of seconds to delete the current schedule on the machine.
The old 700 and 800 series
The buttons on the 700 and 800 series are slightly repositioned so some of you might find it somewhat different to the old 500 and 600 series. However, when it comes to the general instruction, the operations are quite similar. So if you’ve had experience with the previous models, you wouldn’t have any problems working with these machines.
Setting the clock
Start by pressing on to the Clock button to enable the Day, Hour, And Minute buttons. Unlike on the 500 and 600 series, you don’t need to continue holding down the button. Simply adjust the clock with the respective buttons and press OK to confirm the changes.
How To Set the Clock | Roomba® 800 series | iRobot®
How to set the clock correctly
Setting the schedule
To start scheduling the machine, simply select the Schedule button after you’ve finished configuring the time. The Day, Hour, and Minute button will be available for you to adjust. Feel free to select your preferred cleaning time and press OK to finish the operation.
How To Set Select Schedule | Roomba® 800 series | iRobot®
How to schedule your machine
Monitoring the schedule
To view the current scheduled program, you only need to press on the Schedule button then select the Day button to see. At this stage, you can press the Hour and Minute button to change the Schedule or press and hold the Day button again for five seconds to delete your current plan. Press OK to confirm the changes and return to the starting menu.
How To Delete a Schedule | Roomba® 800 series | iRobot®
How to delete your schedule
On Wi-Fi connected models
In the following guides, we’ll show you how to turn off a Roomba robotic vacuum or to program your schedules without having to touch the machine. To start doing this, all you need is to connect your device to the same Wi-Fi connection as your mobile phone. Go to the Google Play Store or App Store to get the iRobot® HOME App for your respective devices, and you’re good to go.
The 600, 800, and 900 series
For the older Roomba robotic vacuums, certain smart control options will not be available. However, you can still perform the standard option via the app quite easily.
Start by opening the installed app on your device, upon entering, it will then show the current Roomba devices that you’re connected to. Simply select the respective device so you can start managing it.
Scheduling your machine
To schedule the model, scroll down the menu to look for the Schedule option. Enter the section to open up the Schedule interface. Here, you can manually adjust the cleaning time, just like on the non-Wi-Fi connected models.
Make changes to the cleaning programs
On the Roomba app, users will have all the virtual control buttons and available settings, which will allow them to fully control their robotic vacuum without having to touch them. Simply choose the Clean button for the robot to get to work and press on it again to stop the machine. Let the robot return back to its base with the Send Home button to recharge it and allow it to automatically empty the bin.
Or you could always make changes to the cleaning programs at a much more in-depth level. Starting by changing the vacuuming behavior, with the Detailed Clean, Quiet Clean, or Custom Clean mode. Make certain adjustments to the Cleaning Passes by switching between Automatic, One Pass, or Two Passes cleaning. And finally, you can change the Bin Behaviors to pause when it’s full or still continue cleaning.

You can use the dedicated app to enable smart cleaning operations
Connect to smart home devices
Much like the Shark Ion Robot Vacuum R75, your robotic vacuums are also capable of delivering a completely automated cleaning experience, thanks to the voice commands via your Google Home or Amazon Alexa assistant.
To complete the setup, your smart home assistant must be connected to the same Wi-Fi as your phone and robot vacuum. Also, you will need to have your smart assistant app installed and properly configured first.
On the starting interface of the app, you will look for the Smart Home menu. Open the menu and select Connected Accounts & Devices. This should show the available devices on your home, be it Amazon Alexa, Google Home, and so on.
Choose the desired assistant and open the dedicated app to complete the linking process. After that, you can start operating your devices via voice commands, which is absolutely convenient. Feel free to tell it to start, stop, return to base, empty the bin, change the cleaning programs with only a single command.
The latest S and I series
And on the latest iRobot devices, Roomba have introduced a wide range of new controls and options for you to work with the mobile app. Thus, allowing homeowners to have even better management over the system.
For these models, you’ll have all the benefits of using the mentioned features on the iRobot® HOME App while still being able to adjust the cleaning operation at a deeper level, and more particularly, with the use of Roomba’s Imprint™ Smart Map.
This is a dedicated mapping technology developed for your premium S and I robot vacuum series, which allow the machines to work more accurately and effectively. However, your machine will need time to steadily build up the correct mapping of your house, so you won’t be able to use this feature right away. Depending on the specific models and your house’s coverage, this process will not take the same amount of time. Feel free to learn more about it with the following articles.
➜ RELATED: Shark Ion Robot R85 Vacuum Cleaner: Awesome Facts You Need To Know
Schedule your machine
To start scheduling your smart machine, you will also start with the standard steps like other Wi-Fi connected models from Roomba. However, after adjusting the certain time of days for the machine to run, you can move on to more specific settings.
Assuming that the robot vacuum has completed the imprint mapping process, you can look for the Location menu to customize the cleaning programs. Choose certain rooms that you wish to clean or for the machine to stay away by simply checking or uncheck on their respective boxes.
You can select the Repeat option for the machine to start cleaning your house at the scheduled time on the next day. Or uncheck all the boxes after you’ve selected the Repeat option.

The smart Roomba app makes it a lot easier to work with your devices Via: Amazon
Working with keep-out zones
And on the premium models that come with built-in cameras, particularly the Roomba i7+ and S9+, users can enjoy working with the useful keep-out zones, which provide even more customization to their vacuuming plans and make the machine one of the best vacuum cleaners in the world.
With the imprint map being ready, users can create keep-out zones quite easily. Start by accessing the standard map view interface, then enable the Keep-Out Zone feature and select the Add Keep Out Zone option.
Now, you can start dragging on the screen to create rectangular keep-out zones on the map. Select the certain zones and drag them around to freely position them around different areas of your room. Finish the keep-out zones by pressing Place. Feel free to add new keep-out zones on your already-configured map whenever you want by repeating the same process.
To improve the performance of your machine, the iRobot app will also study the cleaning reports to note down difficult areas that your robot often gets stuck. Thus, providing you with useful suggestions for keep-out zones in these respective areas.
And if you wish to delete any keep-out zones from your customized map, simply access the Keep-Out Zone feature. Select the map that you want to delete and choose the trash icon to have it removed.

You can create keep-out zones to better manage your device Via: Amazon
Conclusion
For Roomba robotic vacuums owners, this useful guide on how to reset Roomba machines and reprogram them is absolutely beneficial. Here, you can find the correct tutorials for all of your Roomba robotic vacuum models, as well as being able to explore useful features on other machines. Feel free to check on them to learn more about your machine and how you can make the most of it.


