How to Clean Roomba Brushes - Easiest & Quickest Roomba Maintenance Guide (2024)
However, if you want to get the most out of your robot, you need to know how to maintain it correctly. Knowledge like how to clean Roomba brushes are crucial. With this guide, you can learn how to perform important maintenance and cleaning tasks (such as how to clean Roomba brushes) in detail.
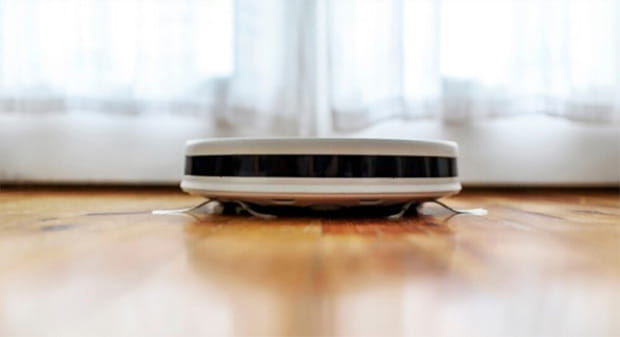
How to Clean Roomba Brushes
One of the most frequently asked questions that we received from our readers is: “How do I clean my iRobot Roomba brushes?” It’s not a bad question! Cleaning the brushes can seem really complicated when you first start. However, once you’ve learned how to do it, it’s actually really easy.
The brushes are the parts that must directly interact with dirt and debris. So, just next to the internal dust cup, the brushes tend to be the dirtiest parts of a Roomba. Because of this, iRobot has recommended that you take the time to clean the brushes at least once a week. If you live with pets that regularly shed hair, you may need to increase the frequency to twice a week.
Fortunately, iRobot has designed the brushes of their Roombas to be very easy to clean. You’ll be able to grasp how to clean iRobot brushes in only a couple of minutes. Then, it shouldn’t take you more than 10 minutes to apply the knowledge and clean out your robot from inside and out!
What You Will Need to Follow This Tutorial
-
Standard Phillips screwdriver
-
Clean microfiber cloth
-
A pair of scissors or a razor blade
-
Rubber gloves
-
Alcohol wipes
-
Can of compressed air
Step 1: Open Up the Brush Guard
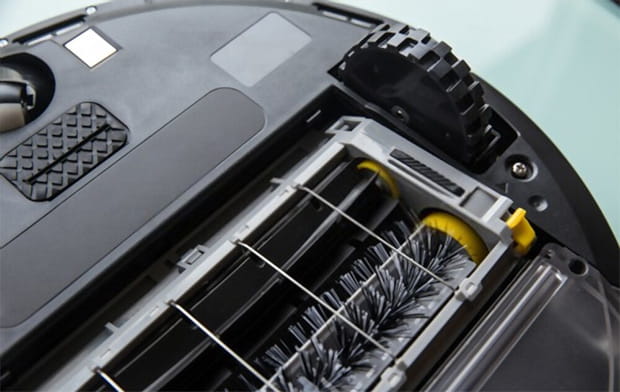
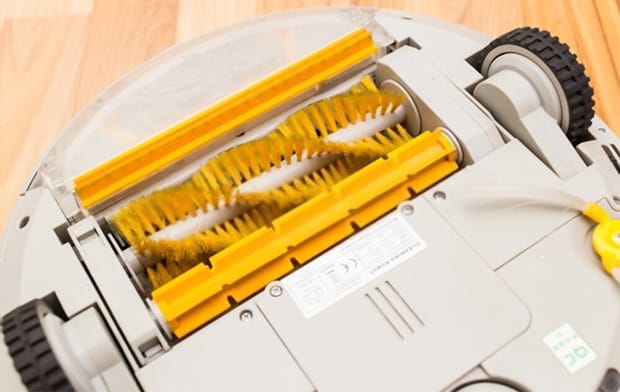
Place your Roomba belly-up on a clean towel on the floor. In the center, you will see a pair of long, cylindrical brushes. These are the Roomba main brushes. One brush will have bristles, the other will have rubber flaps. The brushes are kept in place by an elaborate metal guard. You will have to open up the guard to take the brushes out.
On either side of the guard are two yellow levers. Pull back on them and the guard should easily open up.
Step 2: Take Out the Brushes
Now that the guard is open, take a closer look at each of the brushes. You will notice on one end of the brushes are yellow bearings. Place your fingers on the bearing and gently lift the brushes up from there. They should come off in a jiffy.
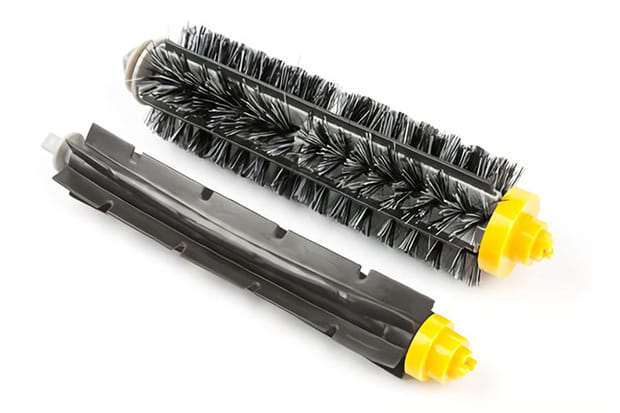
On the other end of the brush cylinders should be a gray-colored cap with a square peg. The peg fits into the slot inside of the brush compartment. When you reinstall the brushes after you’re done cleaning, fit the peg into the correct slot and the brushes should easily click into place.
Step 3: Remove the Hair
Hair tends to be the most difficult thing that you’re going to have to deal with. They tangle up the brushes’ bristles and, in some cases, are packed so tightly that you can’t unravel by hand. So, you’re going to need to do this methodologically.
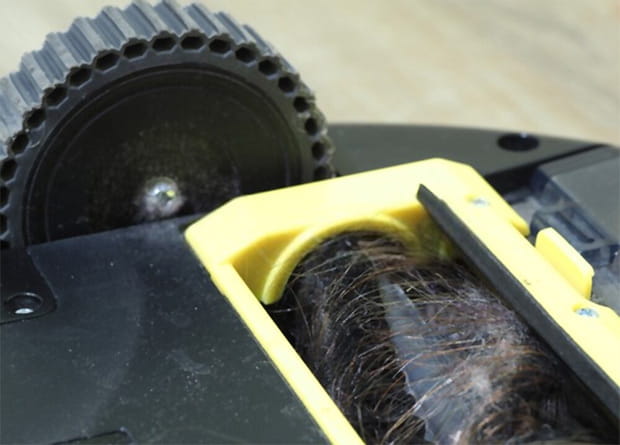
First, take off the plastic cap on one end of the brush. If you find any hair, dirt, or debris inside, remove and thoroughly clean them up with your microfiber cloth.
After that, get to the bristles. Try to take them out by hand. Unravel and yank on them when necessary. If they’re packed too tightly, you can use a pair of scissors or a razor blade to cut through the tangle and take them out.
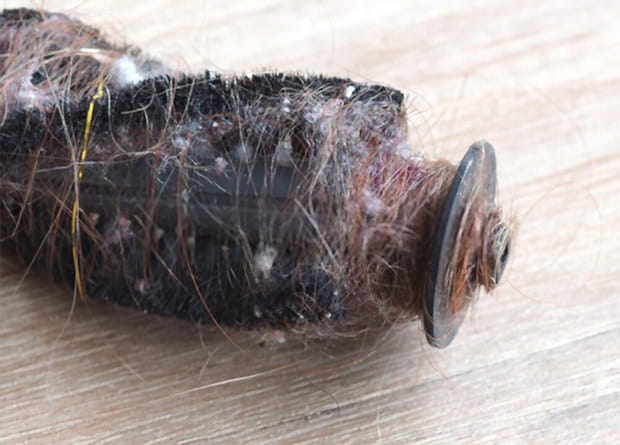
Some Roomba models will come with a Roomba brush cleaning tool that can help you strip out hair more efficiently. If you have one of those with you, use it instead of a razor blade or scissors. It will be a lot safer to use.
Remember that you don’t have to take out every single strand. To save time, just deal with the worst of the clogs.
Once you’re finished with the bristle brush cylinder, deal with the rubber cylinder. Although it doesn’t have bristles for hair to wrap around, there should still be some hair stuck to it. It’s best that you just clean it up while you’re at it.
Step 4: Reinstall the Brush Cylinders
With the cylinders being all clean, put them back into the Roomba. Remember the peg on the side with the gray cap? Fit them into the correct receptacles on the robot.
Put the brush guard back in place and you’re finished with this section.
Step 5: Remove the Side Brush
But you’re not done yet. This is only half of how to clean Roomba brushes.
Most Roombas these days will come with a small, rotating brush to the side. Its purpose is to reach into the room’s corners and take out the dirt, debris, and hair collected there.
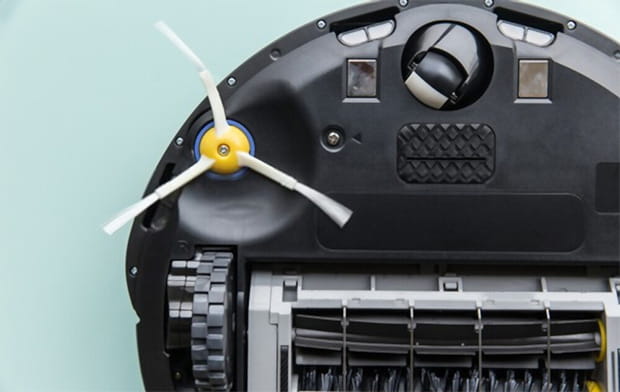
Fortunately, this one is a lot easier to deal with. All you have to do is use your screwdriver and take off the retention screw at the center of the brush. One it’s off, the entire side brush should fall off the robot.
Step 6: Clean Up the Side Brush
Clean up every trace of dirt, debris, or hair that you see. No matter if it’s stuck on the brushes themselves or lodged underneath the brush’s mounting point. Clean the area as best as you can.
Step 7: Reinstall the Side Brush
Reinstallation is as straightforward as it can possibly be. Put the side brush back onto the mounting point, then put the screw through the center with your screwdriver. Wound tight.
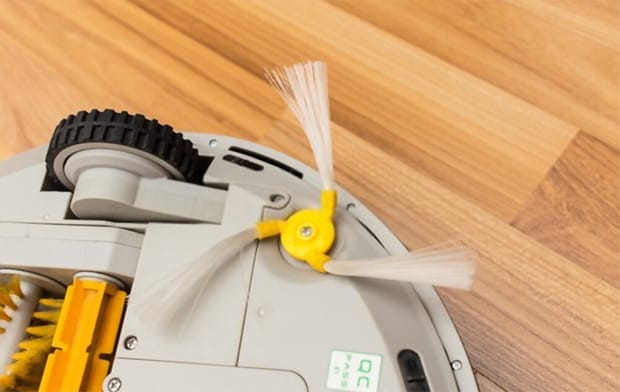
And that’s how to clean Roomba brushes!
Roomba Brush Replacement Process
According to iRobot, you should replace the brushes (two main brushes and the side brush) every 6 to 12 months depending on usage and the level of wear. You can find replacement iRobot Roomba brushes on their website or on third-party marketplaces like Amazon pretty easily.
Replacement isn’t difficult. Earlier, we showed you how to disassemble the robot and take off all three brushes. Take them out again and reinstall the new brushes in their place.
Other Roomba Maintenance Tasks
In a perfect world, cleaning Roomba brushes would be the only thing that you’re going to ever have to do for the robot. Unfortunately, Roomba technology isn’t quite there yet. You still have to perform many miscellaneous cleaning tasks regularly to keep your robot vacuum in good shape.
Here are detailed instructions for a few essential ones.
How to Clean the Wheels of a Roomba
Although the wheels may look robust, you need to clean them from time to time, too. Hair and debris can infiltrate the wheels’ wells, causing them to jam up. If the jam is bad enough, it may immobilize the robot.
How to Clean a Roomba Front Wheel
Step 1: Prep the Robot
Put it belly-up on a soft, clean towel to expose the underside.
Step 2: Take Off the Front Wheel
In most Roomba models, the front caster wheel can be removed without any tool. Simply grab the wheel and tug upward. It should pop out with only some minor effort on your part.
Step 3: Clean Up the Wheels
If it’s been a while since you last cleaned the wheels, there’s a good chance that you would see a lot of hair tangled around the wheel’s axle. Don’t try to yank out the hair, though. Remove the wheel from the housing and you can easily take out the hair from the axle.
With the axle dealt with, redirect your attention to the wheel itself. Clean up any trace of dirt, debris, or hair that you find.
Don’t forget the wheel’s housing, too (it’s the small space that the front caster wheel is slotted into). It’s a spot where dirt and debris regularly get stuck in. Use your microfiber cloth to take them out.
Once everything is sufficiently cleaned, just click the wheel back into its place (reassemble the wheel with the axle first, though).
How to Clean Roomba Side Wheels
There should be two side wheels, situated on either side of the robot. Unfortunately, they aren’t as easy to take off as the front caster wheel. So hard, in fact, that we highly recommend that you don’t try at all.
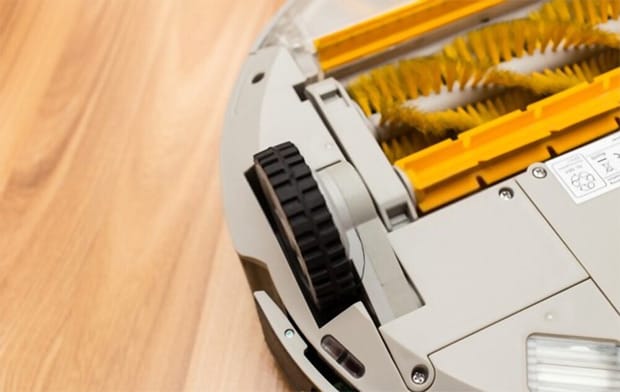
Rather, just spin the wheel around and use a microfiber cloth to take off any surface dirt and debris that you’re able to detect.
Next, push the wheel inward. The wheel should give a little and reveal a small space to the side. If you see any clumps of dirt in that space, pull them out and clean thoroughly.
How to Replace Front Caster Wheel
The caster wheel, according to iRobot, has to be replaced once every 12 months. Replacement wheels can be found online.
Unfortunately, the side wheels are not replaceable (at least easily).
How to Clean Roomba’s Sensors and Charging Contacts
The Roomba relies on a series of sensors to help it navigate around the house. Additionally, there are charging contacts at the bottom to facilitate battery recharge when it docks into its home station. When the sensors or the contacts get dirty, they will be unable to do their jobs.
Do note that each model will have different sensors. Say, the locations of the sensors on an iRobot Roomba 960 are going to be different from the iRobot Roomba i7+.
But since we’re talking about Roomba as a whole, we can’t delve into anything specific. Consult your robot’s user manual (if you don’t have the manual with you, electronic copies of the manual are available online). It should show you the location of all the sensors as well as where the charging contacts are on the robot.
iRobot recommends that you clean the sensors and the contacts with damp melamine foam (Magic Eraser). Run the foam under the tap, wring it out, then polish the sensors and the contacts.
How to Clean Roomba’s Air Filters
A Roomba is built just like your average vacuum cleaner. And that means it also comes with air filters. These filters’ job is to cleanse the vacuum flow that passes through the robot, taking out airborne dirt and small pieces of debris. The filters must be cleaned regularly. Else, all of the dirty particles are going to clog up the filters.
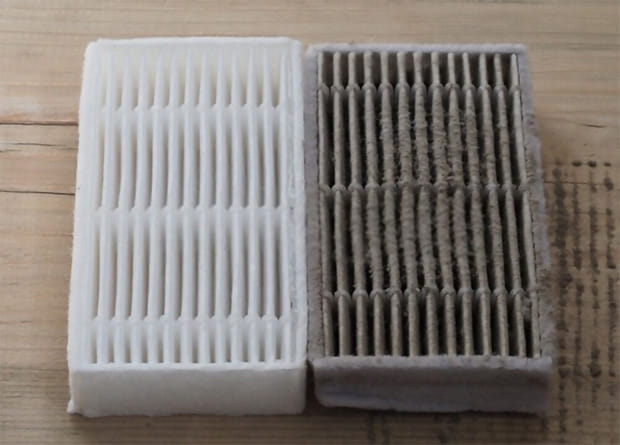
The design and location of the air filter will be different depending on the model of your Roomba. For example, the Roomba 600-series will have a filter seated within the dust cup. Meanwhile, the Roomba 800 or 900-series will have a filter cartridge that’s attached to the top of the dust cup. With the newer E and i-series robots, they also use filter cartridges, but they’re attached to the side of the dust cup.
We’ll show you how to change and clean the filter of all three types.
How to Clean the Air Filter in Roomba 600-series Robots
The 600-series robots will have the air filter seated within the dust cup.
Step 1: Remove the Dust Cup
Take out the dust cup by pressing the dust cup release button at the top of the robot. Then, you will be able to slide the cup out.
You should take the opportunity to clean the dust cup while you’re at it.
Step 2: Remove the Filter
The air filter is the blue plastic piece in the middle of the dust cup. If you’ve been running the robot for some time, the filter should be covered in dirt.
On either side of the filter are two yellow buttons. Press the buttons at once with your fingers. This will allow you to slide the air filter right out.
Step 3: Clean the Filter
There are two ways to clean the filter (but it won’t hurt to do both). Tap the filter against the side of your trash can to shake all the dirt and debris loose. As you tap, they will fall off and into the trash can. If you still see any lingering traces of dirt, use a dry cloth or paper towels to wipe them off the filter.
Do not attempt to wash it with water.
Step 4: Reinstall
After the debris has been sufficiently cleaned, reinstall it back into the robot.
How to Clean the Air Filter in Roomba 800 and 900-series Robots
The Roomba 800 and 900-series have a filter cartridge installed to the top of the dust cup.
Step 1: Remove the Dust Cup
Remove the dust cup by pressing the release button, then slide it out of the robot. Then, clean the dust cup.
Step 2: Remove the Filter Cartridge
Right on top, you will see a door cover. On one side is going to be a small release tab. Press it and lift the cover up to access the filter compartment. Now you will see the filter in all of its glory.
At the center of the filter is a yellow pull tab. Tug on it to take out the filter cartridge.
Step 3: Clean the Filter Cartridge
Tap the filter gently against the side of the trash can. This will force the dirt and debris stuck inside of the filter to come loose and fall into the trash can. Alternatively, if you have a handheld vacuum at home, just run the nozzle across the filter to suck out all the contaminants.
Do not attempt to wash it with water.
Step 4: Reinstall
Place the now-clean air filter back into the compartment, reinstall the cover door on the dust cup, and put the dust cup back into place.
How to Clean the Air Filter in Roomba E and i-series Robots
The latest Roombas (as of June 2022) are the E and i-series robots. The filter cartridge is attached to the side of the dust cup in these robots.
Step 1: Remove the Dust Cup
As usual, press the release button at the top and slide the dust cup out of the robot. Take the opportunity to clean the dust cup.
Step 2: Remove the Filter Cartridge
Look to the side of the dust cup and you should find the air filter. To remove it, grasp the top and bottom with two fingers, then slide it out of its place on the dust cup.
Step 3: Clean the Filter Cartridge
Tap the filter against the side of your trash can to loosen up the dirt and debris, letting them fall into the trash can on their own. The filter of E and i-series robots can be cleaned with a handheld vacuum cleaner.
As always, you should not attempt to wash the filter. Water is going to irreparably ruin the cartridge.
Step 4: Reinstall
Put the air filter back to the side of the dust cup, then reinstall the dust cup back into its compartment.
Conclusion
Now that you’ve learned how to clean Roomba brushes (as well as many other maintenance procedures), try and build a habit of regularly cleaning out your Roomba. As you can see, cleaning the robot isn’t very difficult at all and you can go through the entire routine in 30 minutes or less.
The more care and attention you pay to the robot, the longer it will serve you. If you do it right, the average Roomba can clean your home for up to 4 or 5 years before its battery starts to go. But even then, if you manage to replace the battery, it should continue to work like new!
FREQUENTLY ASKED QUESTIONS
- 01. How to clean Roomba brushes?
-
“How to clean Roomba brushes” isn’t the only question that we’re asked. Our editorial has received many different questions over the past couple of months. Some of these questions are very good. Maybe the answers can teach you a few tricks about cleaning and maintaining your robot vacuum!
- 02. Can You Wash Roomba Rubber Brushes?
-
iRobot didn’t specify whether the brushes are washable or not. However, we still think it’s best that you don’t try it. Simply clean the brush with a clean towel and rip off all stuck-on hair.
- 03. How Often Should You Replace Roomba Brushes?
-
For your main brush cylinders, depending on how heavily you use the robot, you should replace them once every 6 or 12 months (according to iRobot). The company doesn’t specify how often you should replace the side brush. So, we leave it to you to decide. When the side brush seems worn out or some of the spokes are damaged, replace the brush.
- 04. How Do You Clean a Robot Vacuum Brush?
-
You can use a clean cloth or paper towels to wipe all the dirt from the brushes. A pair of scissors or a razor blade can help you cut through hair tangles and clogs. If you have a handheld vacuum, you can use it to suck out all of the dirty particles from the brushes, too.
- 05. How Do I Clean My Roomba Debris Extractor?
-
The debris extractor is another name for the main brush cylinders. We’ve already talked in extensive detail about how to clean them early on in the article.
- 06. How Many Hours Does a Roomba Last?
-
This will depend on the model. However, most Roomba models will last from an hour to up to 2 hours.
- 07. How Often to Run Roomba?
-
This will depend on you. However, a good rule of thumb is to set about 4 to 7 cleaning sessions every week. This will keep your home in a clean state continuously. But this is only a guideline. You can schedule a daily cleaning session if your house is quick to become dirty or has pets that regularly shed their hair.


