How to Make Ice Last Longer: A Simple Five-step Instruction is Waiting for You!
The thing is that all kinds of coolers have their limited time to preserve foods in their fresh form or in other words, to keep ice from melting in a cooler. What I would like to share today is how to make ice last longer in a cooler. Surprisingly, it is much more simple than we think!
Why do we need to extend the duration fo ice in a cooler?

Cooking while going out for camping
Some of you may think: “Why do I have to find a way to make ice melt slower when I’ve already invested in a cooler?” The most important reason is that when we carry foods and beverages for eating outdoors, we must ensure an ideal temperature to prevent all possible foodborne bacteria to spread. High temperature is an optimal condition for most bacteria to thrive.
Some kinds of bacteria and germs multiply every twenty minutes at temperatures greater than 40°F. Most pathogenic bacteria are found in raw meats. When they are stored in cold temperatures, bacteria do not grow or just develop slowly. What we have to do is make sure the food items we plan to take with us during our trips are refrigerated as long as possible. The ideal cold temperatures are below 40°F.
➜ Related: Rtic 65 Cooler: Super-Great Alternative Option to Other High-End Coolers
For your own safety, please never use a food item that is in a “Danger Zone” for two hours even though it does not look and smell bad.
With all of these reasons, I think everyone will see why it’s important to extend the duration of ice
How to make ice colder?
The more expensive the cooler the more time ice will last in it. It is not feasible for everyone to purchase the latest model of cooler. A high-end cooler can cost several hundreds of dollars; thus, it is not a waste of time to learn how to make ice last longer.
There is more than one way to keep ice from melting in a cooler but the simplest one is to use salt or more specifically, rock salt. Adding rock salt to a cooler full of ice cubes can make ice melt slower.
To explain this technique, let’s talk a little bit about science.
First, you should understand what is melting point and what is freezing point.
● Melting point is the temperature at which a solid turns into a liquid.
● Freezing point is the temperature at which a liquid turns into a solid.
So,
What does salt do to make ice melt slower?
Salt or Sodium Chloride (NaCl) can decrease the freezing temperature. Normally, a liquid becomes a solid at 0 degree Celsius. When adding salt to a liquid, depending on the concentration of salt, the new freezing temperature can go down to -21.1 degree Celsius. This is why you will feel a lot colder when holding an ice cube of salt water compared to an ice cube of normal water.
In short, using salt is one of the first things you can think of when you would like to optimize the ice retention of your cooler for your adventures.
Apart from adding salt, you need to combine different methods to give your ice chest the best conditions to be able to keep ice from melting in a cooler for up to ten days. Here is a step-by-step instruction and some practical tips.
How to keep a cooler cold the longest?
Step 1: Cool your icebox with crushed ice a night before the trip
The insulation of an icebox can keep your food and beverages cold when it is chilled with ice before hand. You should never put your stuff in the cooler just after taking it out from your garage. Don’t think that it is a waste of money to buy a bag of crushed ice to pre-chill the ice chest. In fact, you will save half of the amount of ice you will put later.
Please remember to empty out all leftover melted ice and put new ice cubes.
Step 2: Pre-chill food and beverages you plan to carry for your adventure
This step is an essential step to keep the temperature inside the ice chest lower. This step will also help to prevent the ice cubes you put later from having to cool your stuff.
Step 3: Put block ice to create a layer for your stuff
The reason to use block ice is that they will make a solid mass of ice that no warm air can get inside. As a result, this makes the ice melt slower.
Step 4: Lower the freezing temperature with salt
Freezing salt water for the cooler is the most important step to make ice last longer. Putting salt-water ice cubes in the cooler is a must-do.
Step 5: Start organizing your food and beverages
The best way to organize the cooler is to make one layer of food and one layer of ice. This way will limit air circulation that makes ice melt faster.
The first layer of food must be food that needs to be kept cool because food at the bottom of the cooler the coldest. Every time you open the cooler, you do not need to worry about the freshness of your food items.
➜ Related: How to Pack a Cooler - Everything You Need to Know on Using Your Cooler for Camping
I would like to share some practical tips you can consider to make the best for your outing!
1/ Place the cooler out of direct heat
Carrying the cooler to your camping trip means that the cooler is exposed to direct sunlight, especially in the summer. Remember to place it in a cool place such as under a large shaded tree or simply just under your picnic table.
2/ Do not open the cooler so many times
Each time you open the cooler there is a chance to let warm air get inside, which is the main reason why ice melts faster. If possible, to avoid opening the cooler too much, you can separate your stuff into two coolers.
3/ Do not need to drain the ice chest
As the ice will melt, you will see cold water inside the cooler, but, please do not drain the cold water. It helps to preserve the ice.
4/ Place the cooler in a way that air can flow under it
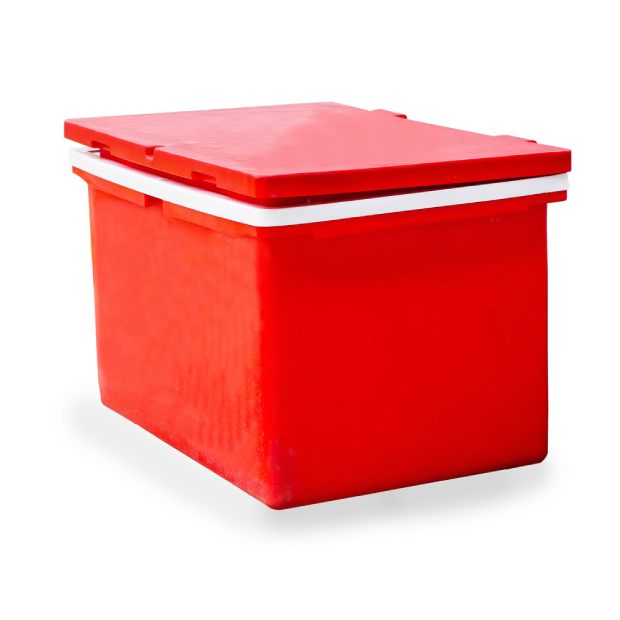
Elevated legs of a cooler
Do you know that there is a lot of heat circulation between the base of the cooler and the surface it is placed on? This is the reason why many brands try to equip their products with elevated legs to limit the contact area between the cooler and the base.
The best coolers like Yeti products always have feet to raise the cooler off the ground, which allows air to circulate underneath. The aim of its design is to limit the amount that the ice chest is in contact with the hot ground.
If your current cooler does not have this feature, you can just simply place it on wooden blocks for example.
5/ Consider to buy a good cooler
A high-end roto-moulded cooler is worth considering if your family often goes out camping. It will help you to save a lot of money in the long run.
In the last part of this guide, I would like to talk about the proper way to clean the cooler. You may think that what I am going to share below is not related to the main topic of this guide but, right cleaning method is an important part in the way of effort to maintain food safety when using cooler to store food and beverages.
Most of us do not remember to clean the cooler thoroughly after a camping trip because we are too tired to care about it. This is the reason why the cooler often has a bad odor when we open it.
How to get the smell out of the cooler?
Step 1: Let’s the cooler air out
The first thing you must do when you notice a bad odor is to place it in an area with plenty of fresh air circulation.
In case that rotten food is stuck inside the cooler for many days, standard cleaning method seems not to be very effective. You should leave the cooler open in an outside area for a couple of days.
Step 2: Apply bleach mixture
Foul odor is caused by bacteria and organisms and bleach can be used to kill these kinds of bacteria.
You must be careful when using bleach to clean and to fight the odor of your cooler. Remember to only use bleach when your cooler is white inside, otherwise, bleach may make the cooler wall fade.
To be safe, let’s mix one part of bleach with four parts of water. Pour the mixture into a spray bottle and then spray around the cooler walls. Leave this bleach mixture on with the lid open for at least eight hours.
Step 3: Clean hard-to-reach places
We often forget to clean some hard-to-reach places such as grooves and hinges. These areas present many possible habitats for bacteria and must be cleaned thoroughly. You can just take an old toothbrush, dip it in the bleach mixture and scrub these areas.
Step 4: Utilize odor absorbers
After you’ve mostly removed all bacteria and germs, it is time to absorb the remaining smell. There are two simple things in your house that are known to be very effective are charcoal and baking soda.
Charcoal is good at letting air pass through while catching odor-causing particles.
Baking soda is also a good choice to fight odor.
With this step, you can close the lid in order to avoid charcoal or baking soda to absorb some odors passing through the outside air. You need to focus on the smell that the cooler is emitting.
Fill up the cooler with charcoal or baking soda and let them rest inside for a couple of days.
Step 5: Finish with some natural “perfume”
Lemon juice and vinegar can be used to “mask” the bad odors from being emitted again after cleaning.
Note:
In all cases, the best cleaning method is that you should never create an opportunity for bacteria to grow inside the cooler. It is especially true if you place the cooler in a hot area in your house such as your garage or your backyard.
I really recommend you bring some extra clean containers or at least some big zip-lock bags to store remaining food items. These things will help to make sure the food is completely protected from the outside air.
➜ Related: How to Get Smell Out of Cooler in Very Easy to Use Steps
Wrapping up
I hope that all of my experiences about how to make ice last longer will help you in some cases. Please remember that there is nothing perfect in life. Using salt to keep ice from melting in a cooler is the simplest method but it is not the best one. Depending on your situation, you should apply different strategies. Some other good tricks you can employ are lining an aluminum foil in the cooler, wrapping the cooler with a thick towel, putting large ice cubes, etc.


