Learn How to Stagger Vinyl Plank Flooring and Make It Prettier
Unlike hardwood, which can come in different lengths, vinyl products are mass-manufactured and identical for each model. This simplified the installation process. You can quickly lay plank after plank to complete a whole flooring in no time. However, it introduces some pitfalls too, and staggering your flooring is a simple method to fix them.
In this tutorial, we show you how to stagger vinyl plank flooring and tips on getting it done right.
Why Do People Stagger Vinyl Plank Flooring?
Vinyl plank flooring is staggered mainly for two reasons: to improve the appearance and to make it stronger.
The importance of floor staggering is obvious to anybody who has ever built something with bricks (even toy bricks or any form of block) or just looked closely at a brick wall. The bricks will topple over if you place them all in straight columns. However, you may have a sturdier wall just by simply overlapping each brick and spacing out the joints between them.
The same idea can be applied to flooring installation. Vinyl floors that are staggered or overlapped provide a sturdy construction that can contract, expand, and absorb impact much better than one large surface. The boards are interlocked by this method in a way that resembles a huge, impenetrable puzzle.
Additionally, staggering prevents unattractive issues like forming gaps, buckling, and warping. Your flooring will remain in great condition for a long time if you avoid these problems.
Finally, if you use a randomized flooring stagger pattern to install the planks, it will be much harder to see the joints between them. The floor will be a large, gorgeous, and unified surface where planks blend into each other.
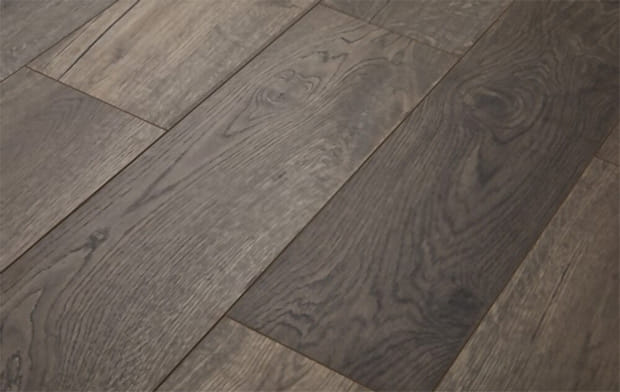
A randomized pattern makes your vinyl flooring even more gorgeous
How To Stagger Vinyl Plank Flooring
What You Need
- Measuring tape
- Chalk line
- T-square or speed square
- Sandpaper or sanding sponge
- Utility knife
- Level
- Pry bar
- Miter saw or another powered saw for cutting vinyl planks
Plan Your Staggering Pattern
Measure your room
Start the process by measuring the width of your room and dividing it by that of the vinyl planks you plan to use. The result is the number of vinyl plank rows you will need.
Determine the width of outer rows
However, it is almost impossible to fit a whole number of planks into your room. You are highly likely to cut the last row to fit it properly with the rest of the flooring. Determining the length of this last row is a must.
Cut the planks for your first row so that they are the same width as the final row if it is smaller than the width of a typical plank. This simple trick will make your final flooring symmetrical as a result.
Here's an example: suppose you have a 154" wide and you are using 5" planks. The math will be 154/5 = 30 with 4 as the remainder. There will be 30 whole planks on your floor and 4 inches of leftover. So, the first and last rows should be 2" wide each to create a nicely balanced installation.
Prepare The Vinyl Planks
Mix the planks
In the room where you will lay the flooring, remove the planks from different packages and mix them up.
The reason is that if those boxes feature planks from different flooring "runs" (which they probably do), there may be a few minor color differences. By mixing them, you may prevent one side from being notably darker and a super lighter color on the other side.
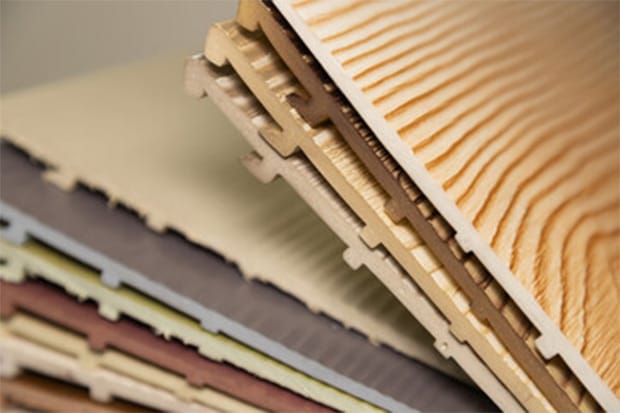
Mix all the planks you have
Peel and stick vinyl planks should be laid out similarly to rigid vinyl planks: mix up multiple boxes of planks to ensure that color differences are evenly distributed, then start the next row at the end of the previous one, and so on.
Peel and stick vinyl tiles come in different patterns. If you are making a checkered design, you can chalk-line the room to determine its center. Other designs could be in rows or already slightly staggered. The installation of these designs is similar to that of regular peel-and-stick planks.
Acclimate the planks
Before you begin installing your flooring, you should give the material 24 to 72 hours to get used to the temperature and humidity of the room.
Acclimatization is a critical step and helps to avoid issues that could happen later, like bubbling or buckling in your vinyl floors. Manufacturers usually ask their customers to do this as well. To avoid voiding your warranties, adhere to the manufacturer's advice and acclimate their products before installation.
Prepare The Floor
It is crucial to have your floor ready before you install your vinyl planks over it. Here's how to set up the room for the installation of vinyl plank flooring.
Remove the baseboards
Carefully remove your baseboards with a pry bar. By doing this step, you can make sure there are no awkward gaps between the flooring and the walls. The baseboards may be protected from damage caused by you when laying the vinyl planks.
If it is difficult to remove them, consider using a putty knife to cut through the excess dried paint. Measure the space between the doors and floor as well to ensure that they can open freely.
Marking the place on your floor where you should cut your door jamb or door is a good idea. Then use a jigsaw or a similar fine-tooth saw to cut them. For a heavy door, you may need a circular saw or specialized tools.
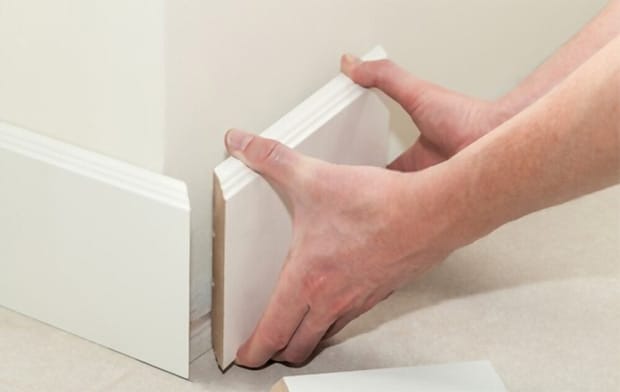
Remove the baseboards
Remove the old flooring
Pull up your old flooring and start tearing away any transition strips separating different floors. A pry bar might be useful if you are struggling with this task.
Level the subfloor
Get rid of as many flaws as possible if you are installing vinyl planks over a concrete subfloor. This might include sanding down bumps, patching thin-set, or filling in holes using a self-leveling product. A level is helpful when you need to check for imperfections on a subfloor.
Self-leveling chemicals may often be purchased online or at any home improvement shop. You should spread and level the concrete quickly since they tend to dry quickly.
Use thinset to fill up any flaws or deep-set grout if you are putting over porcelain tile or ceramic. The leveling type determines the dry times. Normally, levelers need to dry for at least a full day before new flooring can be laid upon them.
Clean the subfloor
When using adhesive, vinyl flooring can have bonding issues due to dust or other particles preventing the flooring from bonding together properly. Clean the subfloor and make sure it is level and damage-free.
Cracks in the subfloor should, if required, be filled with concrete filler. To guarantee sturdy flooring, apply the substance with a putty knife over any holes or uneven surfaces in the subfloor. After the filler dries, sand such areas down.
Make careful to sweep and vacuum away debris, and if necessary, clean the area and degrease it. Grime and dust may be stirred up during installation. To clean up as you go, have a vacuum or brush within reach. Aren’t sure about this equipment yet? Check out the best vacuum for vinyl plank floors.
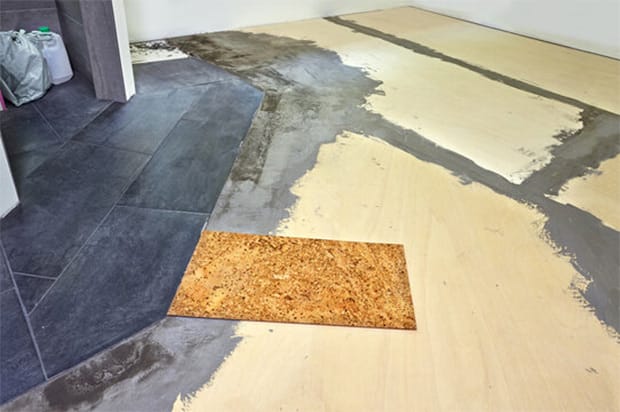
Clean and level the subfloor properly
Install the underlayment
Pay attention to the underlayment suggested by the maker of your flooring. This is a thin layer of foam, plastic, or paper that acts as a barrier to shield the flooring from excessive moisture. In order to prevent hollow sounds or squeaks when you walk on it, you can cushion the flooring as well.
Lay the padding along the way you plan to install the planks. Tape them together to stabilize the pieces before you install the vinyl planks.
➜ RELATED: How to Make Vinyl Plank Floors Shine? Try These 7 Simple Steps
Cut Vinyl Planks
Depending on your experience and available equipment, and the thickness of the plank, there are various alternative methods to cut vinyl planks. You can also check the manufacturer's instructions for more detailed information.
Point and snap
You can break a vinyl plank nicely by scoring and snapping it along the cut. Use a utility knife to make a few light cuts in the vinyl plank's surface first. To make a perfectly straight score line, make use of the t-square. You may need more than one pass for each cut.
The plank should then be split in two by bending along the score line. Some people prefer to use their knee as a lever to quickly snap the board.
Tile cutter
If you happen to have a tile cutter on hand, it is a handy tool for cutting vinyl tiles and planks. You may buy or rent it from a nearby hardware store.
Measure the area where the cut will be made first, and then mark it. After that, making the cut is as easy as pushing a lever.
Circular saw
A circular saw is another terrific cutting tool if you have access to one and can handle it. To prevent melting the vinyl plank, you should operate the saw carefully and use a fine-tooth blade.
Tips for cutting peel-and-stick vinyl
If necessary, a sharp utility knife can be used to cut peel-and-stick vinyl planks. Guide your straight cuts with a T-square and make multiple passes with your utility knife.
For difficult cuts, snips can be a better choice. They are all basic tasks with not much experience required, though, since peel-and-stick vinyl planks tend to be much more flexible.
Install And Stagger The Vinyl Planks
It is time to lay your first row of planks now that you have your tools prepared, the pattern planned, and a clean work area.
- Start by using a knife to remove the first plank's top adhesive strip and its short tongue edge. Cutting off these little pieces provides the floor with a clean, level surface and stops it from sloping near the wall.
- Lay the first full plank, starting with the room's right-hand corner. Make sure it stays 1/4 inch away from the wall. As you work, spacers can help you verify this distance. Adjust the planks so you can have gaps of around 1/8 inches at the right side and top of the first plank.
- Place another full plank next to it. Set your tape measure against the new plank's right side. Find the second third of this plank, then draw in a thin vertical line indicating its border.
For example, many planks are 36 inches long. Use your pencil to mark the line 24 inches away from the side.
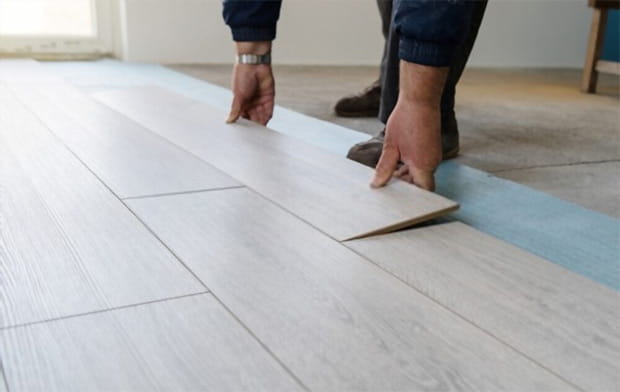
Install each row carefully
- Place a T-square or speed square so that its edge rests on the pencil line and the top sits on the plank. To prevent the tool from moving, firmly press it on the floor.
- Use your utility knife to score a line that runs the whole width of the plank. Use a speed square or T-square as a guideline for this straight cut. Lightly score the line a couple of times, and then pick the plank up and break it apart slowly at the line you have scored.
- Put the two-thirds you have cut in the second row next to the first one. Press its adhesive strips to secure this plank to the first row, making sure the right side has an expansion of around 1/8 inch. Now you can place a full plank in this second row.
- Keep doing this for the rest of the wall's length, and lay the required full planks for your first two rows. When necessary, measure and cut vinyl planks in thirds to make staggered rows.
- Repeat this method on the third row. Just remember that you will need a full-width plank first. For the plank right next to it, you can use a random length - just ensure spacing of at least 6 inches between joints.
- Use the leftover from the second row to lay your fourth row. The third row's leftover material may be used to begin the fifth row, and so on.
For the sixth row, you can randomly cut a new plank into two pieces. Repeat this pattern until the vinyl plank flooring is installed across the whole room.
Reinstall the baseboards
Carefully finish the last row of your vinyl plank flooring. Now it is time to finish it up by putting back the baseboard. You can also opt for a replacement with new baseboards. This step shouldn't be difficult if there is a 1/4-inch gap.
➜ RELATED: Best Robot Vacuum For Vinyl Plank Floors: TOP Robot Vacuums
Common Mistakes When Staggering Vinyl Plank Flooring
A nice and durable vinyl floor requires you to strike a decent balance when staggering it. It will be unstable and potentially cause damage down the road if the spacing between joints isn't at least 6 inches. On the other hand, many people are a little bit too rigid during this process.
When it comes to staggering vinyl flooring, there are two undesired patterns many inexperienced installers make.
H-Pattern
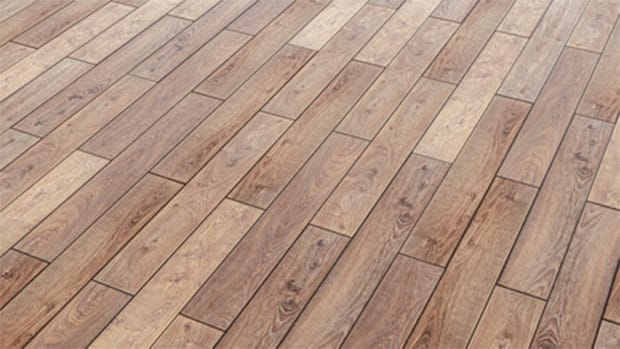
H-pattern
If you alternate half-length and full-length planks for the first board on two adjacent rows, you will produce this pattern.
While the final product doesn't look very random, this method is actually used by some installers to cut down on time. You have only two ways to start a row. It is, therefore, quite simple to determine which length you should use to begin each row.
But this time-cutting method comes with a huge problem. When the length and this vinyl plank flooring pattern repeat, the seams will look like two dotted lines throughout the whole room. This is the first thing in your house every guest will recognize at first glance.
Again, patterning your vinyl floor this way isn't totally wrong. Even professionals opt for that all the time, and it doesn't affect the soundness of your flooring's structure as long as you are okay with the look.
However, this simple pattern certainly detracts from the lovely vinyl finish you have paid for. Staggering in a randomized fashion is superior as it is less distractive.
Stair-step Pattern
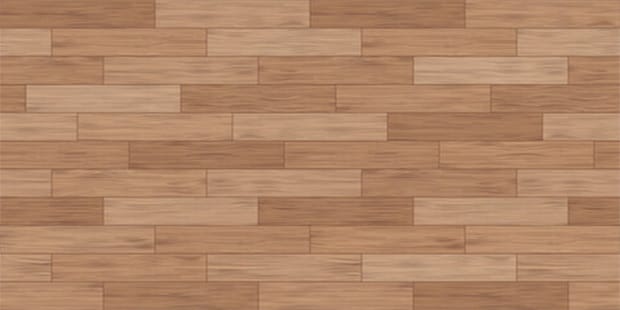
A typical stair-step pattern
This is another typical mistake with vinyl flooring. An installer may repeat the same set of starter planks, creating a stair-step pattern. Although a bit more varied and complex than the H-pattern, it still produces an eye-catching look that always catches the attention of everyone first.
The fact that each row is staggered by a different amount may make you think it is a robust pattern. This is a false impression, however.
The repeated offset generated diagonal seams throughout the room that look like the shape of a stair-step. They may contain weak spots in many rows. Many professionals use this technique due to its simplicity. But at the end of the day, it is the flooring quality that has to be compromised.
Again, you can choose to stagger your vinyl flooring in this stair-step pattern if you really like its look. Just be aware of the risks and limitations you are up for.
Conclusion
Even though vinyl flooring is already stable and strong on its own, there is nothing wrong with increasing its structural strength further by staggering it. On top of that, racking your vinyl planks can also improve their aesthetic appeal. Just make sure to follow our guide on how to stagger vinyl plank flooring. It can help you avoid common unattractive patterns that can partly defeat the purpose of this installation method.
FREQUENTLY ASKED QUESTIONS
- 01. Should I Stagger Vinyl Floors?
-
Smoother joints don't just result in a smoother appearance but also improve the construction of your vinyl flooring. Always consider staggering the planks if you can afford it.
- 02. Which Direction Should I Lay My Vinyl Plank Flooring In?
-
You should start with the more visible wall of your room. Lay your first row and complete the rest of the flooring with rows parallel to this wall.
- 03. What Are The Best Vinyl Plank Flooring Installation Patterns?
-
The best way to stagger vinyl flooring is to do it in a randomized pattern. It makes your room less boring and ensures a sturdier structure.
This is easier said than done, however. You really need to pay close attention to each row to make sure the length of its starter plank is different from those of a few rows before it. If any seams line up too tightly, they will capture your attention instead.
- 04. How Much Should I Stagger Vinyl Flooring?
-
Whenever you are installing vinyl flooring, the essential thing is to read the manufacturer's instructions and follow what they say. According the ALL IN ONE Guides’s experts, almost all vinyl plank varieties need to overlap by at least 6 inches. You may use a cut-off longer than that, but never less.
- 05. How To Reduce Plank Waste When Staggering Flooring?
-
Use the piece you have cut off in the previous rows in the next row. Its length should of course meet the requirements of your current row.


