Deebot Not Charging: Why It Happens and How to Fix It
Quick Model Notes (At-a-Glance)
If you’re in a hurry, start here. These short notes capture the most common, model-specific charging quirks and the fastest practical fixes. Read them first, then move to the deeper sections if your symptom persists.
DN622 / N79 / N79S
These models are picky about charge-pad cleanliness. Keep the pads shiny and dry. To soft-reset, hold the power/reset button for 10–15 seconds. If run time collapses to minutes or the robot dies at a mid-percent reading, the battery’s state of health is gone—replace the pack with a spec-matched unit that matches voltage, capacity class, and connector.
Deebot 900/901 and OZMO 930/950
Charge indicators pulse while charging and go solid at full. If sessions stall around 80–90% and never finish, update firmware and restart. When stalls persist after cleaning and updates, capacity fade from increased internal resistance is the usual cause. Plan for a battery swap and, before you do, reduce drag by cleaning wheels, brushes, and bearings.
OZMO Mop-Capable Models
Water is the hidden enemy. Do not let mop water pool under the dock. After mopping, towel the pad dry before docking. If you mop frequently, place a thin tray under the base so splashes do not wick into pins or flooring. Moisture raises contact resistance and can pit metal over time.
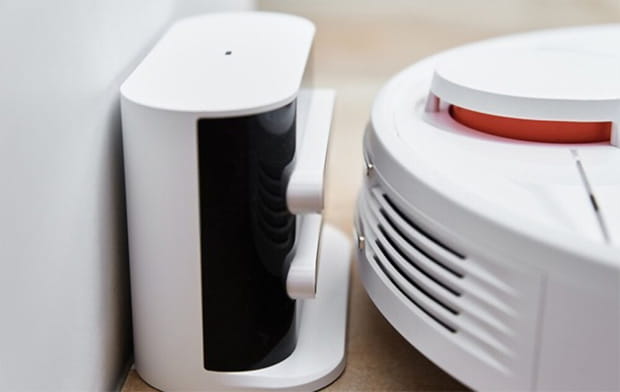
The robot needs to sit properly in the dock
Battery or Dock? Decide Without Guessing
Once you’ve cleaned the obvious surfaces and the same symptom repeats, let the pattern tell you what to fix. Using symptoms to guide decisions saves money and avoids swapping good parts.
Swap the battery if:
- Run time on Standard mode has fallen to roughly 30–40% of former performance.
- The robot dies suddenly at 20–40% indicated charge.
- You can “wake it up” temporarily, but the problem returns days later.
That is classic end-of-life behavior. Replace the pack with a spec-matched battery. Matching the connector shape and length matters as much as voltage and capacity class.
Repair or replace the dock if:
- A proven, otherwise healthy robot fails only on your dock.
- One spring pin is sticky, sits low, leans, or has uneven travel.
- The dock light never comes on, or the adapter runs unusually hot.
Start with an adapter replacement because it costs less. If symptoms persist, replace the dock with the correct model and connector.
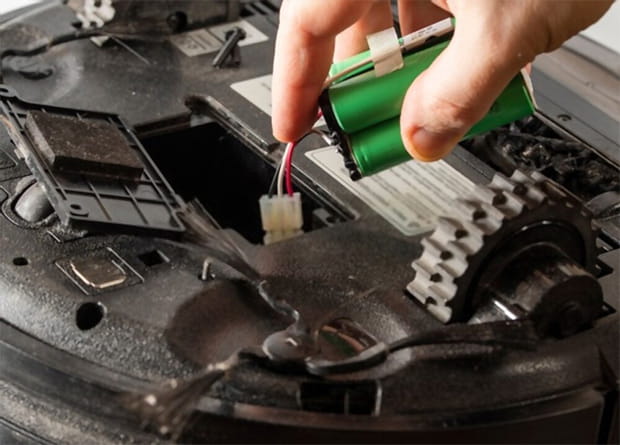
You may need a battery replacement
Choosing Parts Safely
“Close enough” is not safe with charging parts. Match voltage, capacity class, and connector geometry. OEM parts are safest; high-reputation third-party parts are fine if they truly match the specification and reviews are consistent over time. If your robot is under warranty, open a support ticket before opening the unit. Do not mix cells or reuse an unknown battery from another device.
Faster, More Accurate Diagnostics in Minutes
Small, controlled experiments beat guesswork. Change one variable, run one short test, note the result, and move on. This avoids circular troubleshooting and isolates the failed link in the chain.
Sanity test on the wall outlet
Plug a phone charger into the same receptacle used by the dock. If the phone charges but the dock still stays dark, suspect the adapter or the dock. If the outlet is switched, ensure the wall switch is on.
Contact-pressure check
Set the robot on the dock and gently rub the pads to ensure contact. If you must press down to start charging, one spring pin is weak or misaligned. Replace the dock. Shimming works briefly but accelerates wear.
Runtime health check
On clean, hard floors with clean brushes, start at 100%. If run time consistently drops below ~40% of normal or voltage falls sharply around the 40% mark on the display, the pack is at end-of-life.
Thermal reality check
Charging bricks can be warm, not hot. If the brick is painful to touch or smells like overheated electronics, unplug it and replace it. Heat and odor are red-flag signals for failure.
Drag and debris check
Hair in bearings, sticky wheels, and worn brush ends raise current draw. High drag creates odd charge/stop cycles and can make a healthy pack look sick. Clean mechanics before condemning the battery.
What Not to Do (Mistakes to Avoid)
Skipping these basics invites repeat faults and early part failure. Treat them like house rules: simple, repeatable, and safe.
- Do not scrape metal with abrasive pads. You will remove plating and invite arcing.
- Do not spray cleaners directly onto the dock. Wipe with a damp cloth and let metal dry fully.
- Do not deep-drain to 0% as a routine. Shallow to moderate cycles are healthier.
- Do not park on soft carpet without a firm mat. Pins need a flat base to align and to vent heat.
- Do not ignore overheated or smelly power bricks. Replace immediately.
- Do not tug on the DC jack or let the cable hang with weight; that creates phantom charge faults.
- Do not leave a wet mop pad on the robot when docking; dry it first.
Environment Matters
You can’t control the weather, but you can control the micro-environment around the dock and robot. A dry, stable setup prevents oxidation, misalignment, and heat buildup that quietly sabotage charging.
Heat and humidity
Heat ages cells; humidity leaves a film on metal that raises contact resistance. Place the dock in a moderate, well-ventilated, dry area. If your home is damp, use an under-dock tray and wipe metal parts dry monthly.
Dust and drag
Dust builds in bearings and wheel wells. That raises drag, forcing more current draw and more frequent charges. Clean moving parts regularly so the robot rolls freely and the battery doesn’t overwork.
Real-home layout
Busy corridors, toy bins, and cable nests can nudge or twist the dock and trigger deebot not charging issues. Use cable clips and removable mounting strips. Keep a clear approach so the robot docks squarely every time.
Five-Step Weekly Routine (About 90 Seconds)
Rituals beat repairs. Pair this quick set with bin-emptying and you’ll prevent most charging problems. It’s short by design, so it actually gets done.
- Dock check — Power on, seat the DC plug fully, keep the base flush against the wall.
- Contact swipe — Dry-wipe robot pads and dock pins.
- Brush clean — Remove hair from main and side brushes and check end bearings.
- Approach lane — Keep ~1 m (3 ft) clear in front and ~0.5 m (1.5 ft) on each side.
- App check — Within a minute of docking, battery percentage should rise. If not, fix today.
If something looks off:
Bent or sticky pin means replace the dock. Gouged pads require service. Never mash the robot onto the pins—light contact only.
Dock Setup to Avoid Failures
A good parking spot should be “set-and-forget.” Aim for a straight, well-lit target the robot can see so pins line up cleanly. Small tweaks here eliminate the majority of “won’t charge” tickets.
Wall and Floor Fundamentals
Pin geometry and heat dissipation depend on what’s under the dock. Hard, flat surfaces—tile, laminate, hardwood—are best. If the area is carpeted, place a thin, rigid mat under the dock to create a flat platform and to prevent sinks and tilts.
Clearance and Lighting Cues
Robots find what they can see. Keep about 0.5 m on each side and 1 m forward. If the area is very dark, add a small night-light so IR guidance stays consistent without glare or harsh shadows.
Cable Routing and Jack Seating
Loose, heavy cables cause phantom faults and intermittent power. Seat the DC jack first, then route the adapter cable snugly along the wall so kids or pets can’t snag it. Label the brick so it isn’t confused with a monitor or console adapter.
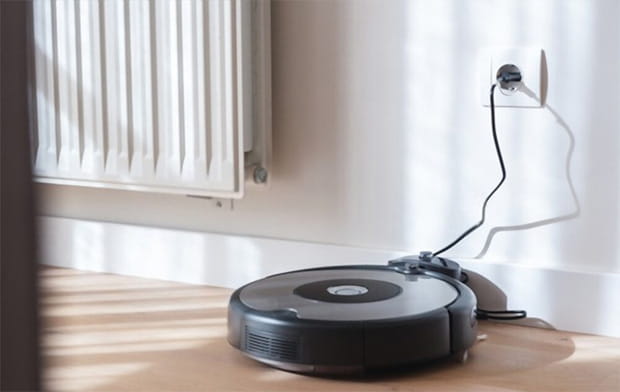
Make sure the dock is properly plugged in
Long-Term Battery Care
Handled correctly, lithium-ion packs deliver hundreds of cycles and predictable performance. The trick is to avoid the extremes—of depth, heat, and moisture—and keep mechanical drag low.
Smart Charging Habits
Avoid repeated deep cycling. Shallow and moderate drains are healthier for everyday cleaning. Let the robot leave the dock as needed—the BMS is designed for that—but don’t let the pack live at 0%. If you won’t run the robot for a stretch, don’t leave it empty.
Reduce Mechanical Load
Less friction equals less current draw. Wipe the main and side brushes, clear hair from bearings, and keep wheels clean. On mop models, dry the pad before docking; moisture can cause surface corrosion and pad arcing over time.
Long Storage and Seasonal Gaps
Packs prefer “half-full.” If the robot will sit idle, store at about 50–60% and in a cool, dry space. On return, dock it, fully charge, then run one normal cycle to re-calibrate the gauge. If the first run is short after months of storage, recharge to full and try again before assuming failure.
After a Battery Swap
Pick a battery that matches voltage, capacity class, and connector shape and length. Install the new pack, charge to full, and expect the gauge to self-correct over the first workday as it learns the curve.
Recycle and Safety
Drop e-waste and old batteries at a proper collection site. Never puncture, crush, short, or heat a battery. Always unplug the dock before cleaning contact surfaces.
Cleaning and Maintenance Keep Charging Safe
The cheapest “upgrade” is disciplined maintenance. A little attention on a weekly, monthly, and quarterly cadence stabilizes run time and keeps contacts healthy. Think of it as preventive care for your charging system.
Weekly Quick Routine
Remove and wipe the dustbin and sensor windows. Dry-wipe pads and pins. Clear hair from the main and side brushes so bearings don’t bind. Spin the wheels by hand; they should turn freely with no gritty feel.
Monthly Deep Tidy
Clean brush bearings; replace worn brushes. Wipe cliff sensors and the front sensor window. Inspect adapter pins and cables for frays or heat marks. Vacuum the docking lane so approach stays debris-free and straight.
Quarterly Health Check
Update firmware, then restart both robot and dock. Test on a clean, hard floor. If run time still dips far below normal under light load, replace the battery rather than chasing ghosts in settings.
App and Firmware (Ecovacs Home): When Charging Is Denied
Software rarely fixes a dead pack, but it does resolve false readings and stuck states. A clean update and reboot sequence often clears odd percentage reports and docking confusion.
Update Properly
A solid Wi-Fi connection matters. Perform updates while the robot sits on the dock. Don’t judge the battery percentage in the first minute after an update—temporary communication gaps can skew reporting.
Reboot the Chain
If you swapped parts or changed setup, clear the basics: reboot the robot, unplug the dock for 30 seconds and plug it back in, and, if Wi-Fi is flaky, restart the router. These three steps reset most soft faults.
Re-Add When Stuck
If the app won’t recognize charging or the percentage behaves oddly in a deebot not charging scenario, remove the robot from the app and add it again. If that still fails, reset the robot, remap a clean area, run normally for two days, then replace any part that keeps misbehaving.
Detailed Model Notes You Can Actually Use
Each model line has quirks, but care routines are shared. Use these as a cross-check: if a symptom matches your unit, apply the note even if the exact model name differs slightly.
DN622 / N79 / N79S
- Charge-pad hygiene: Keep pads clean and dry; these units are sensitive to surface oxidation.
- Soft reset: Hold power/reset 10–15 seconds to clear minor state issues.
- Run-time crash mid-percent: When the robot dies at a mid-level reading or run time shrinks to minutes, the pack has lost usable capacity. Replace with a battery that matches the original specifications and connector.
Deebot 900/901 and OZMO 930/950
- Indicator behavior: Flashing lights mean charging; solid lights mean full.
- Stalls at 80–90%: Update firmware and restart. If repeatable after cleaning and updates, internal resistance has risen. Replace the pack.
- Load sensitivity: Dirty wheels and brushes magnify symptoms. Clean mechanics first.
OZMO Mop-Capable Lines
- Water control: Don’t let mop water accumulate under the dock.
- Pad discipline: After wet mopping, wipe pads dry before docking; moisture invites corrosion.
- Tray tip: If you mop often, a thin tray under the dock protects pins and flooring from splashes and wicking.
Expanded Diagnostics: A Minute-by-Minute Playbook
Use this fast ladder when the robot won’t charge. Stop as soon as the symptom changes. It’s designed to minimize parts swapping and maximize clarity.
- Outlet and adapter — Test the wall outlet with a phone charger. If good, plug in the dock. No dock light means try a new adapter.
- Pins and pads — Dry-wipe pins and pads. Look for bent or sticky pins. If the robot only charges when pressed, replace the dock.
- Cable seating — Reseat the DC plug at the dock and at the adapter. Route slack along the wall to remove weight from the jack.
- Thermal check — After ten minutes on charge, the adapter may be warm—not hot. If hot or smelly, replace the adapter.
- Brush and wheel drag — Clear hair and grit. A smooth-rolling robot charges and runs longer on the same pack.
- Firmware and reboot — Update in the app while the robot sits docked. Reboot robot and dock. Confirm percentage climbs within a minute of redocking.
- Battery verdict — If sessions still collapse early or the robot dies at mid-percent, the pack is finished. Replace with a spec-matched battery.
Everyday Habits That Extend Battery Life
Small habits compound into longer run time and fewer surprises. Keep cycles moderate, reduce drag, and give the dock a clean shot. If the percentage doesn’t rise within a minute of docking, treat it immediately.
- Prefer light to moderate cycles; avoid 0%.
- Dry pads before docking, especially on mop models.
- Keep bearings and wheels clean to lower current draw.
- Maintain approach clearance so docking aligns on the first try.
- Check once, fix once—don’t let “it’ll clear up” become a habit.
Frequently Seen Symptoms and Plain-English Causes
Pattern recognition shortens the path to the right fix. Match your symptom, apply the note, and retest before buying parts.
- “It shows 25% then dies.” Internal resistance is high; under load the voltage sags and the BMS shuts down. Replace the pack.
- “It charges only if I push it.” Weak or misaligned spring pins. Replace the dock rather than shimming.
- “The adapter runs hot and smells.” Failing brick. Unplug and replace.
- “It never reaches 100%.” Oxidized contacts or high drag. Clean pads, pins, wheels, and brushes. If unchanged, battery aging is likely.
- “It stalls at 80–90% every time.” First update and reboot; if the pattern survives cleaning and updates, plan a battery replacement.
Storage, Seasonal Use, and Return to Service
If you pause the robot for a season, store it at half charge in a cool, dry place to avoid deebot not charging surprises later. Don’t trap the dock where mop water can wick or where the adapter sits in direct sun. When you’re ready to resume, dock the robot, fully charge, and run one normal cycle so the gauge re-learns the discharge curve.
Safety Essentials You Shouldn’t Skip
Safety first keeps small fixes small. Power down before cleaning metal, and retire questionable adapters promptly.
- Unplug the dock before cleaning contact surfaces.
- Never short, crush, puncture, or heat a battery pack.
- Recycle batteries and electronics at proper e-waste sites.
- Replace any adapter that runs abnormally hot or emits odor.
- Keep liquids away from the dock; never spray into vents.
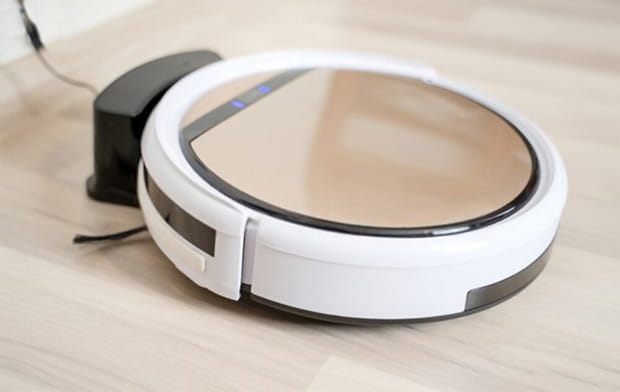
Place the dock away from the wall when possible
Final Checklist Before You Buy Parts
Make one pass through this list so you don’t pay for the wrong part. It’s the simplest way to protect your wallet and your time.
- Confirm outlet and adapter using a phone-charger test.
- Inspect and dry-wipe pins and pads; confirm even spring action.
- Reduce drag: clean wheels, brushes, and bearings.
- Verify the percentage rises within one minute of docking.
- Update firmware; reboot robot and dock.
- If early shutdowns persist, replace the battery with a spec-matched pack.
- If pressure or alignment is required to charge, replace the dock after trying a new adapter.
Appendix: Consolidated Model Notes (For Quick Reference)
Use this summary to double-check your model after you’ve tried the basics. It’s a compact map back to the most likely fix.
DN622 / N79 / N79S
- Keep contact pads dry and clean.
- Soft reset: hold power/reset 10–15 seconds.
- Sudden mid-percent shutdowns and ultra-short runs indicate an end-of-life pack; replace with a matching battery.
Deebot 900/901; OZMO 930/950
- Flashing lights while charging; solid at full.
- If stalls at 80–90% survive updates and cleaning, internal resistance has risen—swap the pack.
OZMO mop-capable lines
- Don’t let mop water sit under the dock.
- Dry pads before docking to avoid corrosion.
- Use a thin tray if you mop often.
Glossary for Calm, Clear Troubleshooting
A short glossary helps you read symptoms like a tech—without the jargon fog. Keep these terms in mind as you test.
- Pads/Pins — Metal contacts on robot and dock that pass charge. Keep them dry and clean.
- BMS — Battery Management System that prevents over-charge and over-discharge; it shuts down if voltage sags.
- Internal Resistance — Increases as batteries age; causes voltage drop under load and early shutdowns.
- State of Health (SoH) — Overall capacity and resistance picture; low SoH shows up as short run times and mid-percent cutoffs.
- Spec-Matched — Battery with the same voltage, similar capacity class, and the exact connector geometry.
Keeping the dock dry, the approach clear, and the mechanics clean solves the vast majority of deebot not charging issues. As TheKingLive notes, when you need parts, match specs exactly. When you’re unsure, let simple, one-change-at-a-time tests point to the culprit. With these calm, native-friendly steps, your Deebot should return to reliable charging—and stay that way.
FREQUENTLY ASKED QUESTIONS
- 01. Why Won't My Deebot Charge On The Dock?
-
Check outlet with a phone charger, dry-wipe pads/pins, reseat the DC jack, and level the dock on a hard surface. If it only charges when pressed, replace the dock (pins are weak).
- 02. Deebot Dies At 20–40%—battery Or Software?
-
Almost always battery end-of-life. Clean brushes/wheels to reduce drag; if it still shuts down mid-percent, install a spec-matched pack.
- 03. Stuck At 80–90% And Never Hits 100%?
-
Clean contacts, reduce mechanical drag, update firmware, then reboot robot and dock. If it repeats, the pack has high internal resistance—replace it.
- 04. Is It Safe To Leave Deebot On The Dock 24/7?
-
Yes. The BMS manages charging. Adapter may be warm, not hot; any burning smell or painful heat means replace the adapter.
- 05. When Should I Replace The Battery And Which One?
-
When run time shrinks or mid-percent shutdowns persist after cleaning/updates. Buy a spec-matched battery (same voltage/capacity, exact connector); OEM or reputable third-party.


