How To Pack A Cooler - Everything You Need To Know On Using Your Cooler For Camping
- Top 3 Ways on How to Clean a Dirty Cooler and Sanitize It Too
- Different Types of Vacuum Cleaners: Everything You Need to Know
- How to Get Smell Out of Cooler in Very Easy to Use Steps
However, as a good friend of mine once said, a cooler is only as good as the one who packs it. Therefore, if you’re planning for your next long trip and you are wondering how to pack a cooler, this article would explain everything you need to know.

The cooler is a must-have item for camping
About the cooler
As enthusiastic campers, hikers, and adventurers,, we know the absolute importance of being well-prepared and well-equipped before any outdoor trips. That’s said, for those long and challenging outdoor recreations it’s essential to be prepared for any situation by packing your stuff with due consideration.
These include tools and equipment that you would be using during your trips, items that can be used for emergency situations, and most importantly, your food supplies. As you go on a long trip, it’s important to make sure that your food and drinks don't go bad due to being exposed to the outdoor environment. And one of the best things that you could do is to have a well packed cooler ready for your trip.
What is a cooler and why you would need one?
Before we get to the packing a cooler part, it’s suggested that you get to know more about your coolers.
As camping and picnicking are getting more and more common these days, especially the long-day trips into the wilderness, the needs of having food and drinks well-preserved are expected. Hence, many people started putting ice into their supply chests to keep the foodstuffs fresh. Thus, the term “ice chest” starts to become popular as storing food during long trips.
And later, they’ve invented insulated boxes (or coolers) that were designed to keep the inner content completely isolated from outdoor environments. To prepare for the trips, you would put ice into your cooler then place your foods inside. The tight lid and insulated body would keep the temperature inside your cooler extremely cold. Thus, preventing foods from going bad because of high temperature.
Hence, for long trips that could take up to 10 days or more, having a good cooler that is properly packed is definitely a must.

Enjoy cool beers with your cooler
Different types of camping coolers?
Here you’ll learn different types of camping coolers and their features:
Plastic coolers
Probably the most common type of coolers due to their durability and affordable prices. The plastic ice chests come in a variety of sizes and designs that can be used for multiple occasions. But generally, you’ll find yourself having large plastic coolers that are capable of holding food and drinks for days. They’re also relatively lightweight and come with convenient handles for easy carrying.
Metal coolers
Like plastic coolers, metal coolers often come in large sizes which are suitable for extended outdoor trips. However, its extreme durability and bulky builds are better suited for high-demanding activities and in tough environments. Otherwise, you wouldn’t want to carry the extra weight that comes with these coolers, not to mention that metal coolers are often more expensive.
Styrofoam coolers
These are pretty much the alternated version of plastic coolers. They’re lighter compared to plastic coolers, but don’t offer as much durability. Hence, depending on your particular needs, you can choose to go for either of them, which are both excellent in keeping your foods well-preserved.
Fabric or insulated cooler bags
And sometimes, for a quick picnic, you can always prepare a small cooler bag instead of the traditional ice chest. They use cooling packs instead of ice and come in relatively small sizes and light weights. This makes them suitable for trekking activities with no car involved.

A cooler bag is more suitable for casual picnicking
Electric coolers
And if your trip goes longer than expected, having an electric cooler that draws power from your car can be quite useful. This would work like your mini-refrigerator and can be connected to a car using the 12V power outlet. However, these tend to be a lot more expensive than your regular ice chest and usually aren’t for heavy-duty storing.
How to properly pack your cooler?
Now that you’ve learned more about the available coolers out there, the next step would be to figure out the best way to pack a cooler for your trip. And here, we have just the right guide for you. Follow the provided instructions below to thoroughly and successfully pack your foods for the next 3 to 10 days.
Step 1 – Create a checklist of all the things that you would need
To start with, be sure to list out all the important things that you need for the trip. This would help you visualize all the items that are required and how you should organize them inside the ice chest.
Depending on the distance that you plan to travel, the number of people, and the amount of days that you would stay outdoors, you can then choose the right type of cooler to bring along.
And by judging the sizes of your cooler, you should also calculate the amount of food and drinks that need to be prepared. Write those down on your notes, paying special attention to the quantities and the types of food that you would want to have.
Focus on proper, nutritional foods such as meat, veggies, and water instead of snacks. When it comes to snacks and treats, it’s suggested that you bring as little of them as possible and only keep small items, like energy bars, inside your coolers. You would want to make space for more important foods instead. And for the drinks, the most important thing would be water, then other beverages.
Always take the sizes of your coolers into consideration so you don’t overpack them with food. Make sure that you only bring those that are most important, and at the same time, you would want to get all the foods that are needed.

Write down the things that you need to pack inside the cooler
Step 2 – Prepare and cool down your foods before putting them in
With the list ready, it’s time to buy the right food and get them ready for the trip.
Start by preparing certain types of food in their own ways. Slice and separate meat into different parts of your preferred proportions, usually for one meal. With the veggies, clean and prepare them before chopping them into the right sizes.
Proceed to put your meat and vegetables into separate plastic bags, preferably with zip locks, so the smell won’t escape and emanate throughout your cooler. You can also season the raw foods before closing the bag so that they can have the best flavors when you take them out for cooking, but make sure not to add any acidic sauces to meats, as they could cook them. Then put everything inside your refrigerator to cool them before you pack. Have the meat in the icebox and the veggies in the cool chamber. This would improve the cooling effects of your ice chest and keep your foods fresh for much longer.
For the drinks, always bring along one or two large bottles of drinking water, making sure that they can fit inside your cooler. These should go in the bottom of the cooler and work just like cooling ice blocks. And once they melt, you will still have refreshing drinking water. Also prepare a few cans of beverages depending on your tastes. Put all of them inside the freezer so that they’re already iced when you take them out for packing.
With other snacks and dry foods, such as bread, fruits, and eggs you don’t need to put inside the freezer, just place them inside the chiller drawer to cool them down.

Prepare foods and veggies for packing
Step 3 – Get the cooler ready and prepare for the packing
After you’re done preparing the foods and drinks, it’s time to check on your cooler and perform some maintenance before packing.
Start cleaning a cooler by rinsing it out with water and scrub the walls with soap. Use a sponge to carefully clean the corners and edges of the cooler to make sure that the inner walls are completely cleaned. You won’t want to store your food and drinks inside a dirty and smelly cooler. Once you finish the scrubbing, rinse out the soap with cool water and turn the cooler upside down to drip off the excess water.
With the cleaning finished, you can spend your time checking out the cooler to make sure that it’s still functional. Start by having the latches checked as you don’t want to have a loose lid. Then proceed to the drain plug to make sure that it’s properly closed and is airtight.
The last preparation that most people would do on their cooler, is to place it inside their house and away from direct sunlight, to let it chill under normal temperature. You can also put a few bags of ice inside of it, a few hours before the packing, just to keep the cooler cool. Remember, you should only pack your cooler minutes before you get going to keep the food preserved longer.

Clean your cooler and pre-chill with ice
Step 4 – Start packing the cooler
With all the items prepared and ready, it’s time for the most important step, which is to pack up your stuff. And here is how to pack a cooler for camping and picnicking trips.
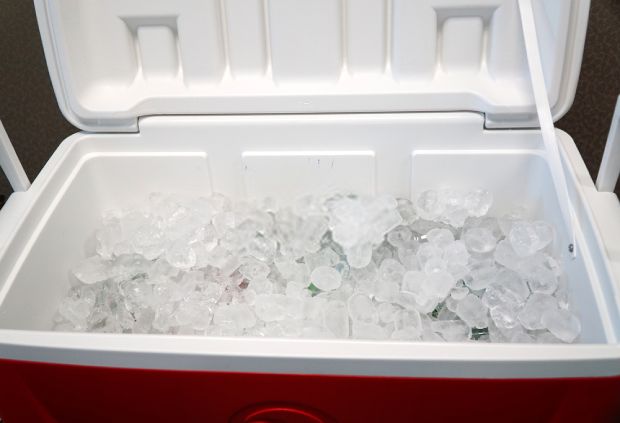
Start by layering the bottom of the cooler with ice. This would be the most important area of your cooler as it helps to cool the foods and drinks on top. It’s recommended that you use block shaped ice since they have the least contact surfaces. And thus, take longer to melt.
Once you finish layering the ice block, you can fill out the spaces left with smaller ice cubes. Make sure to let them cover the entire bottom of your cooler. Then place the large bottles of water that you’ve frozen on top of the ice layer.
Do the same thing with the frozen meals that you’ve prepared. Organize them in order and always go for the ones that you would use later on. Also, try to force a few cans of frozen drinks inside just to keep things extra cool.
Then cover the entire lower section with a large piece of foam or aluminum foil. This would minimize the amount of hot air that can enter the cooling section whenever you open your cooler.

Fill the bottom of your cooler with ice
Step 5 – Organize the food and drinks on the second level
On the second level, you can start placing all the prepared veggies and other dry foods. Remember to follow orders and section the foods into certain areas. These could be canned foods, veggies, snacks, drinks, and so on. Try to note down on the lid where certain foods are positioned so you wouldn’t waste little time taking them out. This would optimize the cooling effect of your cooler, allowing the ice to last longer.
If it’s possible, use wire baskets to keep your foods well-organized and protected from impacts while traveling. This is extremely helpful if you plan to take a long ride to the camping destinations. Once that’s done, put a large piece of foam on top of the food to completely seal it from the outside air. Check for any space left on top of the best cooler in the world and try to put as many cold foods as possible inside.
While you’re packing your cooler, it’s possible to leave out a few food and drinks that you’re planning to consume on the way and once you get to the destination. You can avoid opening your cooler and keep it cool just a little longer by doing this.

Organize the food on your cooler
Step 6 – Finish the packing and get ready for your trip
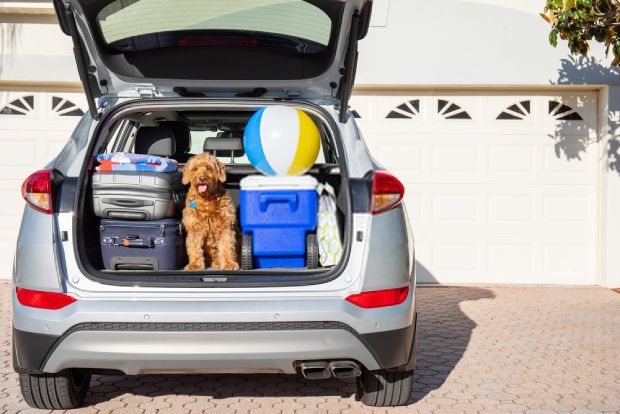
With the packing almost done, you should close the lid immediately to prevent hot air from entering the cooler. Tightly seal the lid back and check the locks before you carry your cooler to the car. Put your cooler in a well-positioned area so it wouldn’t get shuffled around while traveling on the way. If it’s possible, you would want to put your bags and other items around and on top of the cooler to position it before closing the trunk.
And with that, you’ve finished preparing for your next camping trip which could take up to weeks. Feel free to enjoy an iced cocktail and fresh food on the 15th day of your trip, with your well-packed cooler. Learning how to pack a cooler was never so easy.

Pack things up and ready to go
Amazing tips for packing and using your cooler during outdoor trips
To add up to our packing guides, these amazing cooler packing tips will help you with keeping the foods extra cool or make the packing less of a challenge.
Use two coolers if possible
A lot of people tend to pack only a single cooler for their trips with all the different food inside. And by doing this, you would likely have to open up your cooler more frequently to get either your cooking ingredients or even just some snacks. This is absolutely what you wouldn’t want to do during a long trip as the hot air would quickly enter the cooler, making the ice melt faster.
To counter this, many pro campers like to pack their foods into two separate coolers, especially for long trips into remote areas. That’s said, you’ll have a large cooler for keeping frozen foods and veggies, while another small one would be for holding your regular snacks and drinks. That way, you can avoid opening up the cooler too often.

Have another cooler for drinks only
Avoid placing your cooler under the sun
A common mistake that many people often run into while arriving at the camp is that they take out the cooler and completely forget about it. As your cooler is exposed to direct sunlight and heat, naturally, it would get hotter. This makes the ice melt faster, making your food go bad in a short amount of time.
On the other hand, leaving it inside the scorching trunk after a long trip is also not a good idea. That’s said, you should always remember to take out your cooler and place it somewhere cool and in the shade.
Use block ice instead of cube ice for the bottom layer
You might already know this from our guides. As block ice has less exposed areas of contact compared to cube ice, meaning it would take more time for your block ice to melt. However, if you cannot get block ice and must use cube ice or crushed ice instead, there is still an amazing trick to get around this.
You can keep the ice cubes inside the plastic bags and shape multiple bags into the bottom of your cooler instead of scattering them all over. Regardless of how many ice packs for cooler that you’ve used, this trick would help to optimize the cooling effect a lot more.
Always keep foods inside zip-lock plastic bags
And for those of you who’re having problems with your foods getting wet from the melted ice, it would be better to wrap your foods inside zip-lock plastic bags. This would keep food dry in coolers and also prevent the unwanted odors in different types of foods polluting each other.
It’s also possible to use Tupperware instead if you prefer to keep foods well-organized. However, this would also take up a lot of space inside your cooler. Judging on your preferences, feel free to go for either option.

Always keep foods in zip lock bags
Use dry ice to keep your cooler cold
For long trips, some professionals even use dry ice, which is the solid state of carbon dioxide for cooling effects. These are extremely cold and can reach under −78.5 °C. Hence, they’re great at keeping your cooler extra cold, and at the same time, can be quite dangerous if you touch them directly.
So if you plan on using these, you should keep it sealed inside the plastic container and wrap it up with some paper. Put the dry ice in the bottom of your cooler, make sure that it stays as flat as possible. Then position the ice blocks or ice cubes on top.
The dry ice would stay extremely cold and keep everything around it frozen for a significant amount of time.
Just be sure to put on your gloves and always keep the dry ice inside its plastic container to avoid damaging your skin.
➜ RELATED: How to Make Ice Last Longer: A Simple Five-step Instruction is Waiting for You!
Use vacuum sealed bags for more efficient packing
And if you plan to go a little extreme on packing your cooler, it’s also possible to use your vacuum sealed bags to keep the foods. This would minimize the amount of air inside each bag and in the cooler too. Hence, you’ll have more space to store your foods as well as avoiding empty spaces inside your cooler. Thus, making your cooler cold for a longer period of time.
Plus, with vacuum sealed bags, you’ll have even better water insulation and odor control. Not to mention that it would also take longer for foods to go bad, even with outdoor temperatures.
Drain water on long trips
Another tip that you would often get from other people is to drain your water inside the cooler during a long trip. This is because the water from melted ice will also make other ice cubes melt faster, therefore, quickly decrease the cooling effects inside your cooler.
However, at the same time, if you’re only on a short trip and you have a lot of cool drinks inside your cooler, you wouldn’t want to drain off the water though. This is because the extremely cool water will still keep your drinks cool and refreshing for a long period of time. Therefore, allowing you to enjoy your cool beers whenever you want.
Conclusions
Camping outdoors, especially in the wild, is not an easy activity. Hence, you must prepare yourself for any situation. And first and foremost, it’s important to make sure that your foods are well-stored and well-preserved so they wouldn’t go bad anytime soon.
We hope that our guides on how to pack a cooler with ice will help you with preparing foods and drinks for your next trips.
And that’s our options on how to pack an ice chest, thanks for reading and we hope to see you with our future articles.


