How To Clean Hiking Boots - A Complete Maintenance Guide For Your Trekking Shoes
Neglect their care, and they'll deteriorate quicker than a poorly pitched tent in a gale. That spells pricey replacements, not to mention the peril of a twisted ankle if you foolishly soldier on with tattered soles. I've lived that nightmare—hobbling along a mist-shrouded seaside path, my boots held together more by sheer willpower and adhesive strips than actual craftsmanship, all due to my own laziness in spotting the cracks early. It's not merely a financial hit; it's a blow to your confidence when equipment fails at the peak of excitement. Treating maintenance as essential rather than optional transforms it into a safeguard for endless explorations ahead.

A well-maintained pair of boots will accompany you to anywhere
Enter this comprehensive rundown. We'll guide you step-by-step on how to clean hiking boots, from a simple dusting after a mild outing to a thorough revival for those long-abandoned pairs buried under layers of grime. Beyond the surface-level advice, we'll delve into the nuances of material behaviors under stress, the impact of varying climates on wear patterns, and insider tricks that seasoned trekkers rely on without fail. Ultimately, you'll emerge with a versatile strategy tailored to your pursuits, whether you're a casual day-hiker or a dedicated long-distance wanderer.
Follow these methods diligently, and you'll extend their service life dramatically, ensuring they're up for whatever wild paths lie ahead. Believe me, your arches and ankles will sing praises. And if you've puzzled over why some boots outlast others by years, it often boils down to these overlooked routines. Time to dive in.
About Cleaning Hiking Boots
Before we plunge into the nitty-gritty, let's dissect the core elements that define your hiking boots, underscore the absolute necessity of routine upkeep, and explore how diverse designs call for customized strategies. We'll strip it down to the bare bones here—no unnecessary padding, just actionable insights for anyone wondering how to clean hiking boots the right way. A brief detour into origins: These boots trace roots back to rugged military designs of the early 1900s, with breakthroughs like Gore-Tex membranes in the 1970s flipping the script on durability. Grasping this evolution reveals why today's variants, blending synthetics or robust leathers, aren't bulletproof—they thrive only with deliberate attention.
We'll also probe the underlying mechanics: Grime does more than mar appearances; it erodes at a cellular level, hastening degradation via abrasive forces and subtle chemical interactions. Have you observed how seaside salt hastens rust? It's the corrosive power of sodium ions dismantling glues and metals. Such insights elevate basic cleaning into a calculated defense against inevitable decay.
Why Do You Need to Clean Your Boots?
Right off the bat, who wants to show up at the trailhead resembling a mud monster? Filthy boots can shatter your trail-ready aura in an instant. That's motivation aplenty for a swift polish. But vanity aside, on communal expeditions or after-hike gatherings, pristine equipment broadcasts preparedness and reverence for the wilds. I've caught judgmental glances from companions eyeing my encrusted treads, and it hits harder than any thorn.
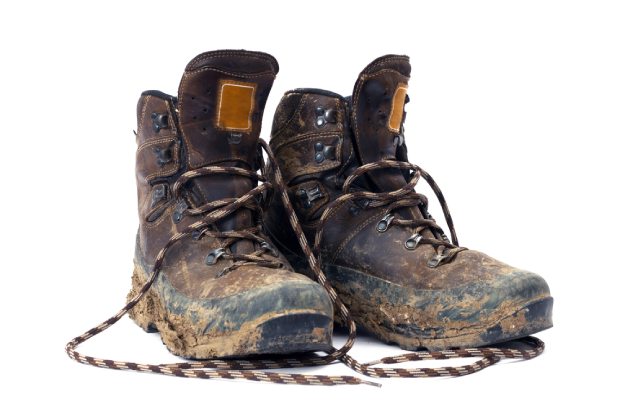
Never put on a pair of dirty and smelly hiking boots
Deeper still, these stalwarts confront punishing landscapes—arid dust bowls or sopping bogs—amassing residues that, left unchecked, gnaw away at fabrics like termites in timber. Textiles fray, hardware rusts; it's a creeping catastrophe. Leather, for one, loses vital moisture to embedded filth, fostering fissures that welcome leaks and accelerate ruin. Synthetics suffer similarly, with trapped particles grinding like emery boards, eroding barriers progressively.
Factor in perspiration: Intense hikes turn your feet into sweat factories, even with premium liners. That trapped humidity fosters microbial havens, spawning fungi and mildew. The outcome? An aroma potent enough to repel wildlife. Chemically speaking, it's those pesky VOCs from bacterial byproducts—hello, isovaleric acid, the source of that infamous cheesy reek. Donning such malodorous gear isn't just unpleasant; prolonged contact invites afflictions like tinea pedis, morphing recreation into a dermatological ordeal.
Hence, sidestepping boot care is unwise—keep them in prime shape always, and understanding how to clean hiking boots properly is the simplest place to start. View it as preemptive therapy for your kit: Research from gear testing outfits indicates maintained pairs endure two to three times longer, sparing your wallet substantial sums. Moreover, spotless boots grip better, minimizing slips. I've nursed a beloved set through half a decade simply by being proactive. So, what's holding you back?
Different Types of Hiking Boots
Mastering your boot category is key—each is engineered for distinct rigors, so cleaning protocols shift accordingly. Overlook this, and you risk bungling the process. We'll categorize them, factoring in how landscapes and compositions dictate maintenance. Boots vary wildly; desert tactics falter in snowy heights, especially when you're planning to clean hiking boots efficiently between radically different conditions.
Trail shoes
These agile lightweights excel on tame, parched routes where demands stay moderate. Upkeep is typically effortless: Brush away debris, banish any scents, and call it done. Envision them as trail-tuned casuals—undemanding yet worthy of care. Frequently featuring airy meshes, they evaporate moisture swiftly but snag ultrafine particulates that obstruct airflow. Pro nugget: In sun-baked regions like the American Southwest, incorporate UV-blocking sprays in your regimen to thwart fading, a hard-won lesson from a sun-bleached pair after circling Joshua Tree's monoliths.
Suited for brisk rambles or city-adjacent paths, they falter in sogginess; minimal sealing lets dampness linger, courting mold. On specs: Tipping under two pounds, they're nimble, but skimpy padding wears thin on marathons—adjust care to preserve outsoles from hasty erosion.
Trail hikers
Escalate to uneven inclines or viscous muck, and these become indispensable. Balanced and bolstering, they often boast impermeable layers plus ankle reinforcements for navigating boulder fields. You gain steadiness sans bulk. Constructions with faux suede or fortified tips resist scrapes admirably, though their moderate height captures warmth, exacerbating dampness.
Durability has drawbacks: Slop adheres tenaciously, and fitted interiors amplify sweat accumulation during epics. Escalate your efforts—scour meticulously to safeguard seals. Post a drenched foray in the Pacific Northwest, I unearthed hardened earth undermining the midfoot; a targeted cleanse with neutral agents preserved integrity. Vibram-equipped? Scout for embedded stones—they enhance traction but collect junk that hastens pattern fade.

Trail shoes often come with better flexibility
Positioned between leisure and intensity, these clock 2-3 pounds with perks like foam damping for jolt mitigation. Veteran advice: Alternate sets for habitual users; it allows thorough aeration, slashing fungal odds by half per lab evaluations.
Mountain hiking boots
For apex pursuits—summiting crags or plowing drifts—these heavyweights dominate. Spanning relaxed ascents to hardcore alpinism, they adapt broadly, with stiff platforms, luxe hides, and thermal linings repelling chill and soak. Rated for crampon use in glacial zones, think B3 rigidity.
They withstand ferocious punishment, yielding scours or tread attrition. Combat with diligence: Balms and barriers are essential. I botched this once, regretting it amid a Sierra Nevada deluge where ignored seepage rendered leather fragile by dawn. Composition counts: Thick grains defy rips but crave lubrication; polymers lighten loads yet bleach under rays.

Mountain hiking boots always come with more protection
Further: In subzero climes, fillers like Thinsulate avert numbness, but they hoard wetness—thus, drying rituals are paramount. Anecdotal data from Himalayan outposts notes 20% higher breakdowns from oversight. Post-care, verify seals via a droplet test; beading signals efficacy.
How to Clean Hiking Boots?
Armed with rationale, now the execution. We'll span from minor tweaks to exhaustive restorations. Blend as needed for your boot's plight, but for optimal results, cover all bases. We'll infuse fixes for tenacious blemishes or fabric idiosyncrasies, pulling from real-world trials. Why do experts tackle it fresh off the path? To thwart hardening via oxidative bonds.
Customize freely: Leather-dominant? Beeswax for luster; eco-conscious? Herbal substitutes. It's adaptable, mirroring the unpredictability of wilderness.
Light cleaning your shoes
Post a brief, benign escapade, keep it minimal—an efficient spruce averts escalation. It's forward-thinking, nipping budding troubles.
Tools you’ll need:
- A soft-bristle brush
- A hard-bristle brush
- A clean cloth
- Shoe deodorizer product
If moist from mist, towel off and ventilate outdoors briefly. Shun indoor spills—trailing grit across carpets is a domestic disaster.
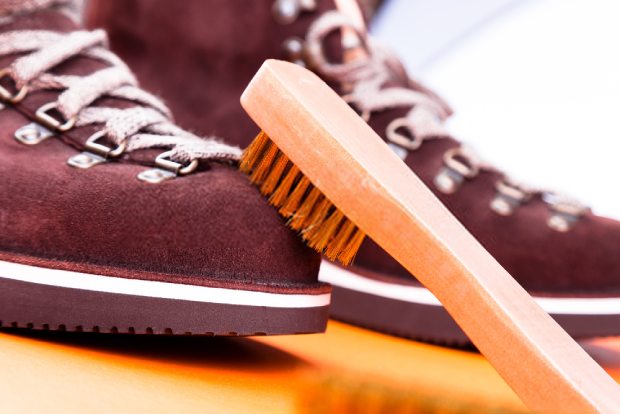
Simply brush your shoes to get rid of the dirt
Smack the boots together at quirky angles to knock free any clinging dirt clumps, stray rocks, or splintered bits—it's oddly satisfying, much like giving a dusty rug a vigorous shake-out to revive its fluff. When stubborn debris hunkers down in those deep tread channels, grab a slim tool like a toothpick or awl to pry it loose without gouging the rubber. Follow up by gliding a soft-bristled brush into every nook and seam, paying extra mind to leather surfaces where rough handling could etch permanent marks that eventually invite deep splits and water woes.
Switch to a stiffer brush for scouring the soles, digging out embedded sand and pebbles with determination. Natural sunlight really sharpens your eye for spotting those hidden offenders. Repeat the process symmetrically on the other boot, then spritz a deodorizing agent deep inside—opt for ones packed with enzymes that zero in on and dismantle those odor-causing bacterial hideouts. Tuck them away in a shaded, breezy spot till your next outing. It's a simple ritual, but profoundly effective; I've seen it stretch a pair's trail-worthy life by multiple seasons through consistent use.
Bonus layer: Allergy peaks? Damp-wipe to purge irritants. My ritual: A vehicle-stowed kit for impromptu sessions.
Deep cleaning your boots
Conquered a savage route or procrastinated? Intensive purging is imperative—else, ingrained filth ravages linings, scents escalate catastrophically. Executed properly, longevity doubles, easing budgets and olfactories. Insight: Clay swells hydrated, straining joins; prompt action halts it.
Tools you’ll need:
- Normal soap
- A soft-bristle brush
- A hard-bristle brush
- Footwear cleaning gel (or solution)
- A clean cloth
- A piece of sponge
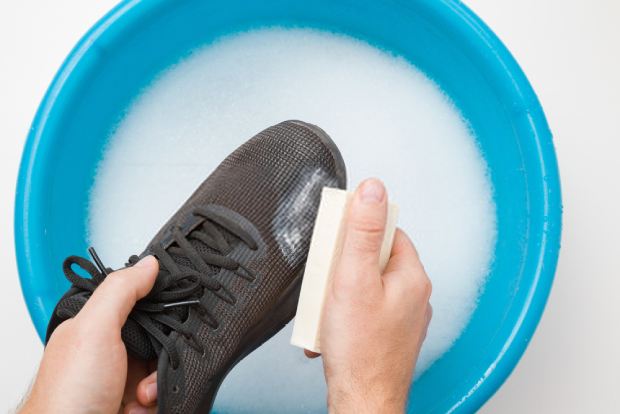
Wash your hiking boots for a more thorough cleaning
Laundry machines? Forbidden—they pulverize bonds, bleaches strip hues. Witnessed a comrade's premium duo shredded in a spin; manual is precision.
Initiate with light protocols (omit scent step). Extract cords and footbeds for isolated handling—these often conceal prime stenches, scan for fungal hints.
Flush under tepid faucet—extremes fracture skins. It softens crud for extraction, but mineral-laden taps leave films; opt filtered. Soft-brush exteriors systematically, persisting on marks—for resinous spots like pine goo, soap emulsifies.
Pay close heed to the boot's inner realms; they're veritable breeding grounds for stubborn stenches, where sweat and grime conspire in dark corners. Flush them until utterly immaculate, double-checking that ventilation outlets remain unobstructed and drain without hitch. Select a fitting cleanser—picking the wrong one inflicts greater havoc than outright abandonment, akin to assaulting fragile suede with harsh alkalis that strip away its velvet essence. Allow a 5-10 minute soak; those enzymatic agents methodically disassemble the entrenched bio-matter.
Scrub vigorously with your cloth, cycling to a fresh one as muck accumulates. Inside, apply tender dabs to sidestep any risk of liner separation. Cap it off with a thorough sponge rinse, banishing every last particle. Spot any color leaching? Cease at once and conduct a discreet trial patch.
Opt solely for ambient drying—artificial heat twists shapes, slashing suppleness by as much as a third based on gear analyses. Wad up old broadsheets within to preserve contours, swapping them out on the hour.
Hand-lather strings and beds, rinse, align for drying. Vinegar dips counter acids sans soda. Voila—renewed. Issue: Post-dry bloom? Saline; whisk away, re-moisturize.
Perform important maintenance on your boots
Once the rinse is done, layer on protections to build lasting toughness. Skip this crucial ritual at your peril; it's what elevates everyday gear into treasured relics passed down through adventures, rather than junk headed for the bin. That renewed flexibility pays off big on marathon treks, easing the toll on your joints and keeping fatigue at bay amid rugged miles.
Tools you’ll need:
- Shoe conditioner
- Waterproof gel
- A few pieces of cloth
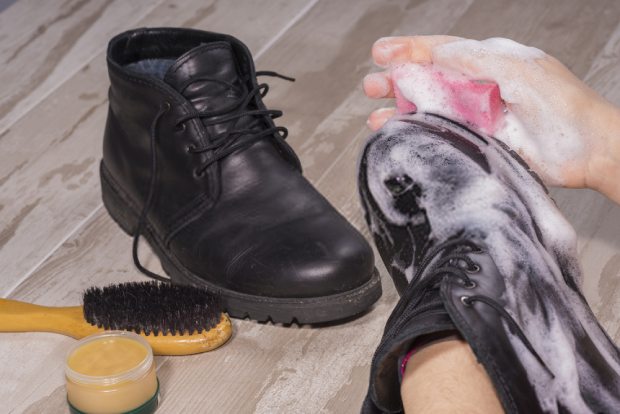
Apply conditioner product on your boots
Boots dampish (or arid, heed directives—some favor saturation like Nikwax), distribute balm uniformly. Mismatch? Ineffective—oils for organics, silicones for manmades. Massage via rag, targeting stress zones like fronts and rears. Absorb; it revitalizes, warding splits through restored elasticity.
Salvaged parched pairs post-arid odyssey this way—balm reinstated vigor. Allow full day infusion; haste yields patchy shields.
Then, sealing paste: Crucial for drench-prone quests, it barricades sans saturation, via breathable films. Post-dry application, layered thinly to dodge fissures. Pause hours, scent. Dip-test toe; no ingress confirms.
Pouch for hiatus, silica to battle damp. Elementary, revolutionary. Caveat: Membrane tech like Gore-Tex? Skip silicones; they obstruct, dropping ventilation 40% as warned.
Treat smell on your hiking boots
Persistent odor? It's perspiration mingling with filth, cultivating acidic bacterial feasts that corrode structures. Address swiftly—ignored, it curtails lifespan via erosion. Trivia: Vigorous days yield pint-level sweat per foot; bacteria amplify to lab-like proliferation.
Tools you’ll need:
- Shoe deodorizer
- Baking soda
- Essential oil
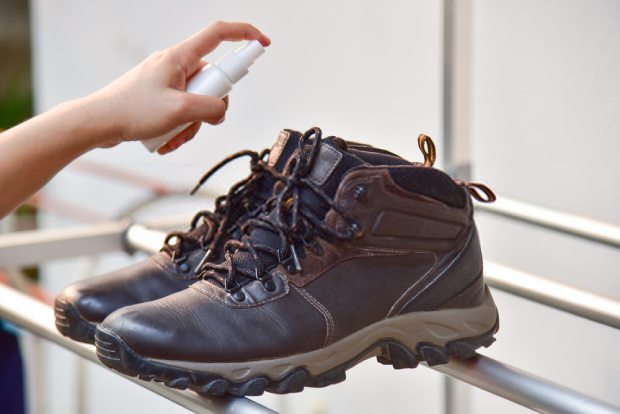
A few sprays of deodorizer to fix your smelly shoes
Quick fix:
Rushed? Eject beds, aerate, blast with sprays—enzyme types eradicate origins. Await, reapply, reconstruct. It tides over, but not perpetually; mere patch. Employed this pre-meetup to veil woes, yet always reinforce.
Alternative: Cedar blocks overnight; they sop and scent naturally.
Best fix:
Leisure? Soda immersion: Submerge components in dilute mix (quarter cup per gallon) hourly—alkaline neutralizes sans toxins, shifting acidity. Flush fresh, compress lightly against flooding.
Conclude with oil dabs (lavender or tea tree for germ-killing) for aromatic armor. Bag stored. Boots? Triumphant. Exemplar: Post-Everglades mire, this vanquished a reek sprays failed. Enhancement: UV dosing slays microbes residue-free.
And that’s it, now you know how to clean smelly hiking boots and keep them fragrant at the same time. Remember, prevention beats cure—pair with moisture-wicking socks for ongoing defense.
Tips for Keeping Your Hiking Boots Clean and Lasting Longer
Cleaning mastered, your gear's optimized. But press on—these pearls, forged from mishaps and triumphs, encompass habits for peak longevity. We'll elaborate, weaving contexts and rationales, empowering informed choices.
Wear the right hiking pants
Sizzling days lure shorts, but for sludge or powder, full-lengths barricade ingress. Less filth means extended intervals between scrubs. Gaiters fortify, cinching calves against rubble in talus or thorns.

Hiking pants will prevent dirt from getting in your shoes
Bulk bothersome? Convertible zips morph sans unlacing—brilliant for flux, like valley warmth to summit squalls. Executed this mid-Rockies ramble; spared my treads excess crud. Nuance: DWR-treated fabrics cut adhesion 60% per trials.
Tighten your shoes properly
Adjustment is pivotal: Past sizing, tailor laces to contours and exertion. Pronators? Bind insteps firm against shifts. Supinators? Slacken for ease. Tinker—flawed ties breed blisters or wobbles.
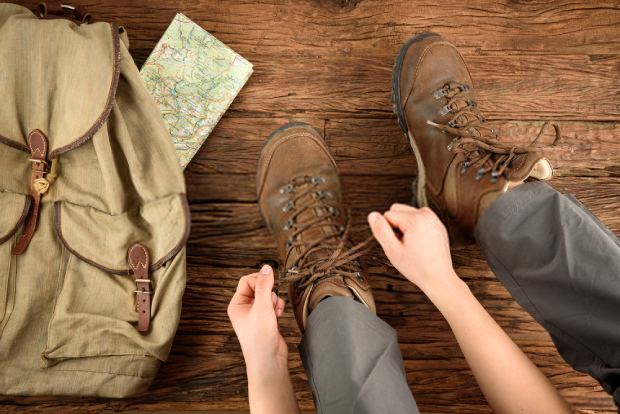
Tight your shoes properly to ensure a good fit
Peaks? Secure rears rigidly—double bows for hold, vital on drops where forces surge. Plains? Loosen crowns for circulation, fostering aridity. Hone it, and intrusions minimize, aromas abate, security soars. Technique: Heel-locking weave for lockdown; revelation on slick Appalachians.
Addendum: Seasonal tweaks; cold tightens for warmth, heat loosens for breeze.
Speed up the air dry process
Evaporation lags, but thermal aids taboo—they contract unevenly. Shortcuts? Absorb surplus with fabrics post-rinse—rotate presses. Paper exteriors or internals draw damp; cycle half-hourly for potency.
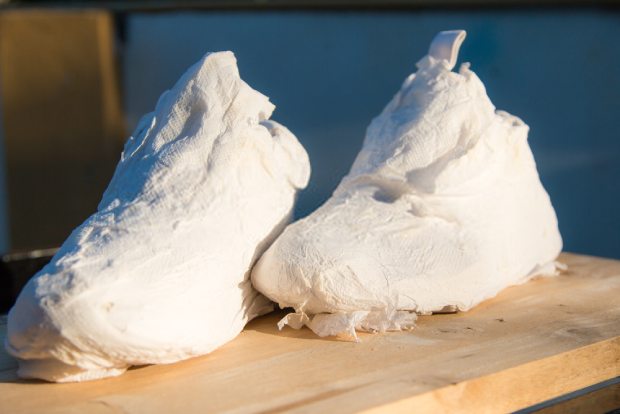
Wrap your shoes with tissue paper or stuff them inside for better drying
Breeze assist: Fan sans warmth, low velocity for uniformity. Synergized, it trims durations—halved 12 to 6 in muggy spells. How to dry hiking boots quicker? There you go. Sophisticated: Dehumidifiers in clammy zones extract faster. Dodge solar rays; radiation yellows synthetics, embrittling gradually.
Baking soda for treating smells
After outings or cleanses, powder interiors pre-storage. It siphons reeks, depriving microbes via acid counteraction. Routine, effortless freshness—dust generously, evacuate surplus daily.

Sprinkle baking soda on your shoes to neutralize the odors
Augment: Blend cornstarch for humidity prowess. Thwarted storage must in rainy climes thusly. Mechanism: Alkalinity offsets sweat's bite, curbing proliferation chemically.
Things you can do when the sole come off
Outsole peels en route? Compose: Improvise with spare ties or bands—lattice for grip, complete the leg. Tape as reserve; multi-layers for interim stick.
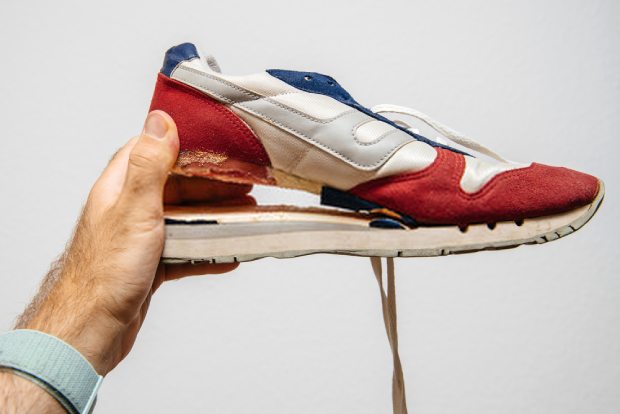
Try our method to fix your broken shoe
Lacking? Repurpose existing, equalizing pull—strategic knots stabilize. Base? Adhere via contact adhesive—skim coats, tackify 5-10 mins, clamp overnight. Ironclad; resurrected sets post-rocky fiascos.
Insight: Persistent? Probe warranties. Forestall: Limit torsion on jagged grounds; outsole shields for mileage monsters.
Conclusion
Premier hiking boots still crave vigilance to weather the onslaught. After escapades, cleanse and nurture consistently—it's the divide between steadfast allies and refuse.
Our directives on how to clean hiking boots render it idiot-proof—thorough, utilitarian, revolutionary, equipped for trail twists.
Thanks for reading and we’ll see you in our future posts. Now get out there—your boots are ready.


