How to Clean Your Room - The Ultimate Remodeling that Every Homeowner Needs
- A Step-by-Step Plan to a Clean Kitchen
- The Easiest Way to Clean a Bathroom
- How to Install Wall-to-Wall Carpet Yourself
And most likely, you’ll have to dive into the piles of junk that are stationed in the middle of your room to look for them. This is time-consuming, stressing, and has literally no positive effects, other than giving you a workout session.
If you’re like me and wish to have a cleaned and well-organized room, then you might want to consider cleaning your room, starting right now. You’ll be surprised to find out how your life can completely change from a small act such as cleaning the room.
To begin with, you’ll find it a lot more convenient with all the required items being exactly where you placed them and within your reach. Moreover, your thoroughly cleaned room will also ensure that you can stay healthy and have a better state of mind.
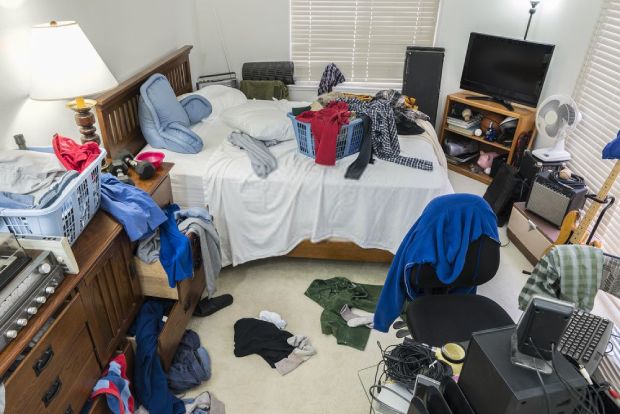
A messy room is not good for both your health and self-esteem
So, what’s keeping you from cleaning your room?
A lot of times, when you’ve neglected your room for too long and it has become a pile of junk that’s both difficult to separate and clean. Thus, making it difficult for you to decide where you should start and how you should handle the cleaning.
Knowing this, our experts are here to help you tackle your cleaning tasks by providing our complete guide on how to clean your room. Here, you’ll be introduced to the different steps and how to properly execute them, so you won’t get intimidated by the number of tasks as well as being completely satisfied with the end results.
For those of you who are in need for a complete room cleaning operation, you’ll definitely find this post extremely useful. Plus, our specific guides on different cleaning tasks on your room will also come in handy whenever you need to clean certain areas of the room.
➜ RELATED: How to Clean With Vinegar - Amazing Remedies and Cleaning Hacks for Homeowners
Just keep in mind that the steps being introduced in our post are universal and can be readjusted to suit your room better. And also, be aware that it depends on how dirty your room is, as the cleaning could take a few days to fully finish. But ideally, if you could just have a whole free day, then you can easily finish within that time.
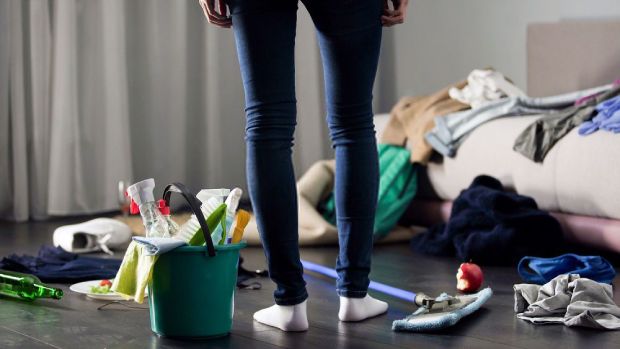
For most of the time, you don’t even know where to start cleaning
Section 2: Things you need to prepare to clean the room
In our complete deep clean bedroom guide, we’ll be tackling all the different areas of your room, which require intensive care. And for each task, you’re going to need certain tools to do your cleaning. So, make sure that you can have them all prepared, before starting your cleaning process.
Here, we’ll briefly introduce all the cleaning steps you need to follow, and at the same time, all the required tools to start cleaning in each and every step. Moreover, we’ll also mention certain alternatives for each tool and items so you can easily have them ready.
Start by preparing yourself for the upcoming tasks
Like with every other project, you’ll need to prepare yourself first before doing anything. This includes putting on some comfy clothes, boost your spirits with some good music, then writing down your cleaning goals and plans. And for this step, you only need something as simple as:
● Your smartphone – to write down all the tasks that need to be done and plan the best way to clean your room. Or, you can always go for the traditional way of using your notebook or a piece of paper and a pen.
● Casual and comfy clothes – you’ll need to stay as comfortable and pleasant as possible inside your outfit. And don’t go for any fancy clothing since you’ll only dirty them in the end.
● Music – Feel free to put on your headphones and turn up your productivity playlist. Or use the speakers if you don’t want to be restricted too much once you get into the cleaning.
Time to take down and out all the stuff that needs to be cleaned or thrown away
A crucial step that you should never overlook, which is to getting rid of all the unwanted items and those that need to be cleaned inside your room. And here are the items that you need to prepare:
● Cardboard boxes – you can get these or anything that’s similar, such as wooden boxes, plastic containers, and so on. Use them to keep all your small items such as books, accessories, jewelry, and all kinds of personal stuff. Get as many of these as you need, depending on how much stuff you have in your room.
● Laundry basket – put all your dirty and old clothes inside to wash later. Just use your prepared cardboard boxes if you don’t have one.
● Plastic bag – to keep all the unwanted items inside. But don’t throw them out just yet.
● Ladder – and if your room has something stored on higher places that are out of your reach, a ladder or firm chair is required to get them all down.
Separate the items and put away the junks
With all the mess strewn all over your room, you’ll need to deal with them first before doing any cleaning. Start by putting items from different categories into the prepared boxes. And use these items to help you:
● Adhesive tape – use this to seal away your cardboard boxes.
● Marker pen – name each different box by the content that’s kept inside. Make certain notes so you won’t forget or mix them up.
Start to clean the different surfaces of your room
As you begin remove all the obstructive items, dirt and dust will start to show all over the room. Now, it would be a good time to clean the different surfaces on your room, by using:
● Clean cloths – soft microfiber cloths will be perfect to clean your windows and glass objects without damaging them. Make sure you get a bunch of these since there’ll be a lot to clean!
● Vacuum cleaner – a good vacuum cleaner plays an important role in this entire cleaning operation. So, make sure you have it ready and don’t forget about the useful attachments, such as the crevice tool, dusting tool, extension wand, and so on.
● Mop – use it to clean the stains on your floors and get rid of annoying odors by using your preferred floor cleaner
● All-purpose cleaner – spray on any tough stain that you need to deal with, on the window, bookcase, table, and so on.

Have your cleaning tools ready
Back to cleaning the stuff that you’ve removed
It’s time for you to start cleaning the stuff that is inside the cardboard boxes. Here are the things that you’ll need:
● All-purposes cleaner – use it to get rid of the stubborn stains on any of your items.
● Clean cloths – use them to wipe away dust and stains.
● Vacuum cleaner – put on your crevice and dusting tool to effectively collect dust and dirt from your old stuff.
Time to move back on your bed
With all that stuff piling up inside your room, your bed is certainly a great place to put them. So, don’t forget to pay attention to it.
● Laundry basket – use it to put your sheets, pillow and duvet covers. And if you want to, also place your duvet and pillow inside.
● Mattress cleaner attachment for your vacuum – this will come really handy if you wish to clean your bedding thoroughly. But you can also use your regular cleaner head for the task.
● Washing machine and dryer – you’re going to need these to wash all your dirty clothes and bedding items. If you don’t have these, just go to the nearest launderette.
● Baking soda – use this to remove the odor from your mattress.
● Sifter – it’ll allow you to distribute the baking soda evenly on the mattress.
➜ RELATED: Baking Soda for Cleaning - The Accessible and Effective Household Cleaner
Once you’re done with all that preparation…
Our last step will involve deciding what you’re going to do with the items and how to organize your room after the cleaning. And while it still features a few items, they’re all optional, so you don’t have to prepare anything.
Since you won’t be needing any more tools after all those that you’ve prepared, let us move on to our complete guides on how to clean your bedroom.
Section 3: Step by step instructions
Now that you know what you need to prepare for your room cleaning tasks, it’s time to focus on the specific steps. Learn how to how to clean up your room with our detailed step-by-step guides. And depending on your room, you can vary the approaches to suit the situations appropriately. Nonetheless, make sure you still perform our separate steps thoroughly and properly to ensure the final results.
Step 1 - Prepare yourself for the upcoming tasks
Before you start doing anything, it’s worth to spend your time to think of a plan and your approaches to certain matters. In this case, for such a huge task such as cleaning your entire room, it’s important to draw out your plans before doing the job.

Spend a few minutes to think about your cleaning plans
Make plans for your cleaning operation
At this stage, you should start to take a look at your entire room to think if there are any that you would like to throw away, put away, or keep. In addition, also pay attention to dirty areas that need to be thoroughly cleaned, and note them down if necessary.
Write in your notebook or smartphone a cleaning your room checklist with intuitive notes. Highlight those that require further attention, and a few details on specific tasks that you might concern. And don’t forget to keep your notes with you so you can easily review them during your cleaning operation.
Get yourself ready and motivated
And once you finish with your planning, you can start putting on something that’s comfy and casual to start your cleaning operation. Feel free to turn on the music from your smartphone or computer to give yourself some motivation. Do what you have to do to feel as relaxed and comfortable as possible while cleaning the room.
Step 2 - Start by getting rid of all the things that need to be cleaned
Every deep cleaning task should start by having all the blocking obstacles removed. And in this case, you might want to take down all the different items from your bookcases, desks, wardrobe, and the like.

Start by taking books and decorations off your bookcases
Take down all the different items
It’s important to remove all those unwanted items so you’ll find it more comfortable, performing the next steps. But for certain large objects such as a television, PC, and the like, it might be more reasonable to keep them where they are, so you won’t have to go through all that trouble.
Start by placing all the items on the ground and on your bed so you can take a look at them later on. Don’t forget about the stuff that is placed at high or inaccessible places such as on top of your closet or those that are hidden under your bed. Use a ladder to reach out for those at high-up locations and use a stick to get things out from the bottom of your bed.
Separate them into different categories if possible
It would be nice if you could spend some time to put the collected items into different categories before you move on to the next one. It’ll save your time in performing the following steps, as well as giving you a good idea of what you have.
At this stage, you only need to decide which items you should throw away and which ones to keep. Put each item into separate cardboard boxes and move on to the other stuff.
Don’t forget to grab your unwashed clothes, put them into the laundry basket and place it away while you perform other cleaning tasks.
Step 3 - Put away unwanted items and throw out the trash
Once you’ve located all the different items and objects that are scattered all over your room, it’s time to organize them and place them in their own categories.

Place unwanted items into categorized boxes
Separate the unwanted items into two categories
Start by separating the stuff that you no longer want and need throw away. There should be two separate categories – the ones that you still want to keep but can’t afford to have inside the room and those that you just wish to chuck immediately.
For those that fall into the first category, you might want to spend a few minutes to do some light cleaning on them and then organize them inside your boxes. Use a marker to write the details on each box, so you can easily identify them later on.
And for those that you want to throw away, it would be nice if you could spend your time to separate them into different boxes. Keep stuff that you can still give out to other less fortunate people such as old clothes, books, toys, and other electronic items. You can also have your own yard sale if you have too much stuff to get rid of.
Remember to sort the junk before throwing them out
The garbage shouldn’t be placed inside a single bag or box. Instead, you should classify it into different categories, especially those that are harmful to the environment such as old batteries and electronic stuff. Put them in separate bags and boxes, then place your junk out for the garbage trucks to pick it up later on.
Step 4 - Clean the surfaces
Now, with all the items inside your room being taken away, you’ll notice that they also leave a lot of dust and dirt on the different surfaces, that will need to be clean off immediately before you start putting stuff back.

Vacuum the room from top to bottom
Use your vacuum to clean up the dust and debris
We’ll start the cleaning by getting your vacuum cleaner ready. Also, pick up the important attachments like the crevice tool, dusting tool, and the extension wand since you’ll need them.
Put on your extension wand and begin the cleaning by using the vacuum to collect all the dust on the higher places such as on top of your closet, bookcase, the ceiling, and so on. Clean your room properly and thoroughly if you don’t wish to have to do this again.
➜ Get More Info: Shark NV803: How to Get the Best Out of Your Vacuum
Don’t worry if there is dust or spiderwebs falling on your floor or bed since we’ll clean them later on. And the main purpose of starting from the top is to make sure that you won’t have to revisit places you’ve cleaned before. It’s also possible for you to stand on a solid platform like a chair or use your ladder to reach those places.
Once you’re done with that, you might want to move on to your bookcase, which is finally free of books to clean. Use the dusting tool and crevice tool to collect dust on each shelf. Run it on the surfaces a few times to make sure that everything is properly cleaned.
Move on to the wardrobe or closet, and make sure you vacuum all the dust and debris that has built up inside of it over time. Do the same things that you’ve done on your bookcase, and let’s move on.
Vacuum your bed to make sure that it’s relatively clean. You don’t need to clean thoroughly, just enough to collect all the debris so it doesn’t fall on the ground when you take off your mattress to clean.
Your desk or bedside cabinet could use some cleaning since they’re pretty exposed. And don’t forget about your windows – use the crevice tool to effectively collect dust and debris from the tracks.
And last but not least, you can spend your time vacuuming all the dust and debris that is scattered on the floor.
➜ RELATED: How to Shine Laminate Floors: The Best Practical Way

Don’t forget to clean with your cloths
Use wet cloths to clean the surfaces
Once you finish vacuuming your entire room, you can put the vacuum away. Pick up your clean cloths and the all-purpose cleaning solution to start working on the stubborn stains and any remaining dirt.
Hold the piece of cloth in one hand while using the other hand to spray the cleaning solution on the surfaces to start cleaning. Wipe the surfaces clean and do that again if you still find them a little dirty.
Start on your bookshelves, then move to the closet and desks. Do this properly so you can get rid of all the dirty stains that are sticking on the wooden and plastic surfaces of your household objects and furniture.
The window should receive proper care since it’s the most visible area of the room, and you don’t want any stains or smudges on the glass. Clean it a few times if you want to and don’t forget to wipe the outer surfaces.
➜ RELATED: How to Clean Wooden Floors With Ease, in the Right Way
Also, clean the doors and doorknob with your cleaning solution. Don’t forget the light switches that are often located nearby. Having these small but crucial surfaces cleaned will make your room a lot brighter.
Mop the floor with your preferred cleaning solution
Finish your surfaces cleaning by mopping the floor with the suitable floor cleaner. Run the mop a few times across the room to effectively getting rid of all the remaining dust and dirt. Also pay attention to the visible stains and smudges.
Step 5 - Clean the items and objects
And once you’ve finished the surfaces cleaning, you can move on to all the items and small objects that are ready to be placed back to where they belong.
Since they’ve also been sitting on the shelves for quite a while now, some of them could be quite dirty, covered with dust and stains. Hence, you might want to clean them first before putting them back.

Clean the small objects with microfiber cloths
Use your vacuum and the dusting tool
Start by having your helpful vacuum ready and powered, attach the dusting tool with soft-bristle brushes on it, and you can begin to pick up dust from all the different items inside your room. Use it on your dust-covered books, toys, souvenirs, and many other small items. Make sure you turn the suction to its maximum and work the brushes on textured surfaces a little, just to collect as much dust as possible.
Use a dampened cloth to wipe away stains
Still, no matter how powerful and effective your vacuum is, it could never deal with the stains and smudges on your items. Now, you’re going to need a dampened cloth for these specific tasks. Use it to wipe picture frames, toys, and other items to get rid of the annoying stains. Just don’t use it on your books though. You can apply some cleaner solution if there are any stubborn stains to effectively deal with them.
And once you’re done with cleaning the small items, just place them away and wait until they’re completely dried.
Step 6 - Clean the bed
After all those room cleaning techniques and steps, you shouldn’t forget about your bed, which is also dying to be taken care of. Not to mention that during your previous steps, the scattered dust and debris has also dirtied your bed.

Take out the bedding for a wash
Start by removing all the bedding items
You can either go for the light cleaning which involves only your pillowcases, sheets, and duvet cover. Or perform a deep clean by dealing with all bedding items such as the pillow, duvet, and your mattress. But for this particular guide, we recommend you to stick to the deep cleaning to avoid having to clean your stuff too often.
➜ RELATED: Improving Your Sleep With the Best Mattress Topper - Read Now
Take them out for a wash
Put your pillowcases, sheets, and duvet cover along with your clothes in the laundry basket. As for the duvet and your pillowcases, it’s recommended to put them in another basket, since you’ll be washing those separately.
Clean your mattress
And of course, with that gigantic size, you won’t be able to fit your mattress into any laundry machine. Instead, what you should do to get rid of the unpleasant odors and dirt inside your mattress is to use baking soda.
Just pour baking soda inside your sifter and gently tap on it to distribute the chemicals onto your mattress. Wait for about an hour for the effect to kick in while you spend your time doing other stuff. The chemicals will absorb all the odious and unhygienic elements inside the mattress, making it cleaner and smell better too.
And when the time comes, just use your vacuum to collect the baking soda. Make sure that the cleaner head is absolutely spotless since you’re using it on your mattress. Some new vacuum models even feature their own proprietary attachment for mattress cleaning, which is quite nice if you to have one.
Wash your clothes and bedding items
Take the two baskets to your laundry room or to the local launderette if you don’t have a washing machine or dryer. Just do the regular tasks that you usually do and put the first basket into the washing machine, set the cleaning mode to auto and add detergent.
As for the pillow and duvet, since they also come with fillings, you’re required to clean them more gently. Thus, you must set the water temperature to warm and only wash at a low intensity. This would take a long time but you can maintain their fluffiness and comfort after the cleaning.
This also applies to the drying stage. Once the bedclothes and your regular bedding is washed, you can put it in the dryer and let it work until everything is dried. The duvet and pillow can be placed inside the dryer, but remember to run it at a low level. You can also air-dry your items if you have the time, but although it’ll take more time, the results are not so different.
Put back your beddings
Once you finish the cleaning, it’s time to put things back to where they belong. You might want to iron your sheets, pillowcases, and duvet cover first before putting them back. Start by laying the sheets evenly and neatly on the bed. Stuff your pillow back to the pillowcase and the duvet back into its cover. As for the clothes, we’ll deal with them in the following step.
Step 7 – Place your items back to the room and organize them
In this step, you can finally put back all the items that you’ve taken out at the beginning of your room cleaning session. And to help avoid any “messy room” problems in the future, you can follow our provided instructions to effectively organize your room.
You can start by paying attention to your closet, which is easily the most important section of the room. Here, you’ll find yourself using it at least a couple of times a day, and it’s exactly why your closet is the first area to get messy and disorganized.
To prevent this, you should organize your clothes and items according to your own habits. It’s basically by placing those that you use often within your reach while keeping the other “less” casual clothes in their own place.
Invest in some wall-mounted hooks and hangers so you can drape your clothes on them without placing them on your chairs or bed, which in many cases, will result in a messy room filled with unwashed clothes.
Pile-fold your clothes if you plan to keep them inside your closet cabinet to optimize the space and make things a little easier for you to see and select your clothes. On the other hand, for drawers, it’s recommended that you go for the file-folding approach since it’ll allow you to completely see what you’re having in there.
And of course, you should always pay attention to your closet to make sure that everything is nicely folded and well-organized. Neglect it a few times, and you’ll soon end up where you started.

Organize your clothes before putting back
Organize your bookshelf
As for your precious books, it’s crucial that you put them back properly so they won’t end up getting messy again.
Hence, you should start by organizing your books into the order that you’re going to put them back. Just lay your books on the ground or the nearby table and bed if you want. Take your time to browse through your many books and come up with the most preferred style of organizing.
You can follow the tradition by placing books with the same genres or the first letter together so you can easily navigate to your favorite books whenever you want. Or go for more stylish ways of placing those with matching-colors together, which will make your bookcase look a lot more appealing.
Speaking of which, don’t forget to spare some room for your souvenirs, picture frames, and other decorations. By throwing away a lot of unwanted stuff, you’ll find yourself with a lot of space to organize these things.

Keep your bookcase neat and tidy
Organize your desk
And since you often spend your time working on it, your desk could get messy relatively quickly if you don’t know how to organize your stuff. Therefore, make sure you spend a couple of minutes to try putting all the items back in their rightful places.
Start by setting priorities for your commonly-used desk items. Those that are more essential and occupy less space should be placed on your desk. And those that take up more space should be placed inside the drawer.
In addition, if you have too much stuff to place on the table, you’ll need a few accessories to make it less untidy. Start by having an office shelf placed on your desk. You’ll be surprised to find how much stuff that you can fit on it. Also, remember to use a monitor raiser to allow for a better view and give you new storing options.
As for the drawers, you can have your drawer organizers prepared so the items won’t become untidy once you place them inside.
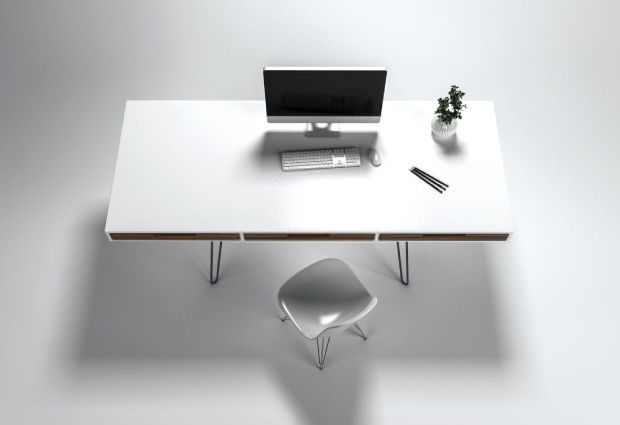
Clean your desk and minimize the stuff you place on top
Section 4: Cleaning tips
And after all those tedious cleaning and organizing processes, you wouldn’t want your room to get messy all over again, right? That is why, to avoid this from happening, you should pay more attention to your room. Start by taking our experts’ advice on the best tips for cleaning your room.
With these, you can easily keep your room well-organized for a long time without any major cleaning to do. Not to mention that you’ll find some of the most incredible hacks that can help you improve your dirty room in 5 minutes.
➜ RELATED: 50 Cleaning Tips and Tricks - Easy Home Cleaning Tips
Keep your clothes off the floor
When you get home, the first thing you would want to do is definitely to get rid of all that extra weight that is stressing your down. However, don’t just drop off your clothes right on the floor, since it’ll be the first step that would lead to a disorganized and messy room.
Instead, you can have your laundry basket right in your room and put those that need to be washed inside of it. As for the other clothes, you should place them on your wall-mount hooks and hangers, instead of draping them on your chairs, beds, and the likes.
Clean your sheets and pillowcases often
For those who don’t know yet, our body lets out sweat, oils, and dead skin while we sleep. And that’s the reason why your bedding often gets dirty and smelly over time. Not to mention that these things also attract dust mites, which are quite troublesome for those who suffer from asthma and such allergic conditions.
Hence, it’s recommended that you wash your sheets and pillowcases at least once every two or three weeks to prevent them from getting dirty. If you neglect them for too long, dust mites can get inside your pillow and mattress, making it a lot more difficult to clean.
Lightly clean your room once a week
Don’t be overwhelmed by the idea of having to clean your room every week since it’s pretty easy once you’re used to it. Besides, since you’ve already deep cleaned your room, it should be a lot cleaner now and there aren’t many tasks you must do.
Just vacuum your room and your bed to collect any new dust and debris. Spend some time to empty the laundry basket and make your bed. And if you have more time to spare, you can also vacuum your desk and bookcases to make sure that they stay nice and clean.
Don’t bring food into your room
Everything should be in its place, so you don’t have to waste your time cleaning things up once you’re done. That being said, if you plan to bring your food inside your room, it’s clear that you’re going to dirty the room. So, you can either save your time cleaning by eating in the kitchen. Or clean up your mess right after so you won’t get overwhelmed later on.
Use a lint roller to quickly clean your bed
And if you think that your vacuum head is a little dirty to be placed on the bed or you don’t want to waste your time to take it out just for a bit of dust and debris, then a lint roller should come really handy. Just use it on your sheets and pillowcases if you’re a little lazy on that day. Plus, the results are often quite similar to vacuuming.
Many other useful tips and tutorials on how to clean your room fast are available on our website. So, if you’re interested, you can always get more advice through our informative posts. In the meantime, you can always review our guides through this video:
Section 5: Conclusion
While the deep cleaning process in your room can be quite tedious and stressful, it is still something that you should do if you care about your health and wish to improve your mental state.
With the provided step-by-step instructions, you can easily follow our guides to effectively clean your room and make it a much better place. Give it a few days to finish if you don’t have enough time or dedicate an entire day with help from your friends to clean your room fast.
And that’s our complete guide on how to make your room cleaner. Hope you’re satisfied with the provided information and thanks for reading. We’re looking forward to seeing you in our future posts.


