How to Change and Empty the Vacuum Bag: 5 Essential Steps to Remember
- Carpet Made Easy: How to Remove Carpet?
- How Often Should You Vacuum? - The Complete Guide to Household Vacuuming
- How to Make Vacuum Smell Better - Why Does My Vacuum Cleaner Smell Bad
In this guide, I would like to share my real experiences about how to change vacuum bags for a bagged vacuum machine. The way you replace vacuum bags is very important, hence, you may require you to spend some time to read through this simple guide. Don’t worry! I’m sure it’s going to be super easy to follow. Let’s go and take action!
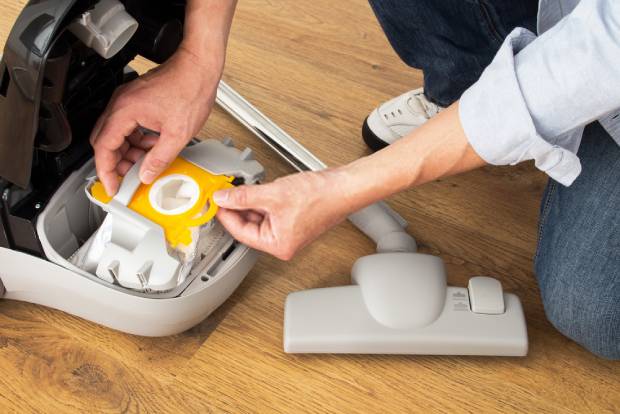
Install a new vacuum dust bag
I am not going straight to the step-by-step guide because it may force you to leave this article and want to get rid of your bagged vacuum cleaner. A vacuum cleaner with a dust bag offers several benefits that can match with your living conditions.
1/ The advantages of bagged vacuum cleaners
Bagged vacuum cleaners are more popular than bagless ones because they have been introduced before bagless vacuums. Let’s drill deeper into the pros of this type of vacuum cleaner.
● Dust and debris are securely stored in the bag
As its name indicates, this kind of machine keeps dust, debris, and allergens well in a zip bag. Although we must replace vacuum bags when full, this way makes sure that all dust will not get back into the air after vacuuming. With the development in technology, vacuum dust bags are designed to keep our living environment always clean during and after vacuuming. This is why the bagged vacuum is highly appreciated in terms of hygiene options.
● Allergens are reduced effectively
This type of vacuum cleaner is recommended for people with allergies. Allergy sufferers don’t need to be worried anymore when their houses are being vacuumed, because all dust and debris is removed from their home and stored in a dust bag.
● Maintenance is simple and cost-effective
Bagged vacuum cleaners do not require much maintenance compared to bagless vacuum machines. Many people think that we need to change dust bags very often but in fact, one dust bag can store up to two pounds of debris; thus, we don’t need to replace it many times. The only one thing that we need to remember is the best time to install a new dust bag.
Tip:
In order not to be frustrated when your bagged vacuum cleaner does not perform well as it has to, you should buy more dust bags as a back-up for your house. You know what? When a dust bag gets full, it will make the vacuum machine reduce suction and the cleaning result will not meet your expectations.
Now,
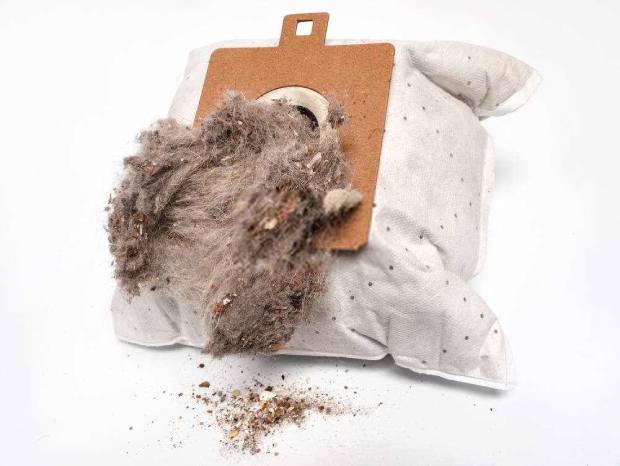
A fully filled vacuum dust bag
You may be wondering how to know when the bag is already full or needs to be replaced. Two scenarios can occur if you don’t replace vacuum dust bags properly. “Properly” here means replacing the bag at the proper time and in a proper way. You risk wasting your money when changing a dust bag too early or you may waste your time when vacuuming with a dust bag that is too full to accommodate more.
Fortunately, some new models have indicators to inform us about the dust bag condition.
Next,
How to replace vacuum bag in the right way?
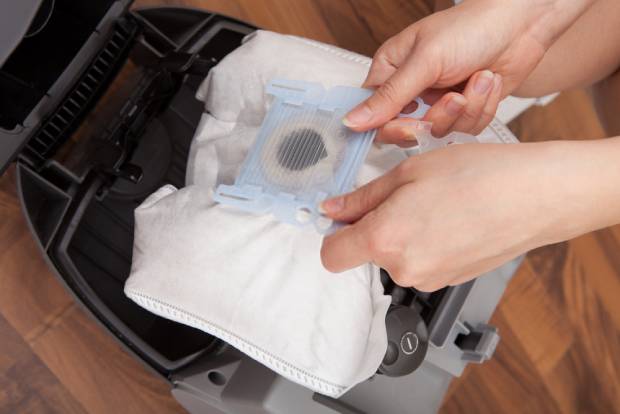
A woman is replacing an old dust bag
This part is going to provide you with essential information about choosing the right dust bag for your vacuum cleaner at home. Installing a wrong bag may harm your machine in the long run.
Different types of vacuum bags
All vacuum cleaners have a letter indicating the type of dust bag. Here is all the information about these letters and their meanings:
● C, D and E
Vacuum bags having these letters are specifically used for upright vacuum cleaners. Different letters stand for different sizes of dust bags of this type. The upright vacuum machine uses its brush to suck all dust and dirt thanks to the suction fan. Nasty contaminants are stored in the bag and your house will be totally clean.
● F, J and K
This type of vacuum bag is used for canister vacuum machines. Once again, the three letters stand for three sizes of dust bags. The canister vacuum is accompanied by a brush and a long hose. All dust and dirt will go through this long hose to reach the vacuum head. The dust and debris is left behind to keep your house fresh and clean.
● G
This letter is used for a small vacuum cleaner which is called a hand-held vacuum machine. This type is not as powerful as other types but it is more convenient to quickly clean small areas. All dust will go directly to the dust bag, thus, the bag plays also the role of a filter. This kind of bag is small and you need to be aware that you have to change it frequently.
● U
This type of vacuum bag is more flexible when it can be used for all hand-held, canister vacuum, and cylinder cleaners.
Once again, I would like to emphasize the importance of changing vacuum dust bag properly because it improves the vacuum cleaner’s performance because new dust bags can increase airflow without making the machine work hard.
And,
You must use genuine branded vacuum dust bags for your machines such as Eureka, Miele, Philips, Hoover, etc. You may find the prices of these branded dust bags a little higher than other dust bags but they worth your investment.
You must check carefully your machine and the manufacturer to have good choices of dust bags to meet your vacuum machine’s needs.
Each of you may ask about different ways to change vacuum bags:
How to replace Eureka vacuum bag? How to change Philips vacuum cleaner bag? How to change Hoover vacuum bag? How to change a vacuum bag Miele?... Many questions are asked about this basic but important maintenance task.
As a normal consumer, I am unable to answer all of these questions technically right as the manufacturer. However, all steps below are essential and can be applied for all kinds of vacuum dust bags.
➜ RELATED: How to Clean a Shark Vacuum - The Ultimate Guide
5 essential steps to replace vacuum bag
What to prepare?
● Dust bag
● Face mask
● Machine’s manual
Step 1: Cut power
This step is required for all maintenance tasks because self-safety is the priority here. Before starting to replace your vacuum dust bag, you must make sure the power of the machine is unplugged in order to prevent any possible serious accident.
Step 2: Open the top cover of the vacuum cleaner
You can easily find the top of your vacuum machine to open it. If you are not confident that you can open it, you should read the manual to open it correctly. You may find it on top or at one side of your machine depending on the model you are using. The bag container varies along with the types and models of vacuum machine.
Step 3: Check the dust bag to make sure it’s the right time to change it
Whether your machine has an indicator light or not, you should check the dust once again if it is more than half-filled. It’s a waste if we replace the dust too early.
Step 4: Remove gently the dust bag
This step asks you to be careful and gentle when removing the dust bag from the machine. Some models of vacuum cleaners have a spring guide for holding the dust bag. You just need to pull it gently to remove the bag. Be careful when removing the bag to prevent all dust from spilling.
Step 5: Install a new dust bag
It’s time to place the new dust bag in its right position. Make sure you do it properly; thus, all dirt can be collected inside it.
You should take the time to read the manual packed with your machine to know about your machine‘s type and manufacturer’s recommendations. You need to be updated with all information about the type of the vacuum, the type of dust bag, etc.
Additional information about vacuum dust bags
● Most vacuum dust bags are in standard sizes that can fit all brands of vacuum cleaners. For example, dust bags marked “C” can be used for all upright vacuums, no matter whether it’s a Hoover or Eureka one.
● If possible, it’s best to buy genuine vacuum dust bags recommended by the manufacturer. The reason is that the manufacturer may have special added features, and only authentic dust bags can meet those requirements. Your machine can work a lot better with branded dust bags rather than generic ones.
● Another small thing that most of you are probably not aware about is the size of the dust bag. Normally, most of you only think about the type of dust bag, the brand and the price but not the size. Please note that it’s important to install the right size of the dust bag in order to store all dust and debris. On one hand, if the bag is too big, it cannot keep connected to the machine. On the other, if the bag is too small, it will rip or tear easily.
In the last part of this guide, I would like to share a short instruction about how to make reusable homemade vacuum cleaner bags. The cost of buying dust bags can be significant and throwing dust bags frequently can create unnecessary trash. Making your vacuum cleaner bags is time-consuming but if you can arrange your time, why not?
➜ RELATED: How to Clean Dyson Vacuum Cleaners in Easy Steps
How to make homemade vacuum cleaner bags
You will need:
● Paper bag
● Sewing kit
● Drawstring
Instructions
Step 1: Create a template for your fabric vacuum bag
Choose one of your old paper bags and use it as a template for your vacuum dust bag. Lay your cotton fabric on a surface and then, put the paper bag on it. Start cutting the cotton fabric to form a general outline for the dust bag. Please make sure the cotton fabric is two inches larger than the paper bag.
Step 2: Sew the fabric dust bag
Don’t worry, because you don’t need to be perfect at sewing! First, you fold the fabric cut above in half. Then, you use the needle to start sewing from the bottom. The seam needs to be ¼ inch from its edge. Next, make another seam ¼ inch from the first inch. These double seams are to ensure that your fabric dust bag is hard to tear or to rip.
Repeat the same thing for the other side.
Step 3: Create a drawstring
Use the scissors to make holes around the top of the sewn fabric dust bag. The holes should be close to each other. Then, start threading the string through these holes until all holes are filled. This step allows us to tie the fabric dust bag to form a slipknot and attach it securely in the vacuum cleaner.
This homemade vacuum bag is reusable, thus, the way to empty vacuum bag is one of the important things to pay attention to in order not to damage it after using it only once.
How to empty vacuum bags?
With this fabric homemade vacuum bag, first, you loosen the drawstring and take the bag out of the machine. Next, turn the bag inside out to empty all dirt and debris. Finally, you can clean the bag before reattaching it to the top rated vacuum cleaner.
Final Words
I hope that the question “How to change vacuum bags?” is perfectly answered in this guide. Once again, please bear in mind that this task is a must for a bagged vacuum cleaner bag to capture all dust, dirt, and allergens, especially if your house has pets or children. In all cases, please read the manual before performing any maintenance tasks like this.


