Carpet Made Easy: How to Remove Carpet
- How to Change and Empty the Vacuum Bag: 5 Essential Steps to Remember
- How to Make Vacuum Smell Better - Why Does My Vacuum Cleaner Smell Bad
- How to Clean a Carpet - TOP 9 Cleaning Carpet Tips
Sure, calling in pros to yank out old carpeting sounds straightforward, but brace yourself for the bill—especially in a sprawling home where every room is blanketed in it. Pros often price by the square foot, so you're looking at anywhere from a few hundred bucks to a couple grand, depending on the scope. Ouch.
The silver lining? Armed with a bit of sweat equity and solid pointers from folks who've been there, pulling off your own carpet teardown is way more achievable than it sounds—I've turned skeptics into converts with just a weekend's effort. Dodge those eye-watering pro charges by snagging rentals from spots like Home Depot or your corner hardware joint, then jump right in. It's a real confidence booster, not to mention the serious cash you'll pocket for that next home upgrade.
In this guide, we'll walk you through every step of ripping out that tired carpet and prepping for a fresh install. You'll get the lowdown on carpet basics, plus tips for handling rooms or tricky stairs. We'll also dive into why carpets rock (and when they don't), along with pro-level advice for a smooth swap. Pay close attention—these details could mean the difference between a flawless job and a frustrating mess.

Old carpets will need to be removed
About Carpeting
Let's kick things off by unpacking why wall-to-wall carpets are a homeowner's secret weapon—and why, despite their perks, they don't last forever. Ever wonder what makes them tick? Or when it's time to bid farewell to that faded favorite? We'll break it down.
The Benefits of Carpeted Flooring
Homeowners rave about these upsides for good reason. Here's the scoop on what makes carpeting a smart pick:
Beauty and style
Few things revamp a room quite like unrolling a brand-new carpet—it's that magical refresh that sparks joy and ties everything together. Suddenly, your space has character, a welcoming glow that draws people in. Imagine the possibilities: a rainbow of colors, intricate patterns, and varied textures turning you into an impromptu interior guru. Stick with understated earth tones to ground bold artwork and furnishings, or crank it up with electric blues and geometric designs that command attention. Don't overlook the tactile appeal—that sumptuous, foot-pampering weave can elevate a drab den into a plush sanctuary. Over the years, I've watched friends mix rugged loop piles with minimalist scandinavian vibes for effortless chic, or dive into retro shag for kid zones where spills vanish into the forgiving fluff. It's all about matching your lifestyle—durability for busy families, elegance for serene escapes.
➜ RELATED: How to Get Dog Hair Out of Carpet - How to Get Rid of Dog Hair in House
Improve air quality
Here's a subtle perk that creeps up on you—not screaming from day one, but building quietly with routine care until bam, breathing feels easier. Think of carpets as silent guardians, capturing drifting dust mites, pollen grains, and fluffy pet remnants that'd otherwise whirl through the air like invisible troublemakers, sparking allergies or that nagging stuffiness. One solid vacuum pass revitalizes both the surface and the atmosphere overhead. Insider advice: For homes battling sniffles, invest in a HEPA-equipped model and schedule steam treatments every few months to amp up filtration—it's like giving your indoor ecosystem a tune-up. Of course, the catch? Let upkeep slide, and those same fibers morph into allergen hideouts, trapping more harm than good, which is why vigilance pays off big time.
Warm and cozy
When winter bites hard in frosty climates, this benefit shines brightest, flipping the script on drafty discomfort. Carpets excel at locking in warmth, forming an insulating shield that blocks chilly updrafts from seeping through subfloors or concrete slabs. Stepping onto that dense, cloud-like pile barefoot at dawn? Pure bliss, no more tiptoeing on icy tiles. It invites lazy afternoons—youngsters building forts amid toys, or you sinking into a novel with tea in hand. From my own reno adventures in creaky victorian fixes, layering on premium underlay has cranked the snug factor sky-high, morphing bone-chilling basements into inviting nooks where you linger longer.
Add cushion and friction
It's not just about feeling good underfoot; this layer pulls double duty as your household's unsung protector. That resilient padding absorbs impacts from everyday stumbles, cushioning joints and minimizing bruises—vital in setups with curious toddlers exploring or seniors steadying their steps through corridors. Envision it as an embedded safeguard against life's clumsy moments, turning potential wipeouts into soft landings. Amp it up in bustling areas like mudrooms with grippy, woven varieties that boost traction and slash slip hazards, especially on rainy days when shoes track in moisture. I've recommended these to clients post-incident, and the peace of mind? It's worth every penny in preventing those heart-stopping close calls.
Prevent noises
Finally, carpets are acoustic heroes. Their fibrous structure absorbs sound waves, muffling echoes and vibrations that echo through bare floors. Noisy households? This cuts down on footsteps thumping overhead or kids' playtime racket traveling room to room. In apartments or multi-level homes, it's a must for peace and quiet—I've advised clients to add extra padding in media rooms for that cinema-like hush.

A nice carpet will complement your room
When and Why Do You Need to Remove Your Old Carpets?
Even the toughest products wear down eventually, and carpets are no exception. Regular care-like spot-cleaning spills pronto-extends their life, but there comes a point where patching won't cut it. Spot these red flags, and it's time for action. Ignoring them? You risk health hazards or a space that just feels off.
Your carpet is getting old
Age catches up after 8-12 years, even with diligent upkeep. Flattened patches from heavy furniture or constant walking make it look shabby and feel less supportive-plus, they get slicker, upping slip risks. Warps, tears, or frayed edges? They're trip hazards waiting to happen, and they drag down your room's appeal. Swapping in new stuff restores that bounce and polish, breathing life into tired spaces. Imagine ditching a threadbare relic for something plush-it's like a room makeover on a budget.
➜ RELATED: How to Clean a Vacuum Filter: Tips and Tricks Worth Knowing
Stains and odors
Those mystery spots from long-ago parties or pet accidents? If you shoved furniture over them instead of treating fresh, they're likely permanent now. Food remnants or urine can breed funky smells that linger, turning your home into an unwelcome zone. A full replacement erases the evidence, restoring freshness. For tough cases, I've seen enzymatic cleaners help temporarily, but nothing beats starting over for that clean-slate scent.
Dusty and allergens
Decades of use pack in grime that vacuums can't fully extract-dust mites, mold spores, you name it. The padding underneath is even worse, trapping allergens that trigger respiratory woes like asthma flare-ups. Washing helps, but it's no match for embedded filth. Removal lets you inspect for hidden issues (like moisture damage) and install hypoallergenic options, ensuring healthier air for everyone.
Want a new change
You don't need catastrophe to justify an upgrade. Bored with the current look? A fresh carpet can reinvent the room-switch from beige to bold patterns for energy, or textured neutrals for calm. It's a low-commitment remodel that refreshes without major renos. Clients often tell me it's the spark their space needed.

Worn-out carpets will need to be removed and replaced
How to Remove Carpets
Ready to roll up your sleeves? Removing old carpet isn't rocket science, but precision matters to avoid damaging floors or injuring yourself. If you're trying to figure out the best way to remove carpet without damaging your subfloor or your back, the step-by-step process below keeps you on track. Follow these steps closely-I've thrown in extras like tool alternatives and what-ifs for real-world hiccups.
Step 1 – Preparation
Don't dive in unprepared-gathering the right gear upfront keeps things safe and saves headaches down the line. I've botched a few jobs in my early days by skimping here, so trust me: this list is gold. Each item's got a purpose, tailored to common pitfalls like hidden nails or dusty surprises. If you're short on something, check online rentals or borrow from a neighbor-it's cheaper than a trip to the ER.
- Leather work gloves – These are your first line of defense against nasty surprises like jagged splinters, rogue nails, or those pin-sharp tack-strip points. Go for reinforced, heavy-duty pairs if your subfloor's hardwood; they've saved my palms more times than I can count during marathon removals.
- Vise-grip – These bad boys shine when you're wrestling with grips that won't budge, especially on those vertigo-inducing staircases where every ounce of torque counts. Clamp down hard on frayed corners and give a solid wrench-say goodbye to futile yanks that leave you red-faced and empty-handed, a lesson I picked up after one too many frustrating tugs in narrow landings.
- Dust mask – Your shield against the sneaky airborne villains: wispy threads, pesky irritants, and those lurking mold bits that stir up in musty corners from past leaks. Level up to an N95 model if you're sniffing out vintage moisture woes; nothing ruins a project faster than hacking away mid-task, and I've dodged that bullet by masking up early in basements with questionable histories.
- Utility knife – There's no substitute for a crisp, edge-honed blade that glides through tangled weaves like butter, keeping edges clean and tear-free. Refresh the blade halfway through if it starts dragging-trust me, botched slices turn bundling into a tangled ordeal, something I ruefully discovered wrestling with dense, decades-old shag that fought back fiercely.
- Vacuum cleaner – Indispensable for gobbling up the chaos pre- and post-removal; a reliable upright handles basics fine, yet switch to a rugged shop vac when facing soggy surprises or hefty fragments that'd wreck your everyday machine-I've salvaged jobs by having one on standby for unexpected grit in flood-prone spots.
- Duct tape – This underrated powerhouse steps in to wrangle those bulky, unruly carpet rolls, sealing them tight so nothing unravels while you're hauling the mess curbside-I've relied on it to prevent dusty spills in driveways, turning potential disasters into smooth disposals, especially when you're working solo without extra hands.
- Plier – A must for wrestling out those tenacious staples that cling like grim death, sparing your digits from scrapes and the floor from gouges-opt for needle-nose styles to snake into cramped nooks with surgical accuracy, a trick that's saved me hours on jobs where broad jaws just couldn't maneuver.
- Pry bar – The ultimate weapon for dislodging deeply rooted tack strips that refuse to yield; pair it with a soft-headed rubber mallet for controlled nudges that protect nearby moldings and drywall from unsightly dings-leverage matters here, and I've found angling it just right can make even the toughest nails surrender without a fight.
- Hammer – Far from a brute-force tool, it excels at subtle tasks like nudging pry bars into snug fits or steadying those surprise loose planks in the subfloor-keep swings light to avoid cracks, something I learned after overzealously hammering and creating more fixes than I solved.
- Broom and dustpan – Ideal for corralling larger shards of wood or metal that a vacuum would choke on; sweep methodically to catch everything lurking in crevices.
- Nails – Keep a handful ready for spot-fixing loose floorboards-mismatched sizes can cause creaks later, so match what you find.
- Wax wood filler – Blends right in to patch nail holes on wooden surfaces, leaving a smooth canvas for whatever comes next-color-match it to avoid obvious spots.
Everything in hand? Awesome-time to get after it.
Step 2 – Clean the Carpet
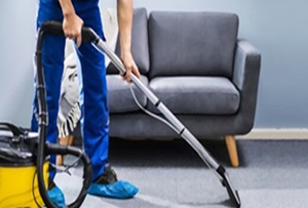
It might feel backward, like polishing shoes before tossing them, but trust me: a thorough vacuum now tames the chaos later. Start by emptying the space-shift furniture to another room or garage to dodge dings and keep pathways clear. Fire up your vacuum and go over the carpet a few passes, really grinding into high-traffic zones to lift pet hair, embedded crumbs, and that sneaky loose grit. In vintage houses with years of buildup, this prevents a dust storm that could irritate eyes or lungs-I've skipped it once and regretted the foggy haze for hours.
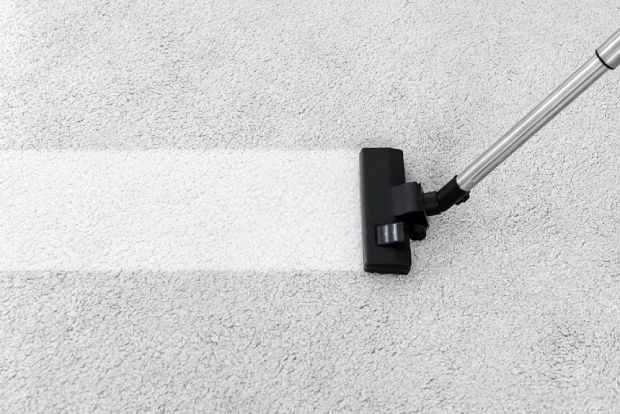
Vacuum your carpet before removal is recommended
Step 3 – Remove the Carpet From the Tack Strips
Suit up with those gloves first-tack strips bite back if you're not careful, and a puncture wound is no joke.
On room
Grab your utility knife and notch a clean slit in a corner to get a solid hold. Lean in with full force, letting your weight do the heavy lifting as you peel it away from the perimeter. Circle the room systematically, freeing it from walls and strips bit by bit. For hefty loads, accordion-fold into manageable 4- to 6-foot chunks, slice along the folds, then roll tightly, tape secure, and cart them out. Heads up: exposed staples below can catch on shoes or tools, so scan as you go to avoid snags.
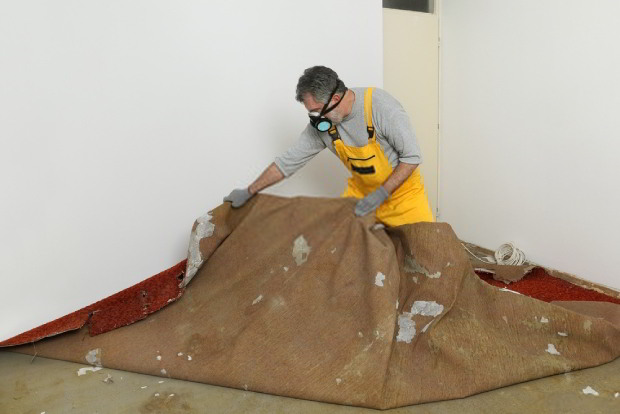
Pull your carpet out from the tack strips
On stairs
Begin with a horizontal cut across the top riser's lip, then clamp vise-grips onto the edge for a firm tug. Work it downward steadily, repositioning your grip every few steps for better control. If the strip gets unwieldy, snip off the excess mid-pull. Bundle and tape just like the room sections. Stairs can be a puzzle-uneven treads and tight turns mean patience is key; rush it, and you might slip or tear more than intended.
Step 4 – Remove the Padding
Ah, the breather-this phase is usually smoother sailing, with fewer surprises lurking.
On room
Most paddings are pieced together in panels, fastened by perimeter staples that give way easily. Hook a finger under an edge and follow the staple path, ripping it free with steady pulls-they detach almost effortlessly if you don't rush. Pliers handle any stragglers. Dealing with concrete bases? Glue's the culprit-ease it off with a wide putty knife, applying even pressure to prevent chipping the slab or leaving gummy residue.

Move on to the padding once you finish removing the carpet
On stairs
The compact layout means padding's minimal, often loosely fitted without much anchoring. Just lift and peel; a gentle scrape suffices for any adhesive holdouts. Fold into small rolls and set aside-no heavy lifting here, but watch for tucked-away staples that could poke through.
Step 5 – Remove the Tack Strips
Brace yourself-this is the gritty showdown, where nails dig in like they're paid to resist. Slide your pry bar beneath each nail head, then rock back with body leverage to lever them out one by one. If it's fighting you, a few targeted hammer taps can wedge the bar deeper-just mind your aim to protect the subfloor from gouges or cracks. The routine's identical for stairs, though angles might feel trickier. Toss all the splintered strips into a sturdy bag right away to contain the mess, then comb the area with pliers for orphaned nails. Give the surface a once-over for flaws; a light sanding with medium-grit paper can erase rough spots and prep for reinstalls.
Step 6 - Clean Up the Area and Finishing
With the heavy work done, focus on tidying to leave things pristine. Use your broom and dustpan to chase down scattered fragments along wall bases and old staple lines, gathering every errant wood chip or metal sliver. Hunt for squeaky subfloor sections by walking them-drive in nails to silence any offenders. Hit the whole area with a final vacuum run to banish fine dust. For stairs, sweep from the peak downward in broad strokes, followed by vacuuming to nab the finer particles. Those pesky tack-strip holes? Dab in wax wood filler for a seamless, professional touch that blends right in.
Conclusion
Frequent cleanings keep carpets fresh, but wear and tear demand eventual swaps-whether from grime, damage, or just craving a new vibe. If you're hunting guides on how to remove carpet, this one's got you covered with straightforward, insightful steps. Tackle it solo and pat yourself on the back. Thanks for reading-catch you in the next one!


