How to Clean with Vinegar - Amazing Remedies and Cleaning Hacks for Homeowners
- How to Remove Pet Hair From Clothes: The Complete Tutorial
- How to Clean a Popcorn Ceiling: The Complete Guide
- How to Get Dog Hair Out of Car: The Top 3 Ways to Get Dog Hair Out of Your Car (And Even More)
Vinegar is undoubtedly one of the most commonly used ingredients that everybody has in their kitchens. But not many of you are fully aware of its amazing uses -- not for cooking but for cleaning purposes.
Vinegar is known to be extremely useful in multiple cleaning purposes. Hence, you can use it to get rid of the stains, grime, and smudges on most of your household objects and appliances with little effort if you know what you’re doing.
In addition, for those of you who are interested in non-commercial cleaning products, you can always pick up a useful vinegar solution at your kitchen counter and start cleaning whenever you want. This way, you can freely clean your house without having to be concerned about harmful chemicals.
In this post, we’ll be providing our complete guide on how to clean with vinegar. This includes all the facts that you should know about cleaning with vinegar, including its nature, usages, and how you can effectively clean your items with it. Feel free to discover the surprising benefits of cleaning with vinegar.
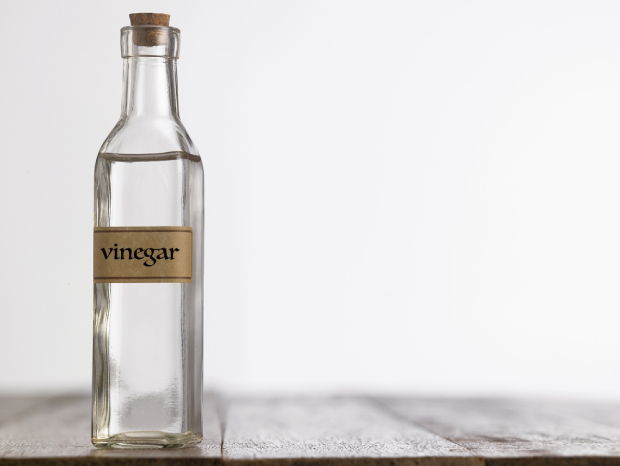
You can use your cooking vinegar for other purposes
Introduction to cleaning with vinegar
In the first few articles, we’ll guide you through the idea of cleaning with vinegar. Here, you’ll learn the natural cleaning effects of vinegar, what vinegar is good for cleaning, and many other informative guides.
About cleaning with vinegar
To start, let’s take a look at our complete introduction to cleaning with vinegar:
What is it?
For those of you who don’t know yet, all of the vinegar products that are available in your kitchen or from the chemical store feature the same elements: acetic acid mixed with water in various concentrations between 5 and 20%.
With your cooking vinegar, which is typically made from fruits, cane, or grains, the concentration levels are often low and won’t go above 10%. If it is white vinegar, they tend to be high in acidity, especially those that are made in labs using water and pure acetic acid.
For those who aren’t sure about what type of vinegar for cleaning, it’s recommended that you use a normal distilled vinegar solution with a concentrated level of less than 10% if you want to clean household objects. The mildly diluted vinegar will ensure that you have enough abrasive power to effectively deal with tough stains while still remaining safe for most household surfaces.
As for those that are made in the laboratory, and often come in 20% concentration or more, they’ll be more suitable for industrial uses. Alternatively, you can dilute them with water before use.
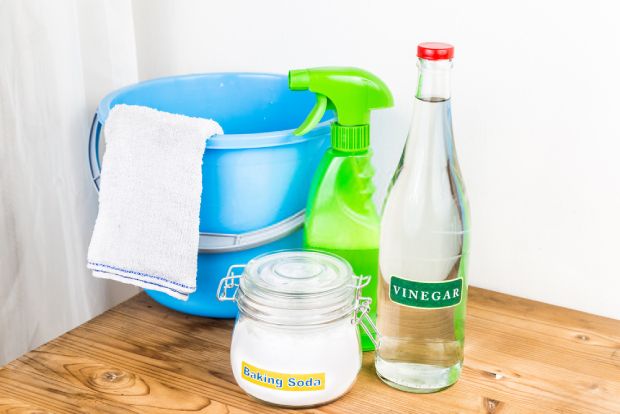
Vinegar is great for cleaning household items
Why should you use vinegar for cleaning?
Vinegar is used in cleaning mainly because of its acid nature, which is extremely effective when you are dealing with hard stains and dirt buildup on your household objects. For instance, you can easily use vinegar to get rid of the nasty brine on your water pipes and faucets, or to remove glue from stickers.
In addition, for those of you who are concerned about using intense chemical products in your house, it might be a better choice to go with natural products such as vinegar, as it poses little threat to your family’s health.
➜ RELATED: 50 Cleaning Tips and Tricks - Easy Home Cleaning Tips
Plus, the product is extremely easy to find; you can get it at most local stores. You can even reach out your hand to grab a bottle of vinegar right on the counter whenever you’re cooking.
For all those reasons, vinegar is considered one of the most useful and accessible natural cleaning solutions. So, why don’t you use it for sanitizing your household objects?
How to make your vinegar cleaner
If you wish to use vinegar for cleaning your household items, it would be nice to know how to make your own vinegar cleaning solution. Hence, for those of you who are interested, our vinegar cleaner recipe should come in really handy.
If you want something that’s convenient and accessible, you can always use your everyday apple or grain vinegar bottles on your kitchen counter. They have a mild abrasive effect and will be effective at most of your daily cleaning tasks.
As mentioned, with white vinegar, you should dilute it first with water. Follow a general ratio of three cups of water per one cup of white vinegar and you’ll have a perfect solution for more effective cleaning. Feel free to adjust the ratio if you wish to have a more aggressive cleaning effect and vice versa.
Plus, if it’s possible, you should pour your vinegar cleaner solution into an empty spray bottle. Use it to effectively distribute vinegar on the surfaces that need to be cleaned.
Effective cleaning remedies with vinegar
Along with using pure vinegar for cleaning, people have also discovered the interesting uses of vinegar when it is mixed with other ingredients. Below, you’ll find some of the most effective cleaning remedies that are made from mixing vinegar with other substances. Each of the introduced remedies has its own uses and distinctive applications in cleaning and sanitizing. You’ll have the best answers for how to mix vinegar for cleaning.
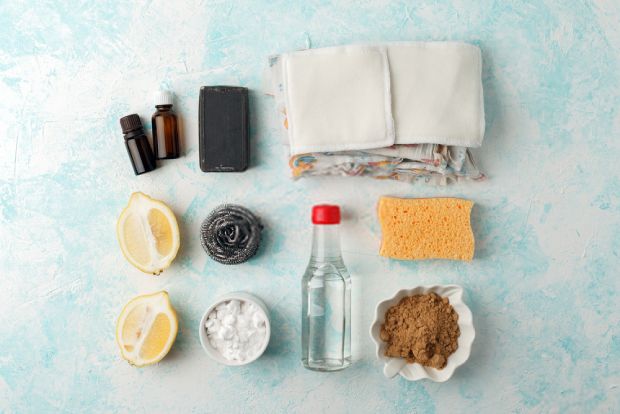
You can make many eco-friendly cleaners with vinegar
Vinegar and baking soda
When it comes to using baking soda and vinegar for cleaning purposes, many people can easily get the wrong idea. By that, I mean mixing baking soda and vinegar together will not essentially create powerful cleaning products. Instead, it is the fizzing reactions between the two of them that cause messes to dissolve easily, thus allowing you to clean more effectively.
If you want to clean an item using vinegar and baking soda, it’s recommended that you clean using diluted baking soda with water first. The substance in itself is already a powerful cleaning solution. Hence, you’ll find it to be relatively effective when you’re dealing with simple stains. For tough stains, just spray some distilled vinegar solution on them. The reaction between the two substances should happen right away. This should make the cleaning process a lot easier.
➜ RELATED: Best Ways to Clean Your Entire Home With Baking Soda
Vinegar and salt
If you wish to clean dirty metal ornaments or cookware in your house, using vinegar and salt will drastically improve the outcome. This remedy can be used on items that are made of copper, silver, brass, and pewter. Most of the time, you’ll find it to be extremely effective.
On its own, the acid in vinegar can also deal with corrosion on these metals. However, due to the oxidization on the surfaces of the metals, it would take a rather long time for the acid to etch through.
During the process, if you add some salt to the vinegar, the chloride will help penetrate the oxide layer. Thus, the acid can work its way through relatively quickly, which results in a much better cleaning effect.
Vinegar and lemon juice
For those of you who can’t stand the pungent and tangy smell from your vinegar cleaner, you’ll find this remedy particularly useful. By adding lemon juice to your vinegar cleaner, you can replace the annoying odor with a more pleasant lemonlike aroma.
In addition, because the two substances are also acids, mixing them together won’t reduce the cleaning effects. Plus, due to the disinfecting and bleaching nature of lemon, you can use it to get rid of the odor and stains in your old clothes, which is quite awesome.
To make your vinegar and lemon cleaner, just chop two lemons into small pieces, then put them inside your blender. Add enough vinegar to fully submerge the pieces and let the blades do their work. It’s like you’re trying to make a lemon smoothie (but not for drinking, of course). Once that’s done, just collect all the lemon waste and you’ll have the perfect household cleaner solution.
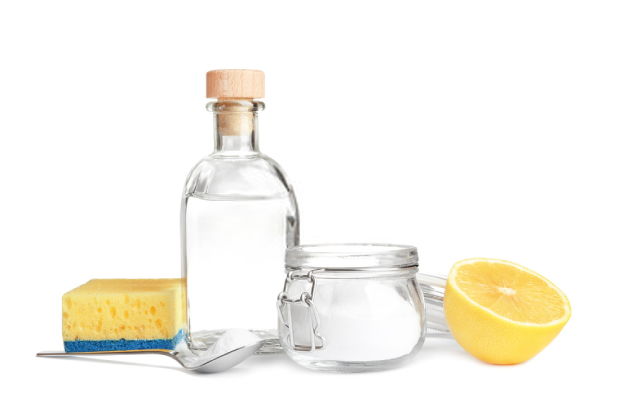
Vinegar and lemon can be a great combination
Vinegar and dish soap
In case you don’t know, vinegar can also be used as a catalyst for detergent because it’ll help you effectively deal with grease and oil. That’s because when you mix your dish soap with regular water, the mineral substances like magnesium and calcium will aggregate with the soap molecules, which causes it to be less effective.
This is also why most detergents have a slightly alkaline nature to help the acetate bind with the metals. It’s even more effective if you use oxalic acids. Hence, by mixing dish detergent with vinegar, you can use the acetic acid to boost the cleaning effects of your solutions.
To make the remedy, you can use any type of dish cleaner that you have on your kitchen counter. Mix it with cooking vinegar in a ratio of three cups of detergent per one cup of vinegar. Pour it into a spray bottle and give it a few shakes to mix the two. You can also heat up the vinegar first so you can effectively mix them.
Vinegar and rubbing alcohol
Rubbing alcohol is a great cleaning solution for dedicated surfaces such as monitor screens, glassware, and mirrors. By mixing vinegar with rubbing alcohol, you can create an even more effective cleaning solution.
Vinegar, which is great for dealing with multiple cleaning tasks, will work with the rubbing alcohol, which has a volatile nature, to create a useful cleaner that’s both effective and convenient.
Create the mixture by using vinegar and rubbing alcohol in a 1:1 ratio. Whenever you need to clean, just apply the solution to any objects and wipe them with a clean cloth. The surfaces will become clean in no time. Plus, there will not be any wiping smudges left behind, so it should work great on your glasses and mirrors.
Vinegar and olive oil
As for those of you who are in need of a quick and effective furniture cleaner, you can also use vinegar. When mixed with olive oil, it has a polishing effect, thus allowing you to clean and polish your wooden furniture with ease.
If you wish to add some aroma to the mixture, it’s also possible to grind a few pieces of lemon into the solution. This will create the pleasant and sanitized fragrances that we all love. Making your furniture look cleaned and polished and smelling great has never been easier.
To make the cleaner, just mix the vinegar with olive oil in a 2:1 ratio, then shake it up until they’re fully mixed. As for the scent, you can use lemon peels or any other extracted scents depending on your personal preferences. Pour the mixture into a spray bottle and feel free to use it on any of your wooden furniture.
➜ RELATED: How Often Should You Vacuum? - The Complete Guide To Household Vacuuming
Awesome hacks and cleaning tips for homeowners
Now, by knowing that you can have great cleaning powers with your cleaning vinegar solutions, it’s time for you to dive deep into the actual cleaning tasks.
Our guides will provide complete information about household cleaning tasks, which consist of most items and areas of your home.
Here, you’ll learn everything you need to know about cleaning with vinegar in your living room, kitchen, bathroom, and laundry through intuitive step-by-step guides. So, make sure you don’t miss any of those if you’re interested.
Living Room
Let’s take a look at the useful cleaning applications of vinegar, starting with your living room.

Many useful cleaning solutions for the living room are made from vinegar
Clean windows and glass items
Spray the mixture of vinegar and rubbing alcohol on any glass surfaces that need to be cleaned. Then use a piece of clean cloth to wipe them off. You’ll find the stains disappearing relatively quickly. The volatile cleaning solution will also prevent residue from forming any smudges on the glass. Use this method to clean windows, glass items, and any dedicated surfaces that you don’t want to be aggressive on.
Clean your wooden couches
If you like wooden furniture, chances are that you also have a set of wooden couches. Over time, the dust and stains that form on the wooden surfaces can be quite visible to the eyes, making your living room less inviting.
In this case, you can use a mixture of vinegar and olive oil to wipe the surfaces clean. Use your spray bottle to effectively spread the cleaning solution, then use a clean microfiber cloth to work on the couches. Be sure to add a few drops of your favorite extracted scents to avoid the pungent smell of the vinegar. Give the surfaces as many wipes as you wish until you’re completely satisfied with the results.
Clean wooden floors
Just like with the couches and other wooden furniture, you can use vinegar and olive oil for both cleaning and polishing. However, this time, you should reduce the amount of olive oil to a quarter to prevent the floor from getting too slippery after you finish. Plus, having a mixture that’s too acidic is never a good way to treat your hardwood floor because it’ll damage the wax and wooden surfaces.
Start by properly vacuuming the floor using your vacuum cleaner to prevent debris from getting in your way. Then use a mildly soaked mop to work around the floor. Make sure the mop is clean before you use it.
For the cleaning, start in the corner of the room, then slowly move backward to avoid stepping on cleaned areas. During the clean, feel free to use the spray bottle to give the wooden floor a few sprays of vinegar and olive oil to polish the surfaces.
➜ RELATED: How to Shine Laminate Floors: The Best Practical Way
Clean carpets and upholstery
If you have children in the house, the carpets, curtains, and other upholstery in your living room can easily get dirty. From dirt to paint to spilled foods, your room can easily become a mess if you don’t know how to get rid of these stains. Plus, you’ll need to deal with them fast if you don’t want these stains to become extremely difficult to eliminate later on.
It’s crucial to have something that’s quick, accessible, and, most importantly, effective. Here come vinegar and lemon juice to the rescue. As you know, the mixture will have excellent cleaning and bleaching effects on any surfaces. So, it should work really well on any fresh stains on your upholstery.
Just use the spray bottle to apply some cleaner solution and then wait a few minutes for the effects to kick in. Proceed to use a soft brush to work on the spots and wipe it clean with dry tissues.
For tough stains that have been present for quite a while, it’s recommended that you heat up the spot using a hairdryer before brushing it. Feel free to give the spot a few more sprays if you notice that it’s getting dry. The high temperature will help break down the hardened particles, making it easier to clean the stains.
➜ RELATED: How to Install Wall-to-Wall Carpet Yourself
Clean ceiling fans and light fixtures
After a certain amount of time, your ceiling fans and light fixtures will become relatively dirty due to dust and stains. Hence, you might want to give them a cleaning if you wish to keep them shiny.
Start by finding a high and stable platform to stand on. It could be a chair or ladder; just make sure you’re completely comfortable and safe on it.
Apply a few sprays of vinegar and soap mixture to the surfaces, then wait a few minutes before you wipe them off. Do this a few times if you want to ensure that they’re completely cleaned.
Clean your ornaments with vinegar and salt
For those of you who have a lot of metal ornaments and souvenirs displayed in your living room, you’ll realize that they can get dirty and tarnished. Often, these items are made of brass or silver, which are extremely easy to clean if you know how to work with them.
For these items, it’s recommended that you submerge them in cleaning vinegar, then add a little bit of salt onto the mixtures to speed up the reaction. Wait a few minutes, and then clean the surface using your scrubbing sponge. The tarnish should come off relatively quickly due to the effect of your vinegar cleaner.
For tougher spots, add more vinegar and salt. Also, give the items more time in the mixture to make sure they completely react with the vinegar. Don’t try to save time by using metal scrubs because they’re quite harmful to surfaces, especially for shiny and dedicated brass or silver ornaments.
Once you finish cleaning, just rinse off the ornaments with water and wipe them dry with a clean cloth. It’s important to get rid of any excess water because it’ll be harmful to the metal surfaces. Hence, you should finish the cleaning by drying your items with a hairdryer.
Kitchen
With your living room properly cleaned using vinegar, it’s time to move to another extremely important area of the house: the kitchen. Here, you’ll find that your vinegar solution has many surprising uses when it comes to cleaning.
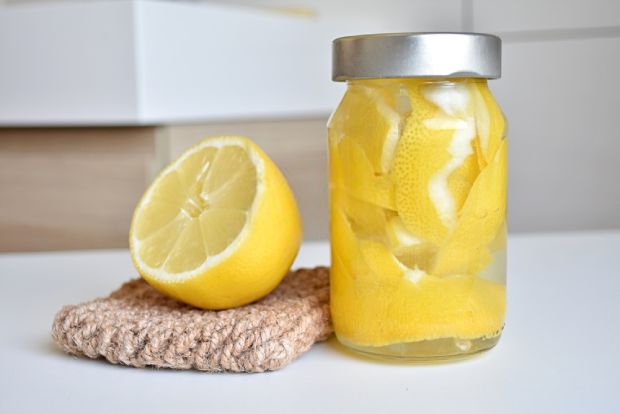
Vinegar cleaning remedies can work great in your kitchen
Clean your cooktop and counter
As you often spend most of your cooking time on the cooktop and kitchen counter, these areas tend to get dirty relatively quickly. Hence, it’s important to clean them immediately whenever you finish your cooking.
To do that, you’ll need something that’s both quick and effective so you can get rid of all the grease and grime in just a few wipes. In these cases, having your spray bottle of vinegar and dish detergent around should be quite helpful.
As mentioned, because the vinegar will enhance the activeness of the detergent, you’ll find your cleaning solution to be extremely useful in dealing with kitchen stains.
➜ RELATED: How To Deep Clean A Kitchen: A Complete Guide
Just shake the bottle before you spray it to make sure the two are properly mixed and enabled. Then use a clean cloth to wipe the surfaces of your kitchen counter, cooktop, counter walls, and the like. You’ll find them getting clean and spotless relatively quickly with just a few wipes.
Clean the sink
In addition, as time passes, your kitchen sink will get dirty on its surface and down under the drain. Hence, you might want to give it a little clean every once in a while so you can comfortably wash your dishes inside without worrying about the dirt. Plus, unclogging the drain will prevent any future problems.
You can start the process by doing some light cleaning using vinegar and a scrubbing sponge on the surface of the sink and the water faucet. Soak the sponge with cooking vinegar and add some soap to scrub all over the surface. Then use water to rinse off the excess soap. Your sink and faucet should look much better after that.
However, your job isn’t done yet, as the dirtiest and nastiest stuff is still down below. You’ll need to do a lot if you want to clean the stinking stuff under your drain. You should start by filling the sink with hot water, then flush it all at once.
Next, sprinkle some baking soda into the drain so it can start breaking down the sludge. Then add a few cups of hot-boiled vinegar into the drain, making sure you pour it down gently so the vinegar has time to work with the baking soda.
In just a few seconds, you’ll start to see the fizzing reaction under the drain and bubbles coming from below. It’s time to close the drain plug and wait a few minutes for the cleaning to happen. In the meantime, you can start to fill the sink with hot water.
After a certain amount of time, unplug the drain and let the water finish the job. The hot water will run down the drain and collect all the remaining residue with it. You’ll be left with a completely cleaned drain.
Clean the oven
After the cooktop, your oven is probably the dirtiest area inside your kitchen, as you might use it every day for cooking greasy foods. Hence, you should clean it properly if you don’t want odors and grime to fill the inside of your oven.
Start by putting your oven into self-cleaning mode, which will heat up the inside to absolute temperature and turn all the remaining grime and food debris into ashes. If your oven doesn’t have this option, just turn the temperature up to the maximum.
Let the heat do its job. Come back to your oven after a few hours, once everything has cooled down. Take out the trays and tracks, then collect all the remaining ashes.
As for stubborn spots, you will want to cover them with baking soda paste, which is made by mixing baking soda with water. Wait for a couple of hours or overnight so the baking soda can break down the tough stains.
Once that’s done, use your spray bottle to apply cleaning vinegar to the inner walls of the oven. Wait for the fizzing reaction to finish, then grab a clean cloth to wipe off the residue. You’ll find that your oven is a lot cleaner compared to its initial state.
Clean the refrigerator
For some of you, the refrigerator could be the dirtiest part of your kitchen, simply because you can’t keep track of everything that you put inside it, as well as keep it properly organized.
Hence, it’s recommended that you have your fridge sanitized and cleaned if you don’t want the food to get bad or the inside to get dirty.
Start by taking out all the items inside the fridge. Organize and get rid of all the things that are unusable. Then apply some vinegar and lemon cleaning solution to wipe off stains on the trays and inner walls of your fridge.
For those of you who don’t like chemical cleaners, this should come in really handy because it offers impressive cleaning and sanitizing effects while using only natural substances. The disinfectant will keep your fridge spotless and remain fragrant at the same time.
Once you finish cleaning, put everything back and organize it into suitable categories.
Clean wooden cabinets
After a certain amount of time, you’ll notice your kitchen cabinets starting to collect dust, stains, and grease on their surfaces. This is unavoidable because you’re cooking with oils and other ingredients every day. However, you can prevent dirt from covering your cabinets by cleaning them frequently.
Start by using a spray bottle to apply the vinegar and dish detergent mixture onto the surfaces. Then wipe them off with a clean cloth. This will help you clean off all the dust, grease, and food stains on them.
If you have wooden cabinets, you can keep them polished and cleaned daily by applying some vinegar and olive oil cleaner. Do this every day after you finish cooking to avoid any deep cleaning in the future.
Clean microwaves with vinegar
Most people try not to use their microwaves too often, due to the fact that they can get dirty relatively quickly.
The moment you turn it on and the heating starts, your microwave will absorb odors from the steam, which results in an annoying smell later. Plus, in most cases, there will be food stains that spilled all over the inner walls. It’ll be even dirtier if you don’t use a microwave cover.
You should properly clean your microwave every once in a while if you don’t want to have an entire bacterial biome inside it.
Fortunately, the cleaning process can be quite simple if you know what you’re doing. In this case, you can use vinegar as an effective cleaning solution. Start by preparing a large bowl of vinegar. Place it inside the microwave and feel free to add some extracted scents.
Turn on the microwave to heat up the vinegar so it can start steaming up the inside. Wait at least 10 minutes for the effects to kick in. Then remove the bowl using oven mitts, as it will be really hot. At this time, the stains and dirt inside your microwave should come off relatively easily. Plus, the scent will give it a relatively pleasant aroma.
Use a few pieces of tissue to wipe off the dirt and stains, then throw them away. Your microwave should be completely clean by the time you finish this process.
Clean coffee makers with vinegar
For the java addicts out there, your top rated coffee makers are probably the favorite piece of equipment in your kitchen. Like everything else, they get dirty after a certain amount of time. Thus, if you don’t want disgusting coffee drinks, you’ll have to clean your coffee machine every once in a while.
Don’t worry, as the process is relatively easy and can be performed in less than 10 minutes. Start by emptying all the remaining coffee grounds from the last brew. Then fill the water tank inside with vinegar cleaner solution. Press the brew button and let it sit for a few minutes.
As the machine heats up the vinegar, its steam will run through the pipes inside and clean them. What you’ll get inside the carafe should be a dirty and disgusting combination of vinegar, grime, and dirt inside your coffee maker.
➜ RELATED: How to Clean Coffee Maker - Simple and Effective Ways
Clean your dishwasher
Unlike most other kitchen appliances, the dishwasher tends to be less dirty due to the fact that it “cleans” itself each time you use it. Hence, most of the trays and inner walls should be in perfect condition once you open it.
However, there is one part of the dishwasher that will require your attention: the filter and drain. Because most of the grease and debris end up inside it after each wash, you should empty the filter frequently to prevent dirt from clogging up the inside.
As for the drain, you can use the baking soda and vinegar cleaning method that you used with the sink drain. Because the dishwasher uses hot water to flush out the food stains, you might not have to do the same with the drain. Hence, it will be relatively quicker for you to deal with your dishwasher drain.
Bathroom
And now, to the least favorite cleaning area that you’ve been neglecting for so long: the bathroom. We understand why you wouldn’t want to work on this area, as it’s dirty and can take a really long time to clean. On the other hand, because we all want to clean ourselves in a sanitized place, you just can’t avoid your bathroom cleaning duty.
➜ RELATED: How to Clean Your Bathroom Like a Pro
To help you with this, our bathroom cleaning guides using vinegar should make things a little less challenging, as we offer some amazing hacks to effectively deal with certain areas of the room. Plus, for those of you who don’t like using commercial cleaning products, you’ll find that vinegar and a few other common ingredients are extremely useful.
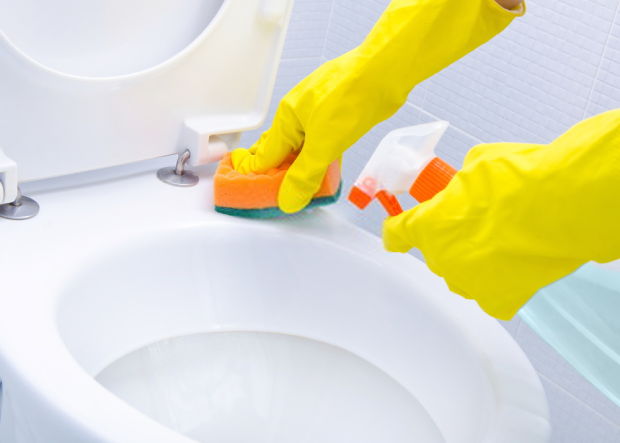
It’s possible to clean your bathroom with vinegar and other ingredients
Pretreat the surfaces with baking soda or vinegar
You should start your cleaning operation by pretreating the surfaces of your bathtub, tiles, and toilet with baking soda paste, which is made by combining baking soda and water. Use a paint brush or anything that features the same effects, and apply the paste to the wall and floor tiles, toilet, bathtub, and sink.
If you plan to use vinegar, it’s recommended that you mix it with Borax to create a paste-like combination. This will help it stick to the surfaces that you wish to pretreat. Otherwise, the vinegar will just drip away.
After you finish pretreating the surfaces, you can pay attention to other cleaning tasks and let the effects slowly kick in.
➜ RELATED: How to Clean Tile Floors With Vinegar, Baking Soda, and Lemon?
Clean the bathroom counter
On your bathroom counter, there are probably a lot of messy items that should be taken away and organized, so make sure you remove them from the counter first. Then spray some vinegar cleaner onto the counter, sink, and faucet.
Use a non-scratching sponge to scrub the surfaces of these items and you’ll find them getting cleaned relatively quickly. You can also add some soap to the spray bottle to make the solution more effective on stains. Once the scrubbing is done, you can easily rinse off all the residue with water.
For the cupboard, stop at wiping and scrubbing the doors and handle using your vinegar spray. If you wish for a more detailed clean and organize guide, you might want to check out our other guides. For this particular post, which is all about cleaning with vinegar, that’s all you can do.
Clean the mirror and medicine cabinet
Next, move on to reorganizing your medicine cabinet and getting rid of items that you no longer use. Use the vinegar and rubbing alcohol to clean your mirror; make sure that there are no smudges on it. For the mirror, you should use a microfiber cloth instead of regular cloth because the dedicated surface can be easily scratched by rough materials.
Clean the toilet, the bathtub, and other surfaces
Once you finish cleaning the other parts of the bathroom, it’s time to move back to the pretreated surfaces. This is not just because it’s time for the final cleaning but also due to the fact that baking soda and vinegar are both abrasive substances. Hence, it’s not a good idea to leave them on enamel surfaces for too long.
Nonetheless, the two will make great cleaning solutions for any surface in your bathroom. You can start the cleaning by using a non-abrasive sponge to scrub them. Due to the paste’s cleaning effects, stains and smudges should be wiped off relatively quickly. Finish the cleaning by rinsing off the residue with water.
Clean the drains and toilet pipes
Only one job to go, and that’s to deal with the nasty drains inside your bathroom, which include those that are in your bathtub, sink, floor, and even the toilet. For the first three, you’ll find the cleaning process quite similar to the one that is used on the kitchen sink. Hence, we don’t see any reason to repeat it. However, for the toilet, the cleaning is a little bit different, so you should follow our step-by-step guide.
Start by locking the water valve in your bathroom so that it won’t refill the toilet tank. Make sure you prepare a water container beforehand. Then flush your toilet until there is no water left to fill it.
Sprinkle a few cups of baking soda into the toilet and gently pour the water from the container to flush it down all the way. Feel free to add some baking soda if you think the current amount isn’t enough to cover the pipe walls. Wait for at least 10 minutes before you come back to it.
Once you think that enough time has passed for the baking soda to take effect, add some vinegar to the toilet. Slowly pour each cup of vinegar into the toilet until you start to see bubbles coming out of it.
Wait at least five minutes for the reactions to take place. Then unlock the valve so that water starts flowing back into the tank. Once it’s full, give it a full flush to drive away all the residue under the pipes. If possible, you can fill the container with hot water for more effective cleaning. Keep flushing until you notice that there are no more bubbles coming out of the pipes. Do this a few times a year and you’re guaranteed to have a clean toilet.
Laundry
While cleaning your laundry can be a tedious and annoying task, you know that it’s crucial to have your clothes properly cleaned and dried, unless you want mold and mildew to start poisoning you with itches and odors.
But don’t you worry too much, as our useful cleaning guides with vinegar will definitely make it easier for you to deal with that pile of dirty and smelly laundry. Plus, we’ll provide our effective guides for cleaning your laundry machine to ensure that it works well and lasts longer.
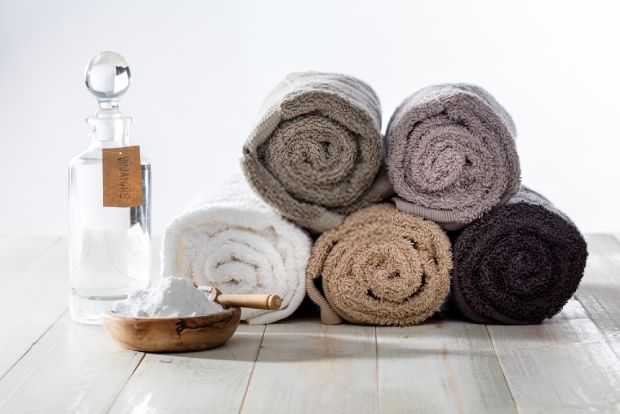
Use vinegar and baking soda on your laundry for surprising effects
Clean your clothes
Laundry can be stinky sometimes, despite the fact that you’ve properly washed it. Don’t freak out yet, as we know what’s wrong with your laundry and how to fix it. But first, you should know the causes of this problem to avoid running into them.
Most of the time, the reason your laundry becomes smelly is because you didn’t dry it completely. This creates the perfect environment for mildew and mold to start forming. It could be because you folded up your clothes and put them away when they’re weren’t fully dry, or you left your laundry inside the dryer overnight. In these dark and moist environments, it should be no surprise to find mildew on your clothes.
To get rid of these odors, simply rerun your clothes inside the washing machine a few times and use only vinegar as your cleaning solution. The acid in the vinegar will help contain the mildew and eliminate it once you finish the cleaning.
As for the pungent and sour smell coming from the vinegar, you can add a few drops of extracted lavender oils to get rid of it. Because lavender oil is also effective against mildew, it serves as a second form of insurance for your laundry. Plus, you can always choose to rewash your vinegar-soaked clothes with your preferred detergent to get rid of the unpleasant smell.
Clean your laundry machine
While you do a lot of cleaning with your laundry machine, you might forget to clean the machine itself because you think that it looks clean.
However, underneath the shiny and spotless look, there are many dirty filters and pipes that are desperate to be cleaned. Hence, it’s crucial to deal with them every once in a while. It’ll make your laundry more sanitized and increase its longevity.
In this article, you’ll learn how to use vinegar to clean your washing machine and drier. Follow the provided steps and you’ll find it relatively easy and convenient to perform a complete clean.
For the washing machine
To begin, we’ll work on the washing machine, as it’s usually the dirtier one. Use two coffee cups of baking soda and sprinkle them onto the inside walls of your washing machine. This can easily be done on top-load or front-load models.
Power up the machine and set it on the hottest water level, then let it run for a full cycle. If your machine has a self-cleaning function, you should use it. This will allow the baking soda to fully work its way into the tiny corners and pipes inside your machine for a complete clean.
Once the cleaning is finished, add two cups of cleaning vinegar into the tub and run it once again with the hot water or self-cleaning setting. This will help get rid of all the mold and other remaining junk with ease. You can also choose to add certain types of extracted scents to combat the smell of the vinegar if you find it particularly unpleasant.
For more in-depth cleaning, you can wipe off the inside walls with a non-abrasive sponge. Also, pay attention to the lint filter by emptying and washing it before putting it back. Feel free to wipe the exterior of your machine with a mixture of vinegar and soap if you wish to see it clean and shiny. Last but not least, it’s recommended that you leave your machine’s door or lid opened, as this will help the remaining moisture to dry up.
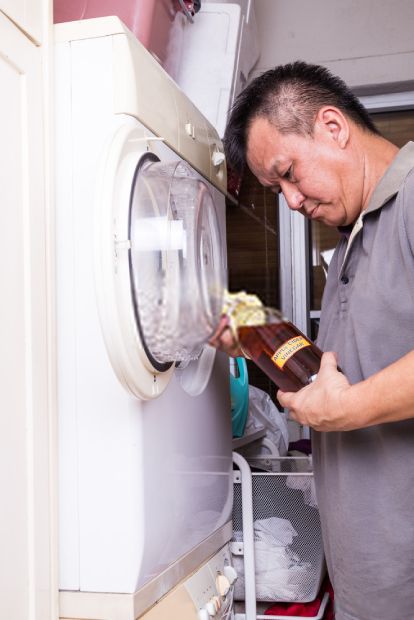
You can remove odor by adding vinegar to the washing machine
For the dryer
As for the dryer, there are two important components that should receive frequent care: the discharge hose and the lint trap. They often attract the most dust and lint during the drying process.
It’s important to clean these areas with the best rated vacuum cleaners every once in a while to make sure that your machine can function more efficiently. Use the dusting tools to effectively force the dust and lint out of rough surfaces, and make use of your crevice tool to reach into small places around the two components.
Put things back together once you finish vacuuming and you’ll notice that your dryer works a lot faster. It’s just like when you clean your vacuum cleaner after a certain number of times. The cleared airflow helps the machine operate more efficiently.
Once you’re done vacuuming, you can finish the cleaning process with the vinegar and soap mixture. Spray it on both the inside and outside of your machine, then wipe clean with a piece of cloth.
➜ RELATED: Different Types of Vacuum Cleaners Everything You Need to Know
How to not clean with vinegar
Now that you know how to effectively clean your household objects with vinegar, it’s also possible for you to learn the other aspect of using vinegar to clean, which is how to avoid cleaning mistakes with vinegar.
This article will cover the two most important aspects, which are the surfaces that you need to be careful of when cleaning with vinegar, and some misconceptions that people tend to have. Stay tuned if you’re interested in cleaning with vinegar.
Surfaces to avoid using vinegar cleaners on
Although vinegar is often considered a cleaning marvel for most household objects, there are still some exceptions that you should definitely know about when using it as a cleaning solution:
Stone surfaces
Most products made from stone don’t do well with acid-based substances, which damage stone surfaces, making them lose their shine and even damaging the smooth surface. This is particularly severe if you use vinegar cleaner on marble, granite, soapstone, and the like.
As an alternative, you can go for normal all-purpose cleaners or mix only a few portions of vinegar into your soap if you wish to achieve aggressive cleaning effects.
Wooden items
Just like with stone surfaces, your hardwood floors or wooden furniture are quite vulnerable to vinegar. If you wipe their surfaces with high-density vinegar, chances are that you will damage the wax and the wood itself. Try to avoid using vinegar, or use our mixture of vinegar and olive oil if you want to polish and clean items. Plus, don’t rub it too aggressively or use any rough scrubbing tools.
Protein-based stains
Using acids on protein-based products will cause precipitation, just like what you see when making mayonnaise. In this case, if you wish to clean your egg messes with vinegar, it’ll only get messier.
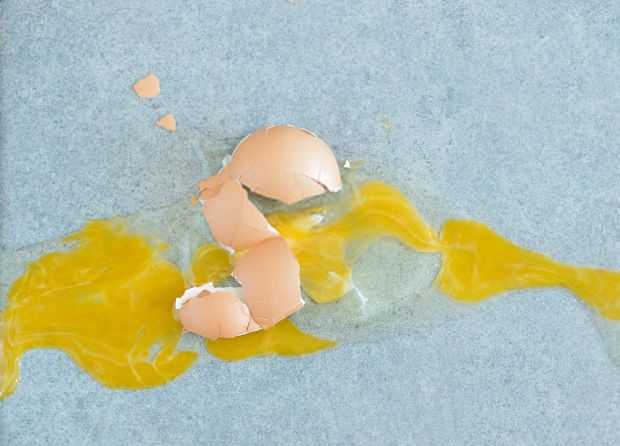
Don’t clean protein-based spills with vinegar
A few common misconceptions about cleaning vinegar
Here are a few misconceptions about cleaning with vinegar that some of you might have:
Vinegar and baking soda
Although we’ve mentioned it before, we feel that it’s important to note the reaction between vinegar and baking soda. While people often clean with vinegar and baking soda, the final products of the two won’t help you clean your items because they’re only water and carbon dioxide.
On the other hand, the fizzing reactions between the two can cause some stubborn junk to dissolve. Hence, you often see people use this application to clean tough stains.
Vinegar and greasy items
The fact that vinegar is acid-based means that it has no effect on cleaning greasy items. However, if you mix vinegar with dish detergent, it will boost the cleaning effects of the soap. Remember this trick if you have to deal with a large amount of greasy cookware and dining ware in the future.
Iron cleaning tip
While this is not as common as the other misconceptions, some people still believe that they can use vinegar to make the ironing process more effective. In reality, doing this will only cause the inner parts of your iron to become less durable.
Conclusion
By now, you should be quite certain that vinegar is a great cleaning substance. Plus, with our comprehensive guides on house cleaning with vinegar, it won’t be a problem for you to effectively clean your rooms using this friendly natural product.
Just keep in mind that you should use vinegar with care, and be sure to follow our provided instructions to achieve the best cleaning results. We hope that you find our post informative and helpful.
For more interesting hacks using vinegar, check out the video below. Thanks for reading and we’ll see you in our future posts.


