How to Clean Bissell Crosswave in a Few Quick & Simple Steps
If you’re part of the CrossWave owner club, an essential knowledge that you need to have is how to clean Bissell CrossWave. The better you take care of it, the better it will perform and the longer it will last.
This detailed cleaning guide on how to clean Bissell CrossWave will show you all the nitty-gritty of maintaining this vacuum.
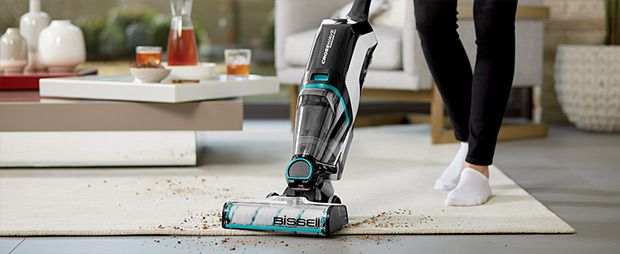
Why You Should Regularly Clean Your Bissell CrossWave
Just like every other household product, your Bissell CrossWave needs careful maintenance in order to last and perform well.
If we were to give you two CrossWaves — one is well-maintained and the other neglected — you will immediately notice the differences. The one that’s neglected will have weak, unreliable cleaning performance. Rather than cleaning up your floor, the vacuum will leave dirty streaks on the surface (this is an actual problem that’s commonly found in improperly-maintained Bissell CrossWaves).
Basically, if you have a dirty CrossWave, your house will be a lot cleaner if you just don’t vacuum at all.
Aside from this point, without regular cleaning, your Bissell CrossWave will wear down quicker. The air filter and the brush will be clogged with dirt until they give out altogether. You will have to spend money and time replacing these parts more often. The vacuum itself could become worn down, too. It may put you in a position of having to replace the whole vacuum before the end of its actual service life.
Needless to say, in both of these cases, you will have to spend a lot more money than you really should have. Spend some time taking care of your vacuum. You’ll end up saving an impressive sum in the long run.
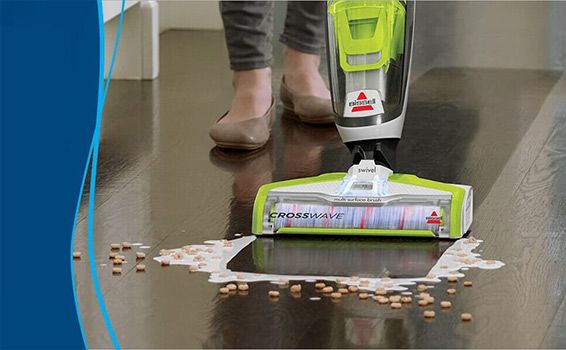
Which Part of the Bissell CrossWave Has to be Cleaned?
There are four major parts that you have to pay close attention to, according to Bissell. They are:
- Dirty water tank
- Brush roll
- Brush chamber
- Easy Clean Storage Tray
In reality, there’s another part that you have to check up on every once in a while, that is the air filter and the float. Therefore, altogether, you have six parts that you have to clean.
We’ll show you how to take care of each one in today’s guide on how to clean a Bissell CrossWave.
Bissell CrossWave Cleaning Instructions
One small note: this guide applies to all Bissell CrossWave vacuums, including the Pet Pro variant. They all share the same design for the most part. If you’re looking for a guide on how to clean a Bissell CrossWave Pet Pro, you’ll also find it here!
Wondering what are the differences between the normal Bissell CrossWave and the CrossWave Pet Pro? See our Bissell CrossWave Pet Pro here for more details.
Before You Start
Before you clean your Bissell CrossWave, make sure to switch the vacuum off and pull the power plug. Never attempt to do any kind of maintenance while power is still on. Doing this will minimize the chance of electrocution or fire.
As for tools, you don’t need much aside from a microfiber cloth.
How to Clean Bissell CrossWave Dirty Water Tank
There are two water tanks on a Bissell CrossWave: a clean water tank and a dirty water tank.
The clean water tank is where the vacuum will draw water to mop your floor. Of course, once the clean water is lathered onto the floor, it will be saturated with all manner of dirt and gunk. The CrossWave will suck up that dirty water and deposit it into the second water tank, made only for storing dirty water. The result is a clean, shiny floor.
You must clean the dirty water tank after every cleaning session. While it’s possible, we recommend against letting the dirty water sit there unattended for several days on end. The dirty water could stink up your vacuum.
Step 1: Release the Tank
You can find the release button at the top of the dirty water tank. It sits in a small recess and should be pretty easy to find. Press down on it, then grab the handle protruding from the front of the tank. Pull outward and the tank will come loose from the vacuum’s body.
Step 2: Remove the Top
To access the inside of the tank, the top has to be removed. At the top of the dirty water tank is also the air filter. We’ll talk more about cleaning this component later down onto the article.
For now, focus on the recesses on either side of the tank. You should be able to find it quite easily. They are right next to where the filter sits in the middle.
Grab onto these recesses and use them as handles. Pull upward. The top should come off easily.
Step 3: Pour Out the Content and Clean
With the top off, you have complete access to the inside of the dirty water tank.
Bring it over to the sink and pour the blackened water out and down the drain. Small debris may also be stuck inside, so check the tank carefully to see if you can find any. If you do, use something like a dirty, unused fork to pry them out.
When everything is cleaned, wash the tank under the tap using cold water. At first, the water that you pour out of the tank will be quite dirty. Keep rinsing until the water becomes clear.
Step 4: Leave the Tank to Dry
After you rinse it, wipe the tank down with a clean, dry microfiber mop. But don’t put the tank back just yet. Leave it somewhere with plenty of airflows to dry for a few hours before you put it back.
Step 5: Tend to the Water Tank’s Seat
While the tank is drying, come back to the vacuum and check the area where the tank connects to. If it is wet or dirty, use a mop to clean it up.
How to Clean Bissell CrossWave Air Filter
After you have finished cleaning up the tank itself, it’s time to move onto the air filter. As a side note, the air filter is replaceable and Bissell recommends that you replace it once every six months for optimum performance.
Step 1: Remove the Air Filter
If you got this far already, you will already notice the air filter sitting at the top of the tank. The removal process is simple enough: hold onto it and tug upward. The filter should pop right off its holder.
Step 2: Clean the Filter
There are actually two parts inside of the filter. There’s the filter itself and then a screen to trap dirt and debris. The screen is installed on a hinge and can be flipped upward to reveal the internal filter. Both components must be cleaned.
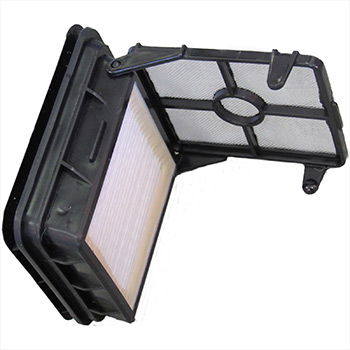
Bring a large bowl over to your sink and fill it with warm water. Then, add a few droplets of mild detergent. Mix up until the water becomes soapy.
Soak the filter and rinse carefully. Make sure to gently scrub every detail so that every particle of dirt comes off of the filter and screen. You can flip the screen upward to make the scrubbing process easier.
Step 3: Rinse Again and Dry
Once the filter package is sufficiently cleaned, rinse it again in clean water so that all of the soapy residues come off. Put the filter next to the dirty water tank in an airy place for a couple of hours to dry.
How to Clean Bissell CrossWave Float
The float is located at the bottom of the dirty water tank. Its job is to prevent the tank from overflowing. When the tank becomes full, the float will activate and shut down the motor to stop it from sucking in more water. Then, it will tell the vacuum to emit a high-pitched alarm noise to tell you that it’s time to empty the tank.
Since the float is in direct contact with the dirty water, it has to be cleaned, too.
Step 1: Locate the Float
The float is at the bottom of the dirty water tank. When you remove the top and the tank, you will end up with a bare bottom piece. This piece contains the float.
Step 2: Clean the Float
Bring the whole bottom piece over to your sink and turn on the tap. Clean every detail with water until it’s sufficiently clean.
Step 3: Put Out to Dry
Set the bottom piece right next to the dirty water tank and the air filter to dry. Put them all together after a few hours and reinstall them back onto the vacuum.
How to Clean Bissell CrossWave Brush Roll and Brush Chamber
The brush roll is another crucial component of the CrossWave. It scrubs the floor and dislodges stubborn dirt and debris, allowing the vacuum to suck them up more easily. It has to be cleaned so that it won’t be jammed or damaged by loose debris or tangled up by pet hair.
Similar to the air filter, Bissell recommends getting a new brush roll once every six months to maintain optimum performance.
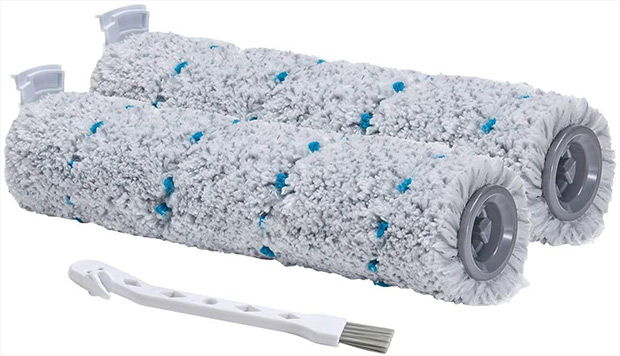
Fortunately, Bissell has made the cleaning process quite simple.
Step 1: Remove the Brush Roll Window
The brush roll window is the protective transparent plastic piece at the front of the vacuum’s cleaning head. At the top is a recess that you can put your fingers in. Grab onto it and pull upward to remove it.
Step 2: Take Off the Brush Roll
Check either end of the brush roll, near where it connects to the vacuum, to find a pulling tab. Grab the pulling tab and tug upward. The brush roll will disconnect from the vacuum, allowing you to remove it.
Step 3: Wash the Brush Roll and the Brush Roll Window
Bring both the brush roll and the brush roll window over to your sink and rinse them in clean water. Keep rinsing until the water running through them turns clear.
If you’re looking for instructions on how to clean Bissell CrossWave Pet Pro, you’re probably a lot more interested in learning how to remove tangled pet hair. If the brush roll has knots of pet hair running through the bristle, use a knife, a pair of scissors, or a razor blade to cut through the knots. You can easily untangle everything afterward. This is the most important knowledge you should know about cleaning Bissell CrossWave Pet Pro!
Step 4: Clean the Brush Roll Chamber
Now, set the two pieces aside and focus on the brush roll chamber. It is the compartment that the brush roll sits in. It should be pretty dusty in there, so grab your mop and sweep everything up.
Step 5: Put the Brush Roll and the Brush Roll Window Out to Dry
Set the two pieces somewhere with plenty of airflows for a few hours until they dry.
Step 6: Reassemble
Once they do, reverse the removal process to reinstall everything.
How to Clean Bissell CrossWave Easy Clean Storage Tray
If you have a self-cleaning storage tray, here’s how to use it to clean your brush roll.
Step 1: Fill Up the Tray
Pour water to the MAX line on the tray, then place the vacuum on top.
Step 2: Turn on the Vacuum
Switch the vacuum to Hard Floor mode, then recline the vacuum backward as it works its magic. Allow the vacuum to run for around 10 to 15 seconds until all of the water inside of the tray is picked up. You can repeat the process as many times as you want.
Step 3: Remove the Brush Roll Window and Brush Roll
This is the same as the first and second steps in the previous section. Grab onto the brush roll window and remove it. Then, tug on the brush roll using the pull tab to take it out of the vacuum.
Step 4: Put the Brush Roll Upright to Dry
Plug the brush roll onto the Brush Roll Drying Tray. The brush roll will stand upright when it’s plugged in, allowing it to dry out more quickly.
Step 5: Reinstall Once Dry
When the brush roll is finally dried, reinstall it back to the vacuum along with the brush roll window.
Conclusion
That’s how to clean Bissell CrossWave! Bissell has made it very easy for user to maintain their vacuum. Now that you’re aware of the procedure, it won’t take you too long to get used to it. Two or three tries are all that it would take until the maintenance steps become an instinct.
If you have any other questions, drop our editorial board a line and we’ll get back to you as soon as we can!
And while we’re on the topic, if you’re interested in learning how to use the Bissell CrossWave, we have a separate tutorial showing you how.
In addition, we also got some collections of FAQs (Frequently Asked Questions) from our readers about things like “Can you use the Bissell CrossWave on carpet?”. It’s worth checking out if you’re wondering the same thing.


