Power Drill 101: A Simple Guide to Learning How to Use Your Power Drill
In this article, we go into great detail over every possible aspect of power drills. There is so much to know about them that you will be mesmerized.
So, we have classified the information into different sections based on a particular aspect of these handy machines.
We bring you details about one of the best cordless drills on the market, the Ryobi drill which gives a reference point when you need to buy a power drill for yourself.
Whether you are a hobbyist or a professional, an electric drill has numerous uses. However, if you don’t use or maintain it properly, you will never get to use it to its full potential.
When you buy a new drill machine, you may be all thumbs and clueless about how to proceed. In this power drill 101, you will find everything you need to know about these power tools and even some tips to operate them safely. So, read on!
Types of Drills
Here, we look at four different types of drills. Each type has a particular set of requirements for using and you need to follow certain steps. So, let’s dive into the subject:
A. Manual Hand Drill
A manual hand drill is a hand tool that enables circular motion to multiply the force and drive a drill bit that spins at a high speed. These tools are rarely used today as electric drills have replaced them. However, some woodworkers who want absolute control and have an aversion to power tools still use them.
Types of Manual Hand Drills
This might come as a surprise to you, but you can get different types of manual hand drills as well. Here are four categories of manual hand drills that exist, with a fifth wild card entry which you might find quite interesting:
1. Eggbeater Drill
This is the commonest type of manual hand drill that you can get. It gets its name from its eggbeater-like appearance. It consists of a big, geared wheel with a handle. This wheel turns a pinion attached to a shaft that holds an adjustable chuck one end and a handle on the other end. Different sizes of drill bits fit into the adjustable chuck.
When we hold the drill vertically with the handle in the left hand we turn the wheel with the other handle with the right hand or vice-versa if you are a southpaw. The result is that the drill bit rotates at a high speed and can drill holes in wood, or other soft material.

A Manual Hand Drill (Eggbeater Type)
2. Swing Brace Hand Drill
What used to be an all-wood affair is today totally made of steel, but you can still get some that have wooden parts, as the one in the image below. It works on the principle of the ratchet handle. Unlike an eggbeater drill, you need a fair degree of skill to handle a swing brace hand drill.

Swing Brace Hand Drill or Vintage Drill
3. Archimedean Drill or Push Drill
Some manual hand drills do not have any separate moving parts. We call these push drills. The reason for this is that we push the drill to make the shaft rotate on its axis. As the shaft rotates, it drives a chuck which contains a drill bit. Push drills do not find a very prominent role in woodworking but are used in some light woodworking jobs like fixing hinges to a box with very small screws, for example.

Vintage Hand Push and Archimedean Drills
4. Breast Drill
You could consider this drill as a type of modified eggbeater drill. However, the moving parts are enclosed in a box. The drill may or may not have provisions for varying the speed.
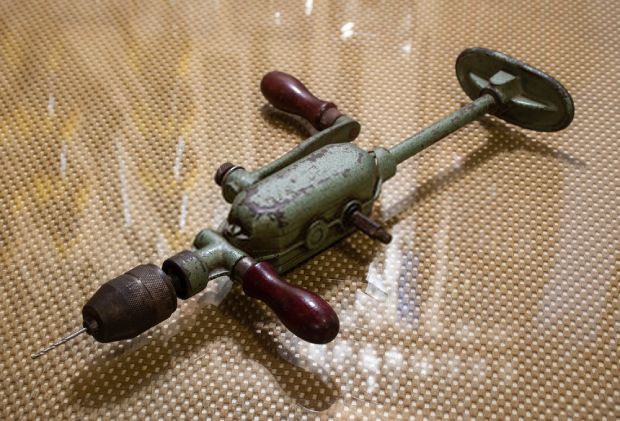
A Breast Drill with a Drill Bit Fitted
5. Old Carpenter Hand Drill
One primitive form of a drill is what some traditional carpenters in India use and are mostly replaced by electric drills today. It is commonly called the “old carpenter” hand drill. The drill consists of a spindle with a handle on one end and a holding device for drill bits on the other end. In the middle of the spindle is a wooden pulley with thin grooves.
One person holds the assembly vertically against the wood to be drilled. Another person winds a rope around the wooden pulley and pulls it back and forth, causing the spindle to make the drill bit spin on the wood, thereby making a hole in the wood. If the rope is stretched across a bow, a single person can operate the rope and the drill. The video below demonstrates this hand drill operated by two people:
How to Use a Manual Hand Drill
You will need:
● Hand drill
● Set of drill bits
● Center punch
● Small hammer for tapping the center punch
● One-foot ruler
● Pencil for marking
● Measuring tape
● Tray for keeping loose items
● Bench vise for clamping small jobs
Keep all your accessories ready to use, so that when you don’t have to run around looking for stuff after starting the job.
Pro Tip: You will be working with different sizes of drill bits, markers, and centerpunches. It's a good idea to have a box to store all these accessories. For this purpose, you can use an old candy tin, biscuit tin or a discarded cigar box.
How to Use a Manual Hand Drill: Step-by-Step Instructions
A manual hand drill requires a bit of getting used to. Hence, you would do well to practice a bit on a few test pieces of wood. Once you are sure of being able to use the hand drill correctly, you can work directly on the workpiece. Once you are ready to start working, follow these steps:
1. Ensure all your accessories are close at hand.
2. If your job is small, clamp it in a bench vise.
3. Select the size of the drill bit you need.
4. Fit the drill bit in the drill chuck.
5. Mark the point where you want to drill the hole using a measuring tape/ruler and marker.
6. Using the center punch, tap it with the hammer to make an indentation where you want to drill the hole.
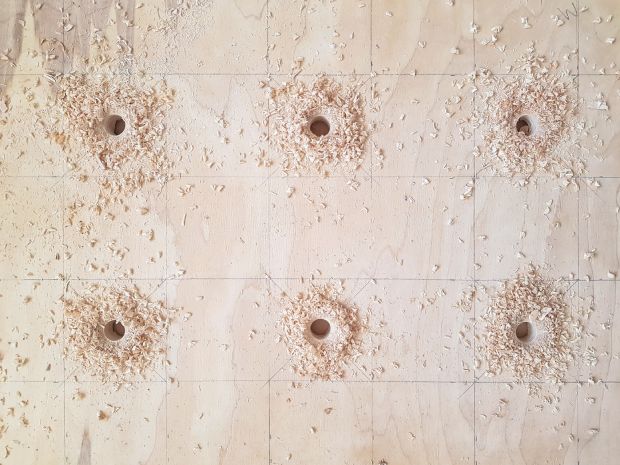
You can drill precision holes if you mark your piece carefully before drilling
7. Hold the straight handle vertically with your left hand (right hand if you are a southpaw)
8. Now, place the drill bit in the center of the indentation.
9. Using your right hand, rotate the handle on the wheel, simultaneously pushing into the material.
10. As the drill bit begins to spin, it will cut into the material and start to drill a hole.
11. Once the hole is complete, continue the rotation and pull out the drill, keeping the tool steady.
12. Use a small brush to remove the debris and a file or oversized drill bit to clean the burrs.
Pro Tip: It is usually advisable to start with a small diameter drill bit and then increase the size by using another one or two drill bits until you reach the desired diameter. The first hole that you make is called a “pilot hole.”
B. Corded Drill

The corded drill is the forerunner of the cordless drill
This drill comes with a power cord, which gives it the name “corded drill.” There are different sub-categories of corded drills, and most of these features are shared with cordless drills as well. A cordless drill machine differs from a corded one in that the cordless type runs on rechargeable batteries. Cordless drills have specific challenges and advantages. We will look at these when we start discussing cordless drills further down in this article to know how to use a power drill better.
In both categories of drills, we get a standard drill (only for drilling holes), and then there is the hammer drill, and the right-angle drill. Most drills have the provision to toggle between the standard and the hammering functions. You can also use a power drill as a driver for driving screws, which we also deal with further down.
Nowadays, we get separate attachments for right-angle drilling, rather than having to get a dedicated machine for the job. The video below shows the various right-angle attachments that you can get:
How to use a corded drill
You will need:
● A power drill with a power cord and plug
● Extension board (if required)
● A set of drill bits including a drill bit to suit each hole size
● A conveniently located power outlet
● Small hammer
● Centerpunch
● Marker
● Set of measurement instruments
● Chuck key (usually provided with the drill out of the box)
Pro Tip: Be aware of the voltage required for the power supply of your corded drill machine. Also, the type of plug on your corded drill should match the socket of the power outlet.
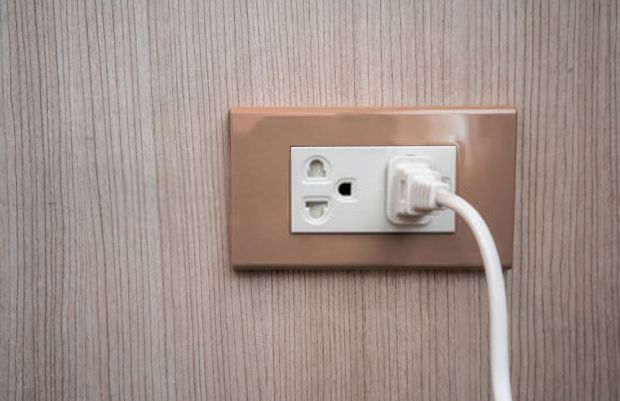
It is important to know the voltage rating and type of power plug you need for your corded drill
How to Use a Corded Drill: Step-by-Step Instructions
1. Check your power outlet and ensure that it matches the plug on your drill.
2. Using the chuck key, adjust the chuck to accommodate the drill bit.
3. Insert the drill bit.
4. Tighten the chuck.
5. Check the torque setting if available.
6. Hold the drill vertically beginning with low speed and slowly speed up.
Safety Tips:
● Avoid allowing the drill bit to overheat.
● Select the recommended speed and torque for specific materials.
● Do not join the power cord with tape – join it with electrically-safe extension joints.
● Never leave the cord trailing on the ground for someone to trip over.
● Don’t allow water to splash on your drill.
● While using an electric drill of any sort, wear safety goggles.
● Never try to force a jammed drill bit.
● Do not hold small workpieces in your hand – clamp them properly and then drill into them.
● Carefully read the safety instructions that come with the manual.
Pro Tip: Most corded drills have a receptacle on the handle for holding the chuck key. As soon as you have fitted the drill bit, always remember to insert the chuck key in this receptacle, to have easy access to it when required.
C. Cordless Drill
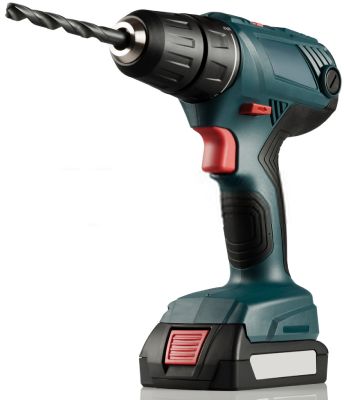
The Cordless Drill is one of the Handiest Invention of our Times
The cordless drill features next in our quest for how to use a power drill better. The cordless drill is one of the handiest power tools of our times. Even if you are familiar with using one of these handy devices, we are sure that you will find some useful information here. Whether you are experienced or a newbie, this information should put you on the right track:
You will need:
● A cordless drill
● Battery charger
● Spare batteries if provided
● Set of bits
● Small hammer
● Center punch
● Marker
● Measuring tools
● Chuck key
How to Use a Cordless Drill: Step-by-Step Instructions
The procedure on how to use a cordless drill is more or less similar to that of a corded drill with some additional points:
1. There is no risk of electric shock with cordless drills, due to the low voltage at which they operate so you get better safety with them.
2. You do not have to check the power supply, because it is all internal and you don’t have to hook the machine to a power outlet.
3. Before you begin, the first step should be to check that your cordless drill is adequately charged.
4. If spare batteries came with the drill machine, keep them charged and ready to use when required.
5. Nowadays, most cordless drills have a Snap-On action wherein you simply push the bit into the chuck. Hence you don’t have to bother about a chuck key anymore.
Pro Tip: If your cordless drill has a built-in level, ensure the air bubble is in the center of the reference point to get a perpendicular hole.
D. Bench Drill Press

Woman Using a Bench Drill Press to Drill Holes
This machine is a standard workshop accessory primarily used for drilling holes in a precision way. It is also known as a radial drill. This machine consists of an electric motor which drives a chuck on a spindle.
The entire assembly is mounted on a frame. The drive system usually consists of a series of gears, pulleys, and vee-belts to enable variation of the speed and torque as required.
This is a stationary machine due to its heavy weight. However, it is possible to get attachments for a hand-held power drill which converts it into a bench press of types for lighter jobs. But for the heavier stuff, you have the bench drill press. So let’s get into how to use a drill press, now:
You will need:
● Bench drill press properly bolted onto the surface of the workbench/foundation
● Set of drill bits
● Chuck key
● Set of hammers and punches
● Safety goggles
● A brush for removing the burrs
How to Use a Bench Drill Press: Step-by-Step Instructions
1.Setting the Speed
You can set the speed by moving around the drive belt between pulleys. Usually, as the pulley on the chuck axis gets smaller, the faster it spins. You need to select lower speeds for harder materials like metal and higher speeds for softer materials like plastic and wood. Check the manufacturer’s manual for full details.
2. Fitting the Bit
Using the chuck key, open the chuck and fit the drill bit into it. Now, using the key again, tighten the chuck and put the key aside. If you leave the chuck key in the chuck, it could fly out during operation and harm someone.
3. Clamping the Workpiece
Before commencing the job, you need to secure the workpiece to be drilled firmly under the drill bit. This is important, because of the tendency of the drill bit to spin the workpiece, which could be dangerous, and your drill bit might break. The workpiece is usually clamped to the worktable which is a platform fixed to the supporting column. Also, by fixing the workpiece firmly, you prevent unnecessary vibration that could damage it.
4. Table Adjustment
You can adjust the drilling table by winding a crank up and down. It is important to maintain the required gap between the table surface and the tip of the drill bit. This will enable you to lower the drill bit to the required depth for drilling.
5. Setting the Required Depth
If you are drilling a through-hole, you don't need to use the depth gauge. However, if you need to drill a hole of fixed depth, you can use this stopper that is incorporated in the machine for more precision drilling. By careful adjustment, you can adjust the stopper so that the drill bit cannot go any further due to the setting.
You can also make a handy depth gauge as given in the video below:
6. The Drilling Process
Once you have set up your bench drill press, the actual drilling is quite simple. Ensure that the drill spins at full speed for that particular setting. Lower the drill bit onto the workpiece by pulling the lever downwards.
Once your drill makes contact with the workpiece, press the lever gently downwards. Ensure that your hand is steady, maintaining even pressure. Once the hole is completed, release the lever slowly and the spring action will bring the mechanism back to its original location.
Pro Tip: If you are drilling a hole in metal, a few drops of cutting oil will result in a hole with a smoother finish and will also prevent your drill bit from overheating.
How to Drill a Pilot hole
What is a pilot hole? A pilot hole is that hole that we drill which helps us to screw in a screw easily. You can also drill this sort of hole to make way for larger-sized drills, of your final hole is going to be rather large. The three outcomes of drilling a pilot hole are:
● The wood doesn’t crack
● You get a perpendicular hole
● You need less torque while driving in a screw
The method of how to drill a pilot hole is quite simple. A pilot hole provides you with the means of how to use a drill for screws. You need to measure the screw at its maximum diameter.
The size of the drill bit that you need to choose for drilling the pilot hole should be slightly smaller than that diameter. Once you decide on the size of the hole required (same for a particular drill size), you need to drill the hole.
Now, if you screw in a screw in this hole, it should not split and your screw will be perpendicular to the surface your workpiece. And that is how to drill a pilot hole.
How to Use a Drill for Screws with a Drill Driver
A drill isn't only a device for drilling holes. We can also use a hand drill to drive screws, nuts, and bolts. Here’s an excellent video that provides valuable information about using the correct bit for driving a particular screw:
Here are some handy tips on how to use a drill for screws:
● Applying the Right Pressure
Once your driver is lined up, you need to apply enough pressure. Even if your driver bit and screw head are well-matched but you don't apply enough pressure, then the bit may slip. This can result in damaging both the bit as well as the screw head. Hence, if you are new to the job, it would be a good idea to practice on some test pieces before you start working on the project.
● Use Torx-Head Screws
These screws have a star-shaped recess. Because the bit fits tightly in the head recess, it doesn’t tend to come out or slip in the head of a Torx-head screw. Because the bit is so secure, you don’t have to put much effort while driving in the screw with your drill driver.
A Torx-head bit will have the letter “T” engraved on it along with the corresponding number of the Torx screw. Ensure that you use the correct numbered bit for the matching screw. The downside of Torx screws is that they don't work very well with drywall.
● Countersink Bits and Pilot Holes
Drilling a pilot hole for the screw and then creating a recess for the screw head is a good practice for using on furniture. The pilot hole reduces the friction, thereby making it easier to drive the drill into the job. We have discussed pilot holes in detail above. You can get a countersink bit with or without a stop collar.
● Magnetic Bit Holders
A magnetic bit holder has multiple benefits. Firstly, it holds the driver bit in place. Secondly, it also makes the bit longer, making changing bits a quicker and easier process. Also, the magnetism transfers to ferrous screws, holding them in position ready to drive. This is particularly useful if you have to drill a vertically-overhead hole.
● Cordless Impact Drivers
Since you are anyway buying a drill driver, why not get one with an impact driving function? A cordless impact driver, for example, gives you a combination of hammer-like blows and torque with each blow. This makes it easier to drive the screw into the job.
● Using the Correct bit
You get driver bits of different shapes and sizes. Each driver bit matches a corresponding screw of a particular type and size. Hence, you cannot use a Torx-head bit for a Philips screw and vice-versa.
● Avoid Using Worn Bits
Even if you use your drill driver carefully, the driver bits tend to get worn with normal use. Hence, you need to inspect your driver bits from time to time and replace them whenever required. Using a worn or damaged driver bit can result in damaging screw heads and you will end up in not being able to drive the screws to the full extent.
Ryobi Drills - Among the Best Cordless Drills on the Market
As we mentioned earlier, Ryobi manufactures some of the best cordless drills on the market. There are several other companies that manufacture cordless drills. We urge you to acquaint yourself with those as well, to get a clearer idea of what is available. The purpose of highlighting the models mentioned below is to set your expectations.
For those of you who have little or no idea about the cordless drills that are available, this information should be quite useful to put you on the right track. If you are already familiar with cordless drills or use one, this should be helpful as additional information.
Although owning a Ryobi drill should give you a good working experience, only you can decide which drill you need to buy for your specific requirements.
To give you a better idea about what is available in the market, we have provided full details about various models of in our Ryobi drill review. To know more about these popular drills, click here. You can then decide whether to get yourself a Ryobi drill or one from the other brands that are available in the market.
➜ RELATED: Dewalt DCD996: Portable Drill That Can Keep Up With The Big Boys
Conclusion
In our discussion about how to use a drill, we touched upon the various types that we use. We covered how to use a power drill as well as how to use a drill press. If you are unfamiliar with drills, you should now be confident of using one properly.
We also covered a few useful tips about best practices while using a drill. To make our discussion complete, we even reviewed one of the best cordless drill brands in the market, the Ryobi drill.
We hope that you find this article useful for your requirements in knowing how to use a drill in the best way possible. Please feel free to let us know your views in the comments section below along with any feedback or questions you may have.


